Chocolate Mousse with Creamy Layers – Rich, Silky & Easy No-Bake Dessert
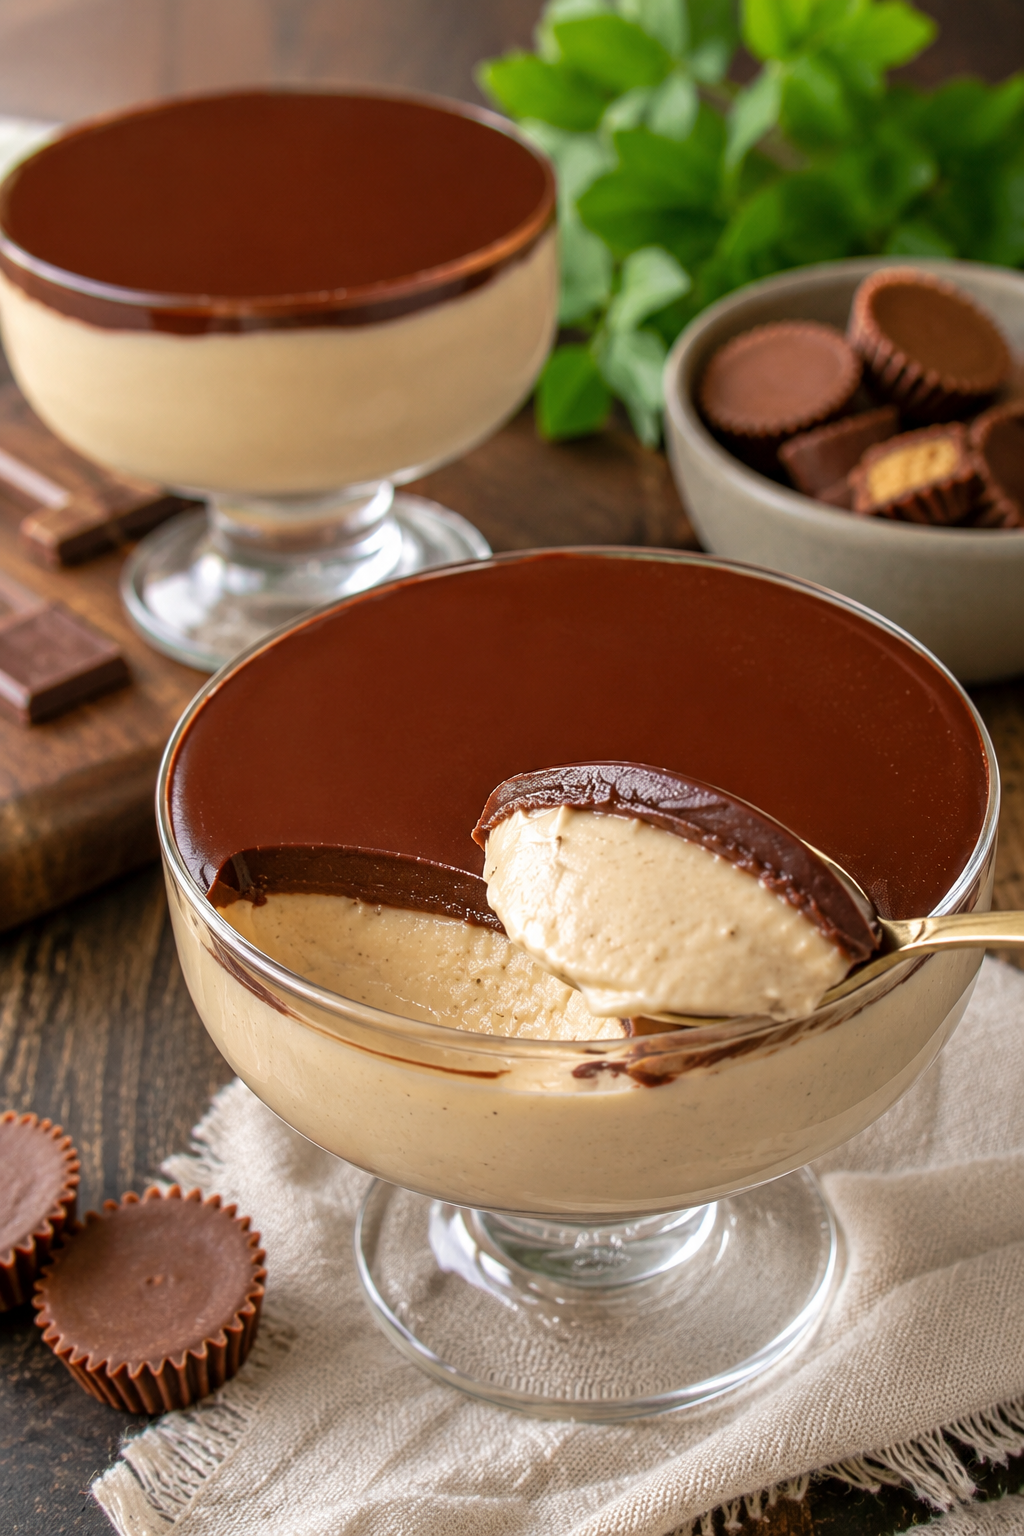
Some desserts disappear from the table before anyone even asks what they are. This Chocolate Mousse with Creamy Layers is one of those recipes. The moment a spoon breaks through the glossy chocolate topping and sinks into the silky mousse beneath, people immediately understand why it is special.
As a food blogger who has tested dozens of chocolate mousse recipes over the years, I have discovered that the secret is not adding more chocolate. The secret is creating contrast. A rich chocolate layer paired with a velvety creamy center delivers a luxurious experience that feels like it came from an upscale pastry shop.
Many homemade mousse recipes fail because they become grainy, too dense, or overly sweet. This version solves those problems with a simple no-bake method that produces an incredibly smooth texture while remaining beginner-friendly.
Whether you need an elegant dinner party dessert, a make-ahead treat for guests, or simply want something indulgent after a long day, this recipe delivers restaurant-quality results with surprisingly little effort.
What Makes This Chocolate Mousse with Creamy Layers Special?
Unlike traditional chocolate mousse recipes that rely heavily on eggs, this version creates luxurious texture through carefully balanced cream, chocolate, and mousse layers.
The layered structure creates multiple experiences in every spoonful:
- Glossy chocolate topping
- Silky chocolate mousse center
- Rich creamy base layer
- Light yet decadent mouthfeel
- Elegant presentation without complicated techniques
One unique insight many recipes overlook is that chilling time affects flavor development as much as texture. After 6 hours of refrigeration, the chocolate notes become deeper and more balanced than when served immediately.
Flavor Profile: Why Everyone Loves It
The flavor combination is beautifully balanced.
- Rich cocoa notes from dark chocolate
- Creamy dairy sweetness
- Smooth vanilla undertones
- Silky mouthfeel
- Light bitterness that prevents excessive sweetness
The result feels sophisticated enough for adults while remaining approachable for children and casual dessert lovers.
Recipe Card
Preparation Time: 20 minutes
Cooking Time: 10 minutes
Total Time: 30 minutes + chilling time
Servings: 6
Difficulty Level: Easy
Calories (Estimated): 380 per serving
Ingredient Selection
Main Ingredients
- 200g dark chocolate, finely chopped
- 2 cups heavy cream
- 250g cream cheese, softened
- 1/3 cup powdered sugar
- 1 teaspoon vanilla extract
- 2 teaspoons gelatin powder
- 3 tablespoons cold water
Optional Ingredients
- 1 tablespoon espresso powder
- Sea salt flakes
- Chocolate liqueur
- Cocoa powder
Garnishes
- Chocolate curls
- Fresh berries
- Whipped cream
- Chocolate shavings
- Mint leaves
Kitchen Equipment You’ll Need
- Mixing bowls
- Electric mixer
- Small saucepan
- Whisk
- Serving glasses or dessert cups
- Rubber spatula
- Measuring cups and spoons
Step-by-Step Instructions
-
Bloom the gelatin by combining gelatin powder and cold water in a small bowl. Let it sit for 5 minutes. The mixture should become thick and sponge-like.
-
Heat 1/2 cup of heavy cream in a saucepan until steaming but not boiling. Add chopped chocolate and stir until completely smooth and glossy.
-
Warm the bloomed gelatin briefly until dissolved. Stir it into the chocolate mixture. The texture should remain silky with no visible lumps.
-
Beat cream cheese, powdered sugar, and vanilla extract until smooth and fluffy. Scrape down the sides frequently to ensure even mixing.
-
Slowly pour the chocolate mixture into the cream cheese mixture while mixing. Continue until fully incorporated and uniformly chocolate-colored.
-
Whip the remaining heavy cream to medium peaks. Avoid over-whipping. The cream should hold shape while still looking smooth and soft.
-
Fold the whipped cream gently into the chocolate mixture using a spatula. Use slow sweeping motions to maintain airiness.
-
Divide the mousse among serving glasses. Tap lightly on the counter to eliminate large air pockets while preserving the mousse texture.
-
For the creamy layer effect, reserve a small amount of whipped cream mixture and swirl it gently into each serving before chilling.
-
Prepare the chocolate topping using melted dark chocolate and a small amount of cream. Pour a thin layer over each dessert.
-
Refrigerate for at least 6 hours or overnight. The mousse should feel firm yet silky when touched lightly with a spoon.
Common Mistakes That Ruin Chocolate Mousse
- Using low-quality chocolate
- Over-whipping the cream
- Adding hot chocolate directly into whipped cream
- Skipping chilling time
- Using cold cream cheese
- Overmixing after folding
A rarely discussed perspective is that many mousse failures happen because ingredients are too cold rather than too warm. Room-temperature cream cheese creates a dramatically smoother result.
Professional Tips for Better Results
- Choose chocolate containing at least 60% cocoa.
- Use real vanilla extract rather than imitation flavoring.
- Chill serving glasses beforehand.
- Fold gently to preserve air bubbles.
- Allow mousse to mature overnight for best flavor.
One uncommon observation from years of recipe testing is that glass dessert cups maintain mousse texture better than wide shallow bowls because they reduce surface moisture exposure.
Homemade vs Bakery Chocolate Mousse
| Feature | Homemade | Bakery |
|---|---|---|
| Cost | Lower | Higher |
| Freshness | Excellent | Variable |
| Customization | Unlimited | Limited |
| Preservatives | None | May contain |
| Flavor Control | Complete | Fixed |
Recipe Variations
Premium Version
- Use Belgian dark chocolate
- Add vanilla bean paste
- Finish with gold chocolate pearls
Budget Version
- Use standard baking chocolate
- Reduce garnish ingredients
- Serve in simple glass cups
Coffee Chocolate Version
- Add espresso powder
- Top with mocha chocolate shards
Serving Suggestions
- Serve after steak dinners
- Pair with fresh strawberries
- Enjoy alongside coffee
- Serve during holidays
- Present at dinner parties
Storage Tips
- Store refrigerated up to 4 days.
- Cover tightly with plastic wrap.
- Avoid freezing if possible.
- Keep away from strong-smelling foods.
Nutritional Information
- Calories: 380
- Carbohydrates: 24g
- Protein: 5g
- Fat: 29g
- Sugar: 20g
- Fiber: 3g
Related Recipes You May Also Like
- Chocolate Ganache Tart
- No-Bake Oreo Cheesecake Cups
- Dark Chocolate Panna Cotta
- Classic Chocolate Trifle
Frequently Asked Questions
Can I make Chocolate Mousse with Creamy Layers ahead of time?
Yes. It is actually better when prepared 12–24 hours ahead.
Can I freeze chocolate mousse?
You can, but the texture may become less silky after thawing.
What chocolate works best?
High-quality dark chocolate between 60% and 70% cocoa is ideal.
How long does mousse last in the refrigerator?
Typically 3 to 4 days when properly covered.
Can I make it without gelatin?
Yes, but the mousse will be softer and less stable.
Why is my mousse grainy?
The chocolate may have seized or ingredients were not properly mixed.
Can I use milk chocolate?
Absolutely, although the dessert will be sweeter.
How do I create clean layers?
Allow each layer to chill slightly before adding the next.
Can I make this dessert gluten-free?
Yes. The recipe naturally contains no gluten ingredients.
What is the best serving temperature?
Serve chilled but allow it to sit at room temperature for 5 minutes before eating.
Chocolate Mousse with Creamy Layers proves that elegant desserts do not need complicated techniques. With its silky texture, rich chocolate flavor, and stunning presentation, this recipe consistently delivers impressive results. Once you experience the contrast between the glossy chocolate topping and the airy mousse beneath, it quickly becomes a dessert worth making again and again.