Welcome to WordPress. This is your first post. Edit or delete it, then start writing!
Blog
-
Easy Chinese BBQ Pork (Char Siu) Recipe Sticky, Sweet & Juicy
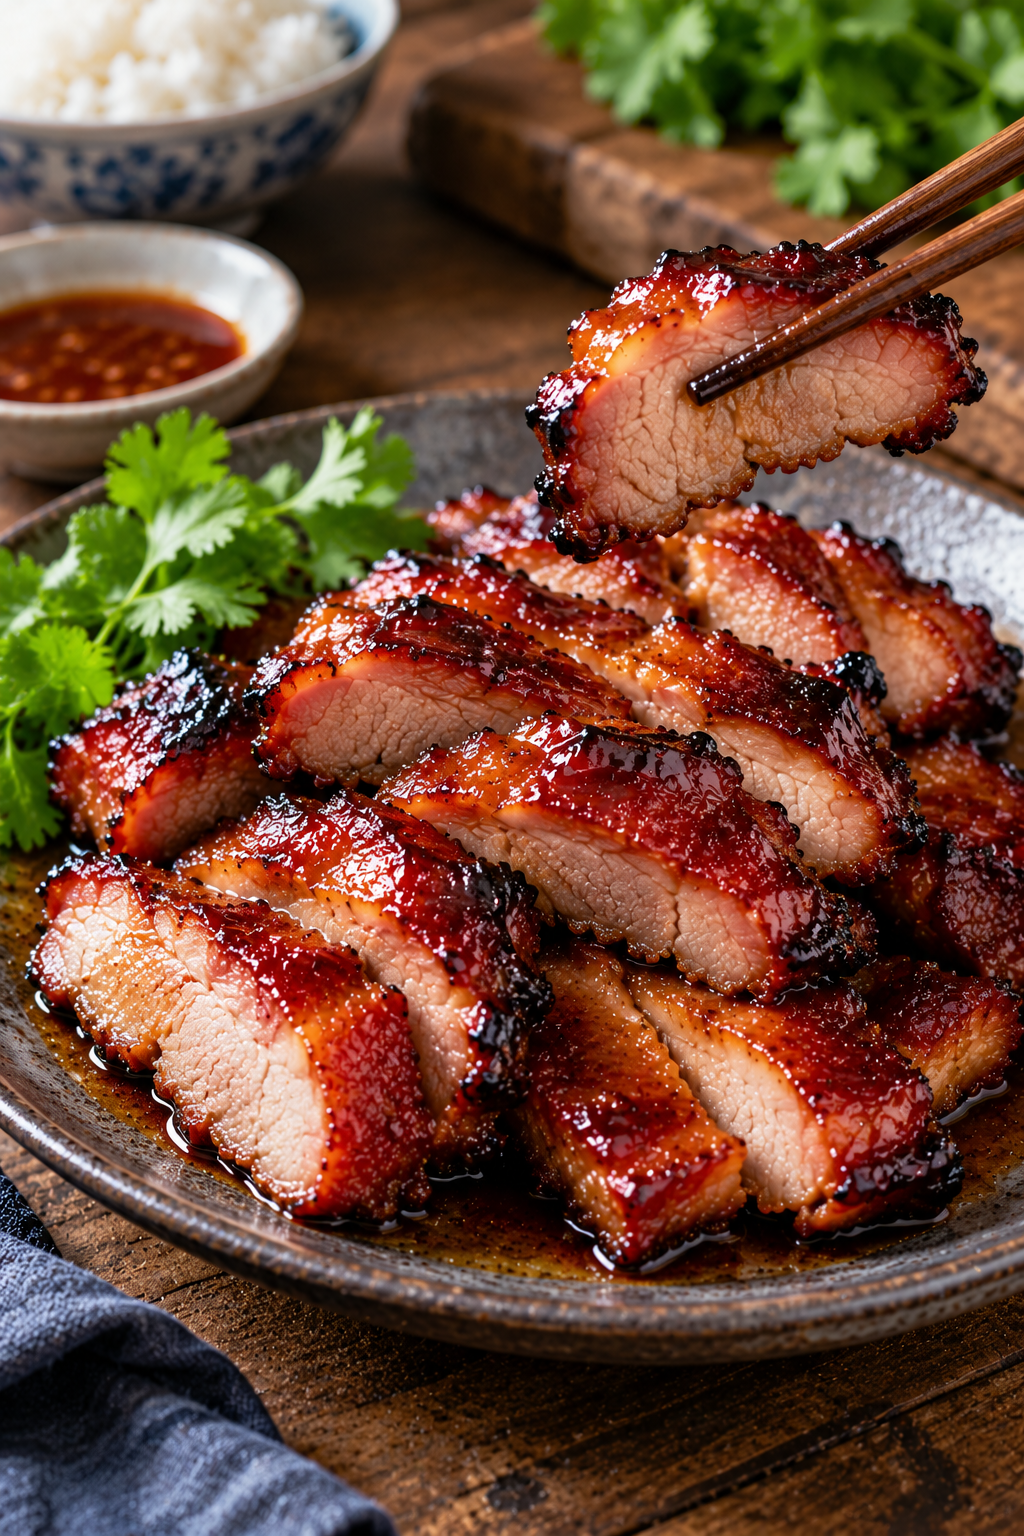
Easy Chinese BBQ Pork (Char Siu) Recipe – Sticky, Sweet & Juicy
This homemade Chinese BBQ pork recipe brings together tender roasted pork, a sweet and savory marinade, and a glossy glaze with lightly caramelized edges. Inspired by Cantonese-style char siu, this oven-roasted version is a practical way to enjoy classic Chinese barbecue flavors at home without a specialized roasting oven.
Serve the sliced pork over steamed rice, tuck it into noodle bowls, or add it to your favorite Asian-inspired dinner. The key is giving the pork enough time to absorb the marinade and glazing it during roasting so the outside develops a rich, flavorful finish.
What Is Chinese BBQ Pork (Char Siu)?
Char siu is a Cantonese-style roasted pork dish traditionally recognized by its reddish-brown exterior, sweet-savory flavor, and caramelized surface. Its marinade commonly includes ingredients such as soy sauce, sugar or honey, garlic, and Chinese five-spice powder. Some traditional recipes also use fermented red bean curd or red coloring to achieve a characteristic color.
This home-style version uses readily available ingredients and an ordinary oven. The result is inspired by the flavors of traditional char siu rather than a claim to reproduce every regional preparation method.
Why You’ll Love This Homemade Char Siu Recipe
- Rich, balanced flavor: Soy sauce, honey, garlic, and five-spice create a savory marinade with gentle sweetness and warm spice.
- A caramelized exterior: Brushing the pork with reserved marinade during cooking helps build a glossy, flavorful coating.
- Everyday kitchen equipment: You can prepare this version with a baking dish, a wire rack, and a standard oven.
- Flexible serving options: Pair the pork with rice, noodles, steamed vegetables, or a homemade rice bowl.
- Useful for meal preparation: Leftovers can be refrigerated and reheated for another meal.
Ingredients for Chinese BBQ Pork
The ingredients below make approximately four servings. Pork shoulder is a good option for a richer, more traditional barbecue-style texture, while pork tenderloin cooks faster and is leaner. This recipe uses boneless pork shoulder cut into long strips for more even roasting.
For the pork
- 2 pounds (900 g) boneless pork shoulder, trimmed and cut into long strips about 1 1/2 inches thick
For the char siu marinade
- 1/4 cup (60 ml) regular soy sauce
- 3 tablespoons honey
- 2 tablespoons hoisin sauce
- 2 tablespoons Shaoxing cooking wine or dry sherry
- 2 tablespoons brown sugar
- 3 garlic cloves, finely minced
- 1 teaspoon Chinese five-spice powder
- 1/2 teaspoon ground white or black pepper
- 1 teaspoon toasted sesame oil
- 1 teaspoon red fermented bean curd paste, optional
For the finishing glaze
- 1 tablespoon honey
- 1 tablespoon water
Important: Reserve the finishing glaze separately. Do not use marinade that has contacted raw pork as a finishing sauce unless it is thoroughly cooked first.
Ingredient Tips and Substitutions
Choose the right cut of pork
Boneless pork shoulder contains enough fat to help keep the meat moist during roasting. Cut it into similarly sized strips so the pieces cook at a more consistent rate. Pork tenderloin can also work, but because it is leaner, it may cook more quickly and become dry if left in the oven too long.
Soy sauce
Regular soy sauce supplies salt and savory depth. If you use reduced-sodium soy sauce, the finished flavor may be less salty. Avoid adding extra salt until you have tasted the cooked pork.
Hoisin sauce
Hoisin adds sweetness, savory depth, and a slightly thick consistency to the marinade. It is helpful for developing the characteristic sticky coating associated with Chinese BBQ pork.
Honey and brown sugar
These ingredients help create a glossy glaze and encourage browning. Because sugar can burn under intense heat, watch the pork closely during the final roasting stage.
Shaoxing wine
Shaoxing wine contributes depth to the marinade. Dry sherry is a practical substitute if Shaoxing wine is unavailable. The flavor will differ slightly, but the recipe can still work well.
Chinese five-spice powder
This aromatic blend often contains star anise, cinnamon, fennel seed, cloves, and Sichuan peppercorn. It gives the pork a recognizable warm, fragrant flavor. Use the measured amount rather than adding a large quantity, which can overpower the other ingredients.
How to Make Chinese BBQ Pork in the Oven
Step 1: Prepare the marinade
In a medium bowl, whisk together the soy sauce, honey, hoisin sauce, Shaoxing wine, brown sugar, garlic, five-spice powder, pepper, sesame oil, and optional fermented bean curd paste until evenly combined.
Set aside the separate honey-and-water glaze for later. Keep the raw-pork marinade away from ready-to-eat foods and clean any surfaces that come into contact with raw meat.
Step 2: Marinate the pork
Place the pork strips in a covered, nonreactive container or a food-safe resealable bag. Pour in the marinade and turn the pieces until coated on all sides.
Refrigerate for at least 4 hours, preferably overnight, turning the pork occasionally if practical. Keep the pork refrigerated throughout marinating rather than leaving it at room temperature.
Step 3: Prepare the oven and baking tray
Preheat the oven to 400°F (200°C). Line a rimmed baking sheet with foil for easier cleanup, then place an oven-safe wire rack over the tray. Lightly oil the rack if needed to reduce sticking.
Remove the pork from the marinade, allowing excess liquid to drip off. Arrange the strips on the rack with space between them. Discard the marinade that has contacted the raw pork, or cook it thoroughly before using it in another application.
Step 4: Roast the pork
Roast for approximately 25 to 40 minutes, depending on the thickness of the strips and the characteristics of your oven. Turn the pieces partway through cooking if necessary for more even browning.
Begin checking the internal temperature before the estimated cooking time ends. For whole cuts of pork, the USDA minimum safe internal temperature is 145°F (63°C), followed by a rest of at least 3 minutes. For this shoulder-based recipe, continue cooking as desired for tenderness, but do not rely on appearance alone to determine food safety.
Step 5: Brush on the glaze
Mix the reserved tablespoon of honey with the tablespoon of water. During the final 5 to 10 minutes of roasting, brush a thin layer over the pork and return it to the oven.
Watch carefully as the glaze begins to darken. Honey and sugar can burn quickly, so use the broiler only briefly if additional caramelization is needed, keeping the pork under close supervision.
Step 6: Rest and slice
Transfer the cooked pork to a clean cutting board and let it rest for at least 3 minutes. Slice across the grain into bite-sized pieces or thin serving slices.
Arrange the pork on a serving platter and spoon over any clean cooking juices that are suitable for serving. Add fresh cilantro or sliced scallions if desired. Serve warm with rice or noodles.
Tips for Juicy Pork and a Sticky Glaze
- Cut evenly: Similar-sized strips help prevent thin pieces from drying out before thicker pieces finish cooking.
- Allow enough marinating time: Several hours in the refrigerator gives the seasoning time to flavor the meat.
- Use a rack: Elevating the pork allows hot air to circulate and helps the surface roast instead of sitting in liquid.
- Apply the finishing glaze near the end: This reduces the risk of burning the honey and sugar.
- Use a meat thermometer: Check the thickest section rather than judging doneness by the outside color.
- Slice across the grain: Cutting across the muscle fibers can make each piece easier to chew.
Common Mistakes to Avoid
Skipping the marinade
Cooking the pork immediately after adding the marinade can produce a less developed flavor. If time is limited, marinate it for as long as practical under refrigeration.
Overcrowding the baking tray
When the pork pieces are packed too closely, moisture can accumulate around them and interfere with browning. Use a sufficiently large tray or cook in batches.
Applying too much glaze too early
A thick coating of honey and sugar can darken or burn before the pork is fully cooked. Apply the finishing glaze toward the end and monitor the surface closely.
Cutting the pork immediately
A short resting period allows the meat to settle before slicing. Use a clean cutting board and utensils for the cooked pork.
What to Serve with Chinese BBQ Pork
The sweet-savory flavor of char siu pairs well with simple sides that balance its richness.
- Steamed white rice: A simple base that absorbs the flavorful juices.
- Garlic fried rice: A savory side for a more substantial meal.
- Stir-fried vegetables: Bok choy, broccoli, green beans, or cabbage add freshness and texture.
- Asian-style noodles: Serve sliced pork over noodles with vegetables and a complementary sauce.
- Rice bowls: Combine pork, rice, cucumber, scallions, and vegetables for an easy lunch or dinner.
Recipe Variations
Spicy Chinese BBQ pork
Add a small amount of chili garlic sauce or red pepper flakes to the marinade. Adjust the heat gradually so it complements the sweet and savory flavors.
Char siu with pork tenderloin
Replace the pork shoulder with pork tenderloin for a leaner version. Because tenderloin is smaller and leaner, check its temperature earlier and remove it when it reaches a safe internal temperature rather than following the shoulder cooking time automatically.
Grill-style char siu
You can adapt the method for a grill using indirect heat and a controlled finishing stage. Monitor the glaze carefully, as drippings and sugary marinades can cause flare-ups. Cooking times will vary by grill and meat thickness.
How to Store and Reheat Leftovers
Refrigerating
Place leftover pork in a clean, airtight container and refrigerate within 2 hours of cooking, or within 1 hour if the surrounding temperature exceeds 90°F (32°C). For best food safety, use refrigerated leftovers within 3 to 4 days.
Freezing
For longer storage, freeze the cooled pork in a freezer-safe container or bag. Remove excess air and label the container with the date. For best quality, use within 2 to 3 months.
Reheating
Reheat the pork in a covered oven-safe dish with a small splash of water or broth to help retain moisture. Heat leftovers to 165°F (74°C). You can also use a microwave-safe container, covering the pork and stirring or rearranging pieces as needed for even heating.
Frequently Asked Questions
Is char siu the same as Chinese BBQ pork?
Char siu is a well-known Cantonese style of Chinese BBQ pork. It is typically marinated and roasted until the exterior develops a distinctive reddish-brown, caramelized finish.
Can I make Chinese BBQ pork without red food coloring?
Yes. This recipe does not require artificial red coloring. The soy sauce, hoisin, honey, and brown sugar help create a naturally deep brown glaze, although the color will differ from some restaurant-style versions.
Can I marinate the pork overnight?
Yes. Overnight refrigeration is convenient and allows the flavors to develop. Keep the pork covered in the refrigerator and cook it within a suitable food-safe timeframe.
Why is my char siu glaze burning?
The honey and brown sugar can burn when exposed to excessive heat for too long. Apply the finishing glaze late in the cooking process, monitor the pork closely, and avoid leaving it unattended under the broiler.
Can I use pork tenderloin instead of pork shoulder?
Yes. Tenderloin is leaner and cooks faster, so adjust the cooking time and monitor its internal temperature. The finished texture will be different from the richer, fattier pork shoulder version.
What temperature should pork reach to be safe?
The USDA recommends at least 145°F (63°C) for whole cuts of pork, followed by a rest of at least 3 minutes. Ground pork has a different minimum safe temperature. Use a food thermometer to check the thickest part of the meat.
Easy Chinese BBQ Pork Recipe Card
Chinese BBQ Pork (Char Siu)
Oven-roasted pork shoulder coated in a sweet-savory marinade and finished with a sticky honey glaze.
Prep time: 15 minutes
Marinating time: 4 hours to overnight
Cook time: 25–40 minutes, approximately
Resting time: At least 3 minutes
Total active preparation and cooking time: Approximately 45–60 minutes, excluding marinating
Yield: 4 servings
Cooking method: Oven roasting
Ingredients
- 2 pounds (900 g) boneless pork shoulder, cut into long strips
- 1/4 cup (60 ml) soy sauce
- 3 tablespoons honey
- 2 tablespoons hoisin sauce
- 2 tablespoons Shaoxing cooking wine or dry sherry
- 2 tablespoons brown sugar
- 3 garlic cloves, minced
- 1 teaspoon Chinese five-spice powder
- 1/2 teaspoon ground white or black pepper
- 1 teaspoon toasted sesame oil
- 1 teaspoon red fermented bean curd paste, optional
- 1 tablespoon honey, for finishing glaze
- 1 tablespoon water, for finishing glaze
Instructions
- Whisk together the soy sauce, 3 tablespoons honey, hoisin sauce, wine, brown sugar, garlic, five-spice powder, pepper, sesame oil, and optional fermented bean curd paste.
- Coat the pork with the marinade, cover, and refrigerate for at least 4 hours or overnight.
- Preheat the oven to 400°F (200°C). Line a rimmed baking sheet and set an oven-safe wire rack on top.
- Arrange the pork strips on the rack, allowing space between pieces. Discard the used raw-pork marinade or cook it thoroughly before using it elsewhere.
- Roast for approximately 25–40 minutes, checking the internal temperature and adjusting the time for the thickness of the meat.
- Mix 1 tablespoon honey with 1 tablespoon water. Brush over the pork during the final 5–10 minutes, watching closely to prevent burning.
- Ensure the whole cuts reach at least 145°F (63°C), then rest for at least 3 minutes. Slice across the grain and serve.
Recipe Notes
- Pork shoulder produces a richer result; pork tenderloin is leaner and requires different cooking timing.
- Use a meat thermometer rather than color alone to assess doneness.
- Keep the pork refrigerated while marinating.
- Refrigerate leftovers promptly and reheat to 165°F (74°C).
Estimated nutrition per serving: Not calculated. Actual nutrition varies with the pork cut, trimming, marinade absorption, and serving size.
Make This Chinese BBQ Pork for Your Next Dinner
Homemade char siu is a flavorful way to bring Chinese BBQ-inspired cooking into your kitchen. With a balanced marinade, evenly sized pork strips, and a carefully applied finishing glaze, you can create tender slices with a rich, caramelized exterior.
Serve it with rice, noodles, or vegetables, and save any leftovers for a convenient meal later in the week. If you make this recipe, adjust the seasoning to your taste and keep a close eye on the glaze during the final minutes of roasting.
-
Spicy Garlic Fish Recipe with Homemade Chili Sauce

Spicy Garlic Fish Recipe with Homemade Chili Sauce
If you love seafood with bold, savory flavors, this spicy garlic fish recipe is a delicious dinner to add to your rotation. A whole fish is pan-fried until the skin is golden and lightly crisp, then topped with a homemade chili garlic sauce filled with chopped garlic, red chilies, and fresh green onions.
The combination of crisp fish skin, tender flesh, and a rich, savory sauce makes this dish especially satisfying with a bowl of steamed rice. It also brings the flavors of an Asian-inspired seafood dinner to your own kitchen without requiring complicated ingredients.
This recipe uses a whole tilapia or snapper, although another firm-fleshed fish of a similar size can work well. The key is to dry the fish thoroughly before frying and prepare the sauce separately so the garlic and chilies retain their flavor without burning.
Why You’ll Love This Spicy Garlic Fish Recipe
- Bold, savory flavor: Garlic, fresh chilies, soy sauce, and a touch of sugar create a balanced sauce with heat, saltiness, and a little sweetness.
- A satisfying texture: Properly dried fish develops a golden exterior while the flesh stays moist when cooked correctly.
- Simple ingredients: Most ingredients are available at a regular grocery store or Asian market.
- Easy to customize: Adjust the chili level, add a little lime juice, or use a different firm-fleshed fish.
- Great for sharing: A whole fish makes an appealing centerpiece for a family-style dinner.
Ingredients for Spicy Garlic Fish
The ingredients are divided into two groups: the fish and the homemade chili garlic sauce. Keeping them separate makes preparation easier and helps prevent the garlic from burning during frying.
For the Fish
- 1 whole tilapia or snapper, about 1 to 1 1/2 pounds, cleaned and scaled
- 1 teaspoon kosher salt, divided as needed
- 1/2 teaspoon ground black pepper
- 3 tablespoons cornstarch, optional, for a lighter crisp coating
- 1/3 cup neutral cooking oil, such as canola or vegetable oil, for shallow-frying; adjust as needed for the pan
For the Chili Garlic Sauce
- 2 tablespoons neutral cooking oil
- 5 garlic cloves, finely chopped
- 2 to 3 red chilies, finely chopped, with seeds removed for less heat if desired
- 2 green onions, thinly sliced
- 2 tablespoons low-sodium soy sauce
- 1 tablespoon oyster sauce
- 1 tablespoon rice vinegar or fresh lime juice
- 1 teaspoon granulated sugar
- 3 tablespoons water
- 1 teaspoon cornstarch mixed with 1 tablespoon cold water, optional, for a thicker sauce
Ingredient note: Oyster sauce adds savory depth, while rice vinegar or lime juice brightens the sauce. For a seafood-friendly alternative without oyster sauce, use a suitable mushroom-based vegetarian stir-fry sauce. Check product labels if you need to avoid specific allergens.
Choosing the Best Fish
A whole tilapia is an accessible choice because it is widely available, relatively affordable, and suitable for shallow-frying. Snapper is another good option, offering firm flesh that holds together well when handled carefully.
Look for fish with a fresh, mild smell, moist flesh, and clear eyes when buying whole fish. If purchasing cleaned fish, make sure the scales and remaining entrails have been removed before cooking.
For the best texture, choose a fish of relatively even thickness. A very large or unusually thick fish may need a longer cooking time, while a smaller fish can cook more quickly.
Equipment You’ll Need
- A large, heavy skillet or frying pan wide enough to hold the fish
- A fish spatula or two wide spatulas for turning
- A sharp knife and cutting board
- Paper towels for drying the fish
- A small saucepan or skillet for the sauce, if you prefer not to use the same pan
- A food thermometer to check the internal temperature
A wide skillet makes turning the fish easier and helps prevent it from breaking apart. A heavy pan also tends to retain heat better when the fish is added. Avoid crowding the pan or using so little oil that the fish sticks to the surface.
How to Make Spicy Garlic Fish
Step 1: Prepare and Dry the Fish
Pat the cleaned fish thoroughly dry with paper towels, paying special attention to the skin, the cavity, and any cuts along the sides. Moisture on the surface can cause oil to splatter and makes it harder for the skin to brown.
Make three or four shallow diagonal slashes on each side of the fish, cutting through the skin into the flesh without cutting all the way to the bones. These cuts help heat reach the thicker parts and give the seasoning more contact with the fish.
Season both sides and the cavity lightly with salt and black pepper. If you want a slightly crisper exterior, dust the skin with a thin, even layer of cornstarch and shake off any excess.
Step 2: Heat the Oil
Pour the frying oil into a large skillet and heat it over medium to medium-high heat. The oil should shimmer before the fish goes in, but it should not smoke heavily.
Carefully lower the fish into the pan, positioning it away from you to reduce splashing. If the fish does not fit comfortably, use a larger pan or cook a smaller fish rather than forcing it into the skillet.
Step 3: Pan-Fry Until Golden
Cook the first side for approximately 6 to 9 minutes, depending on the fish’s thickness and the heat of the pan. Let the skin form a crust before attempting to move the fish.
Carefully turn the fish with two spatulas and cook the second side for another 5 to 8 minutes, adjusting the time as necessary. The skin should become golden brown, and the flesh near the thickest part should be cooked through.
Use a food thermometer to verify that the thickest part of the fish reaches 145°F. The flesh should be opaque and separate easily with a fork. If the outside browns before the center cooks, lower the heat and continue cooking gently.
Transfer the fish to a serving platter and let excess oil drain. If the pan contains dark, burnt residue, discard the oil carefully and wipe the pan before preparing the sauce.
Step 4: Make the Chili Garlic Sauce
Heat 2 tablespoons of fresh oil in a clean skillet over medium-low heat. Add the chopped garlic and stir for about 30 to 60 seconds, just until fragrant. Add the chopped chilies and cook for another 30 seconds.
Do not let the garlic turn dark brown. Burnt garlic can make the entire sauce bitter, especially when combined with chili oil.
Stir in the soy sauce, oyster sauce, rice vinegar or lime juice, sugar, and water. Bring the mixture to a gentle simmer and stir until the sugar dissolves.
If you prefer a thicker sauce, stir the cornstarch slurry again and gradually add it to the pan. Simmer briefly, stirring constantly, until the sauce lightly coats a spoon. Add a small splash of water if it becomes too thick.
Step 5: Add the Green Onions
Stir in most of the sliced green onions, reserving a small handful for garnish. Let the sauce cook for another 15 to 30 seconds, then taste it.
Add a little more lime juice for brightness, a pinch of sugar for balance, or extra chopped chili for more heat. Make small adjustments rather than adding large amounts of seasoning at once.
Step 6: Sauce and Serve
Spoon the warm chili garlic sauce over the fried fish, distributing the chopped garlic and chilies along the body and into the shallow cuts. Finish with the reserved green onions.
Serve immediately while the fish is hot. For the best contrast in texture, avoid covering every part of the skin with sauce long before serving, since the moisture will gradually soften the crisp exterior.
Tips for Crispy Fish and Better Flavor
Dry the Fish Thoroughly
This is one of the most important steps. Water on the surface interferes with browning and can cause hot oil to splatter. Pat the fish dry just before seasoning and frying.
Give the Fish Enough Space
A crowded pan loses heat more quickly and can make the fish steam rather than fry. If cooking multiple fish, prepare them in batches and allow the oil to return to temperature between batches.
Resist the Urge to Turn It Too Early
Fish skin can stick when it has not developed a crust. Allow the first side to cook undisturbed until it releases more easily. A thin, flexible fish spatula helps support the fish during turning.
Keep the Garlic at Moderate Heat
Garlic cooks quickly, and finely chopped pieces can burn within moments. Use medium-low heat and stir continuously before adding the liquid ingredients.
Adjust the Sauce to Your Taste
For a hotter sauce, add another chili or a small amount of chili flakes. For a tangier finish, use extra lime juice. If you prefer a less salty sauce, start with less soy sauce and add more only after tasting.
Common Mistakes to Avoid
- Frying wet fish: The surface may not crisp properly, and the oil can splatter more than usual.
- Using excessive heat: The skin may burn before the flesh is cooked. Adjust the heat throughout cooking.
- Moving the fish constantly: Frequent movement can tear the skin and break the fish apart.
- Burning the aromatics: Add the garlic before the liquid ingredients, but cook it only until fragrant.
- Adding sauce too early: Pouring sauce over the fish well before serving can soften the crisp skin.
- Guessing the cooking temperature: Check the thickest part with a food thermometer and cook fish to 145°F.
Easy Variations
Extra-Spicy Chili Garlic Fish
Increase the amount of fresh red chili or add a small pinch of red pepper flakes. Keep the garlic and sauce proportions similar so the heat does not overwhelm the other flavors.
Ginger Garlic Fish
Add 1 teaspoon of finely minced fresh ginger to the garlic during the first few seconds of cooking. Ginger gives the sauce a fresh, aromatic note that pairs well with seafood.
Lime Chili Fish
Use fresh lime juice instead of rice vinegar and finish the sauce with a little extra juice just before serving. This version has a brighter, tangier flavor.
Boneless Fish Fillets
If handling a whole fish is inconvenient, use firm white fish fillets. Pat them dry, season lightly, and pan-fry according to their thickness. Smaller fillets generally cook faster, so monitor them closely and verify the internal temperature.
What to Serve with Spicy Garlic Fish
Steamed white rice is a natural pairing because it absorbs the savory chili garlic sauce without competing with the fish. Brown rice or another cooked grain can also work well.
- Steamed jasmine rice: A simple base for the flavorful sauce.
- Stir-fried vegetables: Bok choy, broccoli, or green beans add freshness and color.
- Cucumber salad: A cool, crisp side provides contrast to the warm, spicy fish.
- Steamed greens: Lightly seasoned vegetables keep the meal balanced.
- Fresh lime wedges: A squeeze of lime brightens the rich sauce at the table.
For a family-style dinner, place the fish in the center of a large platter and serve the rice and vegetables separately. Keep the serving utensils separate from those used to handle raw fish.
How to Store and Reheat Leftovers
Transfer leftover fish and sauce to a clean, airtight container and refrigerate within 2 hours of cooking, or within 1 hour if the surrounding temperature is above 90°F. Refrigerate at 40°F or below and use the leftovers within 3 to 4 days.
To reheat, place the fish in a covered oven-safe dish with a small spoonful of sauce or water. Warm it in a 300°F oven until heated through, checking that the center reaches 165°F for reheated leftovers. The fish may be less crisp than when freshly cooked.
A skillet over low heat can also work for smaller portions. Add a little water, cover loosely, and heat gently to avoid drying out the flesh. Reheat only the portion you plan to eat.
Freezing is possible, although the texture of the cooked fish and its skin may become softer after thawing. For best quality, freeze promptly in a freezer-safe airtight container, label it with the date, and thaw in the refrigerator before reheating. Discard leftovers that have been stored improperly or show signs of spoilage.
Frequently Asked Questions
What fish is best for spicy garlic fish?
Tilapia and snapper are practical choices for a whole-fish preparation. Other firm-fleshed fish can work as long as the size suits your pan and the cooking time is adjusted for thickness.
How do you make fish skin crispy?
Dry the fish thoroughly, use a properly heated pan, and avoid moving the fish before the skin has browned. A light coating of cornstarch is optional, but it should not be applied too thickly.
Can I make the chili garlic sauce ahead of time?
Yes. You can prepare the sauce ahead and refrigerate it in a covered container. Reheat it gently and add a little water if needed. For the freshest flavor, add the green onions close to serving time.
Can I use frozen fish?
Yes, provided it is thawed safely in the refrigerator and dried thoroughly before cooking. Fish that is still icy or wet on the surface will be harder to brown evenly.
Is this recipe very spicy?
The heat depends on the number and type of chilies used. Start with one or two mild red chilies for a gentler sauce, remove their seeds if desired, and add more only after tasting.
Can I bake the fish instead of frying it?
Yes. Bake a seasoned whole fish in a preheated 400°F oven until it reaches 145°F at the thickest part. The cooking time depends on its size and thickness. Prepare the chili garlic sauce separately and spoon it over the fish after baking. The skin may not be as crisp as pan-fried fish.
A Flavorful Seafood Dinner Worth Making
This spicy garlic fish recipe combines golden pan-fried fish with a savory, aromatic chili garlic sauce for a satisfying homemade seafood dinner. With a few simple preparation techniques, you can achieve well-browned skin, moist fish, and a sauce that balances garlic, chili, saltiness, and acidity.
Serve it with steamed rice and fresh vegetables for a complete meal. Adjust the heat to your preference, prepare the sauce just before serving, and enjoy the contrast between the fish and its rich, flavorful topping.
Spicy Garlic Fish Recipe
A whole pan-fried fish topped with homemade chili garlic sauce, fresh chilies, and green onions.
Prep Time: 15 minutes
Cook Time: 25 minutes
Total Time: 40 minutes
Servings: 2 to 3Ingredients
- 1 whole tilapia or snapper, 1 to 1 1/2 pounds, cleaned and scaled
- 1 teaspoon kosher salt
- 1/2 teaspoon ground black pepper
- 3 tablespoons cornstarch, optional
- 1/3 cup neutral oil, or enough for shallow-frying
- 2 tablespoons neutral oil for the sauce
- 5 garlic cloves, finely chopped
- 2 to 3 red chilies, finely chopped
- 2 green onions, sliced
- 2 tablespoons low-sodium soy sauce
- 1 tablespoon oyster sauce
- 1 tablespoon rice vinegar or lime juice
- 1 teaspoon granulated sugar
- 3 tablespoons water
- 1 teaspoon cornstarch mixed with 1 tablespoon cold water, optional
Instructions
- Pat the fish dry. Make shallow diagonal cuts on both sides, then season with salt and pepper. Dust lightly with cornstarch if desired.
- Heat the frying oil in a large skillet over medium to medium-high heat until shimmering.
- Pan-fry the fish for approximately 6 to 9 minutes on the first side and 5 to 8 minutes on the second side, adjusting for thickness. Cook until the thickest part reaches 145°F.
- Transfer the fish to a serving platter. Carefully discard excess oil and remove any burnt residue from the skillet.
- Heat 2 tablespoons of fresh oil in a clean skillet over medium-low heat. Cook the garlic for 30 to 60 seconds until fragrant, then add the chilies and stir for another 30 seconds.
- Add soy sauce, oyster sauce, vinegar or lime juice, sugar, and water. Stir and bring to a gentle simmer.
- If a thicker sauce is desired, stir in the cornstarch slurry and simmer briefly until the sauce lightly coats a spoon.
- Stir in most of the green onions. Taste and adjust the seasoning, then spoon the sauce over the fish.
- Garnish with the reserved green onions and serve immediately with steamed rice or vegetables.
Recipe Notes
- Drying the fish well is essential for better browning.
- Adjust the number of chilies to suit your preferred heat level.
- Keep the garlic over moderate heat to avoid bitterness.
- Refrigerate leftovers within 2 hours and use within 3 to 4 days.
Food safety: Cook fish to an internal temperature of 145°F. Reheat leftovers to 165°F.
-
Crispy Fish with Garlic Pepper Sauce (Easy Dinner)
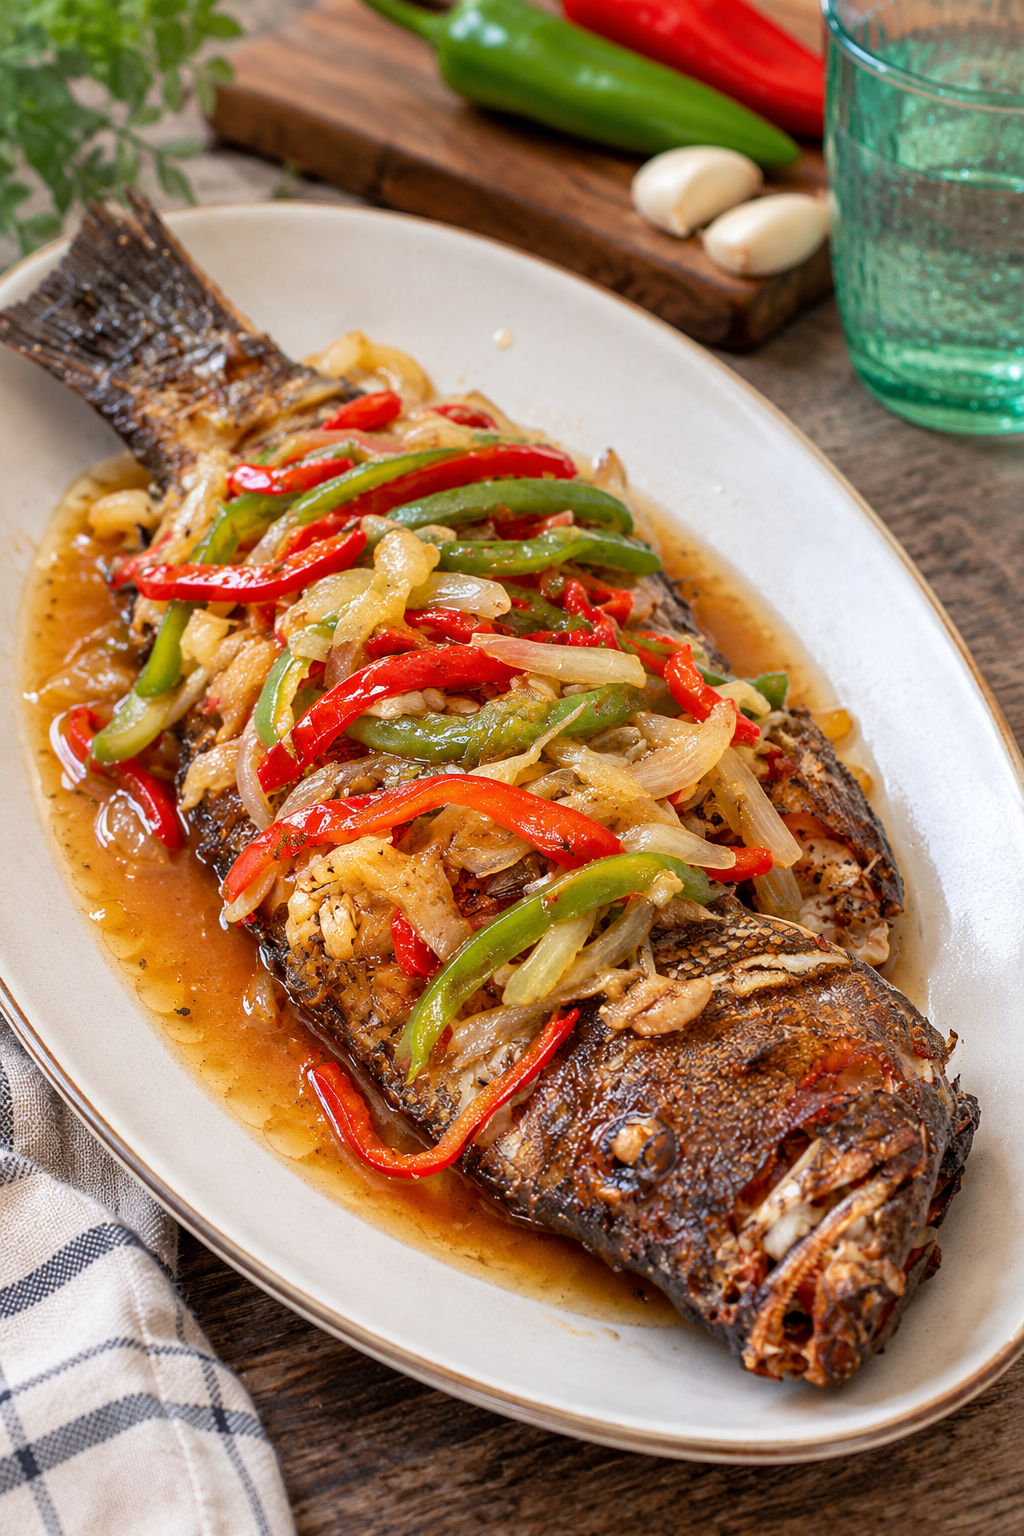
Crispy Fish with Garlic Pepper Sauce – An Easy Dinner Recipe
If you love golden, crispy fish served with colorful vegetables and a savory sauce, this crispy fish with garlic pepper sauce is a delicious dinner to add to your meal rotation. A whole fish is cooked until the outside is beautifully browned, then topped with red and green bell peppers, tender onions, and a flavorful garlic sauce.
The combination of crisp fish skin, flaky fish flesh, sweet peppers, and a lightly thickened sauce creates a satisfying contrast of textures. Serve it with steamed rice or your favorite simple side dish for a homemade seafood dinner that looks special without requiring complicated ingredients.
This recipe uses a practical two-part method: cook the fish first, then prepare the pepper sauce separately. That way, the fish has time to develop a browned exterior before the vegetables and sauce are added.
Why You’ll Love This Crispy Fish Recipe
- A flavorful combination: Garlic, onion, red bell pepper, and green bell pepper create a savory, slightly sweet sauce that complements the fish.
- Contrasting textures: The browned fish pairs beautifully with tender vegetables and a light, glossy sauce.
- Simple ingredients: Most ingredients are easy to find at a regular grocery store.
- Flexible serving options: Serve the fish with steamed rice, sautéed vegetables, or a fresh cucumber salad.
- Suitable for sharing: A whole fish makes an attractive centerpiece for a family dinner or a relaxed weekend meal.
What Kind of Fish Should You Use?
Choose a whole fish that has been cleaned and scaled, with the gills and internal organs removed. A firm-fleshed fish works particularly well because it can hold its shape during cooking and serving.
Snapper, tilapia, branzino, and similar whole fish are possible options. The best choice depends on availability, size, and your preference for flavor. Smaller fish generally cook more quickly, while larger fish need additional time.
For this recipe, a whole fish weighing approximately 1 1/2 to 2 pounds is a practical starting point. If your fish is significantly larger or thicker, adjust the cooking time and check the internal temperature rather than relying on the clock alone.
Ingredients for Crispy Fish with Garlic Pepper Sauce
For the fish
- 1 whole fish, approximately 1 1/2 to 2 pounds, cleaned and scaled
- 1 teaspoon kosher salt, or to taste
- 1/2 teaspoon ground black pepper
- 1 tablespoon cornstarch, optional, for a light coating
- 1 to 1 1/2 cups neutral cooking oil, or enough for shallow-frying in your pan
For the garlic pepper sauce
- 1 tablespoon neutral cooking oil
- 4 garlic cloves, minced
- 1 small yellow onion, thinly sliced
- 1/2 medium red bell pepper, thinly sliced
- 1/2 medium green bell pepper, thinly sliced
- 1 teaspoon freshly grated ginger, optional
- 1/4 cup low-sodium chicken broth or vegetable broth
- 2 tablespoons low-sodium soy sauce
- 1 tablespoon rice vinegar or mild white vinegar
- 1 teaspoon granulated sugar, or to taste
- 1 teaspoon cornstarch mixed with 1 tablespoon cold water
- 1/4 teaspoon ground black pepper, or to taste
- 1 small red chili, thinly sliced, optional
Equipment You’ll Need
- A large, heavy skillet or frying pan that can accommodate the fish
- A wide fish spatula or two sturdy spatulas for turning
- A small mixing bowl for the sauce thickener
- A small saucepan or skillet for the pepper sauce, if needed
- A food thermometer to check doneness
- A wire rack or paper towels for draining excess oil
A wide skillet makes handling the fish easier. If the fish does not fit comfortably in your pan, choose a smaller fish rather than forcing it into the pan or risking splashing hot oil.
How to Make Crispy Fish with Garlic Pepper Sauce
Step 1: Prepare the fish
Pat the cleaned fish thoroughly dry with paper towels, including the skin and the inside of the cavity. Removing surface moisture helps the fish brown more effectively and reduces oil splattering.
Make two or three shallow diagonal cuts through the thickest parts of each side, being careful not to cut all the way through the fish. These cuts help the heat reach the thicker flesh more evenly.
Season the fish inside and out with salt and black pepper. If desired, dust it lightly with cornstarch and shake off the excess. Keep the coating thin so it does not become heavy or pasty.
Step 2: Fry the fish until golden
Pour enough neutral cooking oil into a large, heavy skillet for shallow-frying. Heat the oil over medium to medium-high heat. The oil should be hot enough to sizzle when the fish is added, but it should not smoke.
Carefully lower the fish into the pan, placing it away from you to minimize splashing. Fry the first side until the skin is well browned and releases from the pan relatively easily. Depending on the fish’s size, thickness, and pan temperature, this may take approximately 7 to 10 minutes.
Use two spatulas to support the fish as you turn it. Cook the other side for approximately 7 to 10 minutes, adjusting the heat as necessary to prevent the skin from burning before the center cooks.
Cooking times are estimates. Check the thickest part of the fish with a food thermometer, avoiding contact with bones. Fish should reach an internal temperature of 145°F. The flesh should also appear opaque and separate easily with a fork.
Transfer the cooked fish to a wire rack or a paper towel-lined plate. Allow excess oil to drain while you prepare the sauce.
Step 3: Sauté the garlic and vegetables
In a clean skillet, heat 1 tablespoon of oil over medium heat. Add the minced garlic and optional ginger. Stir for about 30 seconds, just until fragrant. Do not let the garlic turn dark brown, as it can become bitter.
Add the sliced onion, red bell pepper, and green bell pepper. Sauté for approximately 2 to 4 minutes, stirring occasionally. The vegetables should soften slightly while retaining some texture and color.
Step 4: Make the garlic pepper sauce
Pour in the broth, soy sauce, vinegar, sugar, and ground black pepper. Stir to combine and bring the mixture to a gentle simmer.
Stir the cornstarch and cold water together in a small bowl until smooth. Slowly pour the mixture into the simmering sauce while stirring continuously.
Cook for about 30 seconds to 2 minutes, or until the sauce thickens enough to lightly coat the vegetables and the back of a spoon. If the sauce becomes too thick, add a tablespoon of broth or water at a time until it reaches your preferred consistency.
Taste the sauce before adding more salt. Soy sauce already contributes saltiness, so additional seasoning may not be necessary. Add sliced red chili if you want a little heat.
Step 5: Assemble and serve
Transfer the crispy fish to a large serving platter. Spoon the garlic pepper sauce and vegetables over the fish, distributing the peppers and onions along the body.
For the best texture, serve immediately. You can also place the sauce beside or underneath part of the fish if you want to preserve more of the crisp skin.
Serve with steamed white rice, brown rice, or your favorite vegetable side. Spoon some of the savory sauce over the rice to make the most of the garlic, pepper, and onion flavors.
Tips for Crispy Skin and Flavorful Sauce
Dry the fish thoroughly
Moisture on the skin can interfere with browning and cause hot oil to splatter. Pat the fish dry immediately before seasoning and frying.
Do not overcrowd the pan
A pan that is too small makes the fish difficult to turn and can lead to uneven cooking. Choose a pan that provides enough room to handle the fish safely.
Maintain a steady frying temperature
If the oil is too cool, the fish may absorb excess oil and develop a soft exterior. If the oil is too hot, the skin can burn before the center cooks. Adjust the heat as needed throughout frying.
Keep the vegetables slightly crisp
Red and green bell peppers add sweetness, color, and texture. Cook them just until they begin to soften so they do not disappear into the sauce.
Add the sauce just before serving
Even a well-fried fish will gradually soften when covered with liquid. For a crispier result, spoon the sauce over the center of the fish or serve some of it on the side.
Common Mistakes to Avoid
- Using wet fish: Excess moisture makes browning more difficult and increases splattering.
- Turning the fish too early: Allow the skin to brown and release from the pan before attempting to flip it.
- Cooking over excessive heat: Very high heat can burn the outside while leaving thicker flesh undercooked.
- Adding dry cornstarch directly to the sauce: Mix it with cold water first to reduce lumps.
- Making the sauce too thick: Add broth or water gradually until the sauce coats the fish without becoming pasty.
- Adding too much soy sauce: Taste the sauce before adding extra salt, especially when using regular soy sauce instead of low-sodium soy sauce.
Easy Recipe Variations
Spicy Garlic Pepper Fish
Add thinly sliced fresh chili or a small amount of chili paste to the sauce. Adjust the heat gradually so it complements the garlic and bell peppers instead of overpowering them.
Lemon Garlic Fish
Replace the vinegar with fresh lemon juice and add a little lemon zest. This variation produces a brighter, citrus-forward flavor that works well with many types of fish.
Fish Fillets Instead of Whole Fish
If a whole fish is inconvenient, use firm white fish fillets. Pat them dry, season them, and pan-fry according to their thickness. Check that the center reaches 145°F before serving, then prepare the same garlic pepper sauce separately.
Gluten-Free Garlic Pepper Sauce
Use certified gluten-free tamari or another suitable gluten-free soy sauce, and check the labels on your broth and other packaged ingredients. Cornstarch is naturally gluten-free, but cross-contact and product formulations can vary.
What to Serve with Garlic Pepper Fish
This fish has a savory sauce that pairs well with simple side dishes. Consider these options:
- Steamed jasmine rice: A fluffy base for soaking up the garlic pepper sauce.
- Brown rice: A heartier option with a slightly nutty flavor.
- Steamed broccoli: A simple vegetable side that balances the richness of the fried fish.
- Cucumber salad: Fresh cucumber and a light vinegar dressing provide a refreshing contrast.
- Sautéed green beans: A quick vegetable side that works well with the peppers and onions.
How to Store Leftovers
Remove any uneaten fish from the serving platter and refrigerate it in a shallow, airtight container within two hours of cooking, or within one hour if the surrounding temperature is above 90°F.
For best quality, refrigerate cooked fish and sauce separately when practical. The fish will soften as it sits in the sauce, so storing them apart can help preserve more of the exterior’s texture.
Use refrigerated leftovers within 3 to 4 days. Reheat the fish and sauce until they reach 165°F, checking the temperature with a food thermometer. An oven or air fryer can help improve the fish’s exterior texture, although the original crispness may not fully return.
For longer storage, freeze the cooked fish and sauce in separate freezer-safe containers. Use within approximately 2 to 3 months for better quality. Thaw in the refrigerator before reheating, and avoid leaving cooked fish at room temperature for extended periods.
Frequently Asked Questions
What fish is best for garlic pepper sauce?
Firm-fleshed fish such as snapper, tilapia, and branzino can work well. Choose a fish that fits your skillet and is suitable for frying. Cooking time depends on its size and thickness.
How do you keep fried fish crispy?
Dry the fish before cooking, maintain a steady frying temperature, and let excess oil drain on a wire rack. Add the sauce immediately before serving, or serve it separately to keep more of the skin crisp.
Can I make this recipe without deep-frying?
Yes. You can pan-sear the fish with a smaller amount of oil or bake it in an oven. The texture will differ from shallow-fried fish, and cooking time will depend on the fish’s thickness and the cooking method. Check that the thickest portion reaches 145°F.
Can I use frozen fish?
Yes, provided it is safely thawed in the refrigerator before preparation. Pat it thoroughly dry before frying. Do not thaw fish on the kitchen counter, and follow the package instructions when applicable.
Can I prepare the garlic pepper sauce ahead of time?
Yes. You can prepare the sauce in advance and refrigerate it promptly in a covered container. Reheat it gently, adding a little broth or water if it becomes too thick. For the best texture, fry the fish shortly before serving.
Is this recipe very spicy?
Not necessarily. Bell peppers and black pepper provide flavor without making the dish especially hot. The optional fresh chili adds more heat and can be adjusted or omitted according to your preference.
Final Thoughts
Crispy fish with garlic pepper sauce is a satisfying way to serve whole fish with everyday ingredients. Golden fish, colorful bell peppers, tender onions, and a savory garlic sauce come together in a dish that works well for both family meals and weekend dinners.
The key is to cook the fish thoroughly while developing a browned exterior, prepare the sauce separately, and combine them just before serving. Pair the finished dish with steamed rice and a fresh vegetable side for a complete seafood dinner.
Crispy Fish with Garlic Pepper Sauce
A whole golden-brown fish topped with red and green bell peppers, tender onions, and a savory garlic pepper sauce.
Prep Time: 15 minutes
Cook Time: 25 minutes
Total Time: 40 minutes
Yield: 2 to 4 servings, depending on fish size and side dishes
Cooking Method: Shallow-frying and stovetop simmering
Ingredients
For the fish
- 1 whole fish, approximately 1 1/2 to 2 pounds, cleaned and scaled
- 1 teaspoon kosher salt
- 1/2 teaspoon ground black pepper
- 1 tablespoon cornstarch, optional
- 1 to 1 1/2 cups neutral cooking oil, as needed for shallow-frying
For the sauce
- 1 tablespoon neutral cooking oil
- 4 garlic cloves, minced
- 1 small yellow onion, thinly sliced
- 1/2 medium red bell pepper, thinly sliced
- 1/2 medium green bell pepper, thinly sliced
- 1 teaspoon grated ginger, optional
- 1/4 cup low-sodium broth
- 2 tablespoons low-sodium soy sauce
- 1 tablespoon rice vinegar or mild white vinegar
- 1 teaspoon granulated sugar
- 1 teaspoon cornstarch mixed with 1 tablespoon cold water
- 1/4 teaspoon ground black pepper
- 1 small red chili, sliced, optional
Instructions
- Pat the cleaned fish dry. Make shallow diagonal cuts on both sides, then season with salt and black pepper. Dust lightly with optional cornstarch.
- Heat the frying oil in a large, heavy skillet over medium to medium-high heat. Carefully add the fish and fry for approximately 7 to 10 minutes per side, depending on thickness and size. Check that the thickest part reaches 145°F.
- Transfer the cooked fish to a wire rack or paper towel-lined plate to drain excess oil.
- In a clean skillet, heat 1 tablespoon of oil over medium heat. Add the garlic and optional ginger; stir for about 30 seconds.
- Add the onion and both bell peppers. Sauté for 2 to 4 minutes until slightly tender.
- Stir in the broth, soy sauce, vinegar, sugar, and black pepper. Bring to a gentle simmer.
- Stir the cornstarch and cold water together, then add the mixture gradually to the sauce while stirring. Simmer until lightly thickened.
- Taste and adjust the seasoning. Add optional sliced chili if desired.
- Place the fish on a serving platter and spoon the garlic pepper sauce and vegetables over it. Serve immediately with steamed rice or vegetables.
Notes
- Cooking time varies according to fish size, thickness, and pan temperature. Use a food thermometer to confirm doneness.
- For crispier skin, serve the sauce on the side or spoon it over the fish just before eating.
- Use gluten-free tamari instead of soy sauce if needed, and check the labels of packaged ingredients.
- Refrigerate leftovers within two hours and use within 3 to 4 days. Reheat leftovers to 165°F.
Nutrition: Nutrition values are not provided because a reliable estimate would require the exact fish species, edible portion, amount of oil absorbed, and actual serving size.
-
Chinese Steamed Fish with Ginger and Soy Sauce
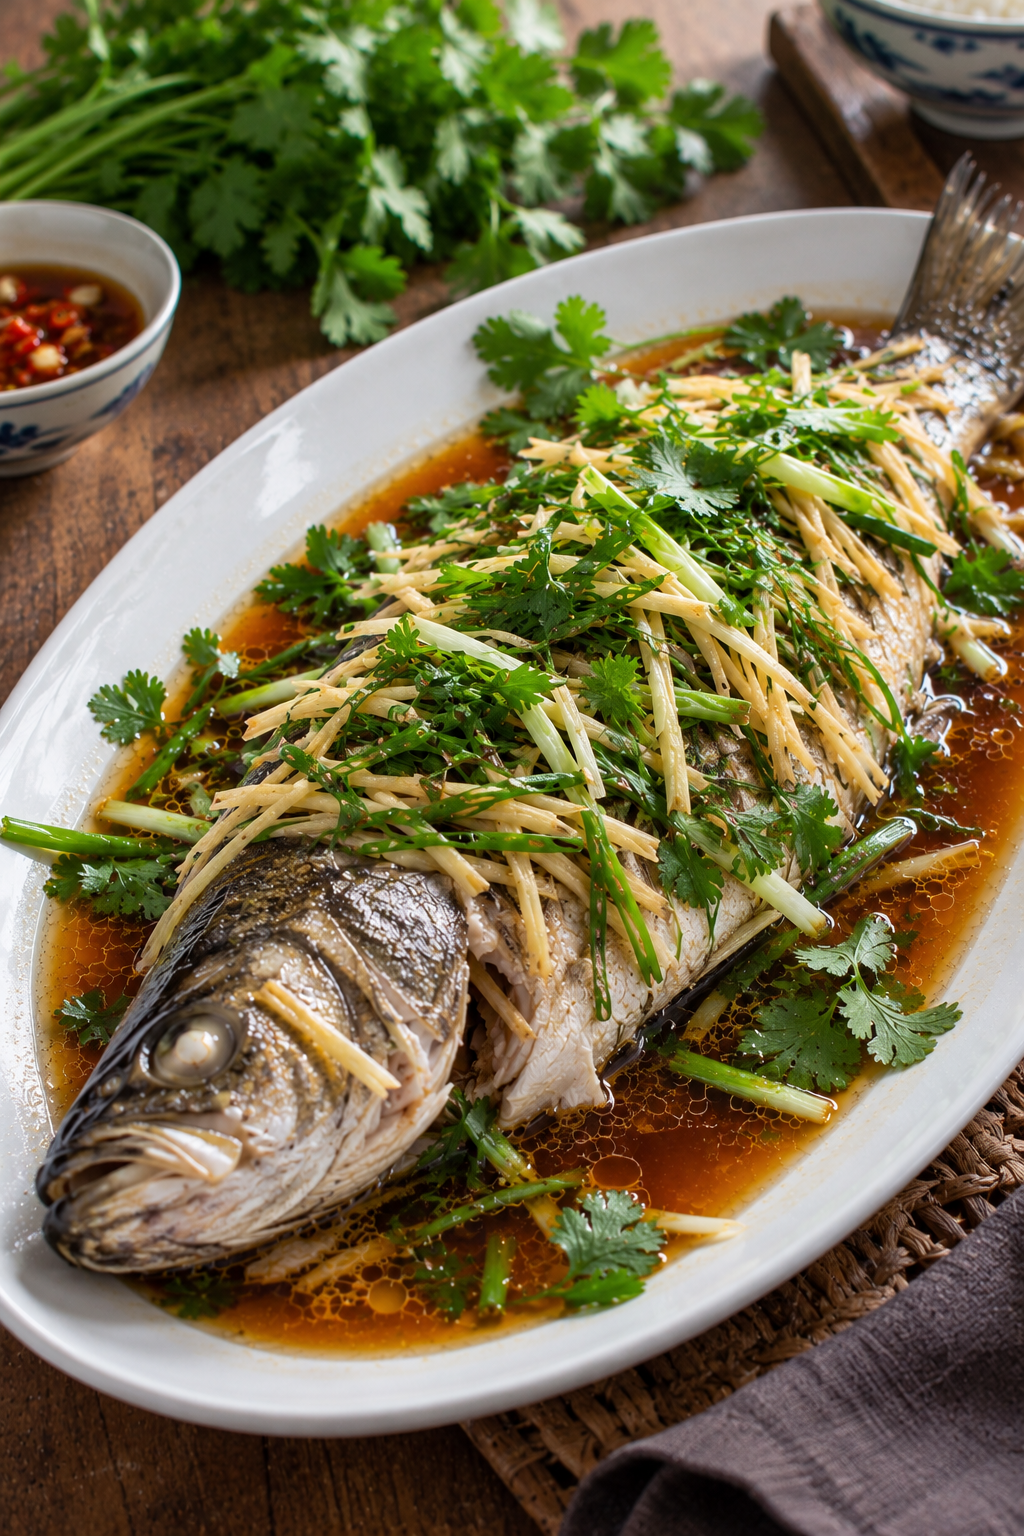
Chinese Steamed Fish with Ginger and Soy Sauce
Chinese steamed fish with ginger and soy sauce is a flavorful seafood dish featuring tender whole fish, fresh aromatics, and a savory sauce. Thin strips of ginger, green onions, and fresh cilantro add fragrance and freshness, while soy sauce creates a rich, balanced finish.
This Asian-inspired fish recipe is a wonderful option for a family dinner when you want something satisfying without deep-frying or preparing a complicated meal. Serve it with steamed white rice and your favorite vegetables to make a complete dinner at home.
The key to good steamed fish is simple: choose fresh fish, avoid overcooking it, and add the aromatic toppings at the right time. With a few everyday ingredients and a steamer, you can prepare this dish in about 30 minutes, depending on the size and thickness of the fish.
Why You’ll Love This Chinese Steamed Fish Recipe
- Fresh and aromatic: Ginger, scallions, and cilantro bring bright, fresh flavors to the fish.
- A savory sauce: Soy sauce, garlic, and a touch of sugar create a balanced combination of salty and slightly sweet flavors.
- A simple cooking method: Steaming keeps the fish moist when cooked properly.
- Easy to customize: You can use several types of whole fish and adjust the aromatics to your taste.
- Perfect with rice: The flavorful sauce is delicious spooned over freshly cooked rice.
What Is Chinese Steamed Fish?
Chinese steamed fish is a traditional style of fish preparation in which a whole fish or fish fillets are cooked with steam and served with aromatics and a savory seasoning. Many versions feature ginger, scallions, soy sauce, and sometimes hot oil poured over the fresh toppings to release their aroma.
The exact ingredients and preparation vary by region, household, and fish type. This home-cook-friendly version uses a whole fish, a ginger and scallion topping, and a simple soy-based sauce. It is inspired by Chinese-style steamed fish rather than a claim to represent every traditional regional preparation.
Ingredients You’ll Need
Choose a fresh, properly cleaned whole fish and prepare the aromatics before you start cooking. Steaming moves quickly once the fish is in the steamer, so having everything ready makes the process easier.
- 1 whole fish, about 1 1/2 to 2 pounds: Sea bass, red snapper, or another suitable whole fish works well. Ask your fishmonger to scale, gut, and clean it.
- 2 tablespoons soy sauce: Provides the main savory flavor. Use reduced-sodium soy sauce if preferred.
- 2 tablespoons water: Helps balance the soy sauce and creates a lighter serving sauce.
- 1 tablespoon Shaoxing cooking wine: Optional, for additional aroma. It can be omitted.
- 1 teaspoon sugar: Softens the salty edge of the sauce.
- 2-inch piece fresh ginger: Cut half into thin julienne strips and slice the remainder for the fish cavity.
- 4 scallions: Cut into thin strips or short lengths.
- 2 garlic cloves: Finely minced for the sauce.
- 1 tablespoon neutral cooking oil: Optional, for briefly heating and pouring over the aromatics.
- Fresh cilantro: A small handful for garnish.
- White or black pepper: A small pinch, optional.
Choosing the Best Fish
A fresh whole fish with firm flesh is a good choice for this recipe. Sea bass and red snapper are suitable options, while tilapia can work as a more accessible alternative. The important consideration is the fish’s size, thickness, freshness, and suitability for steaming.
Look for clear, bright eyes, moist skin, and a fresh, mild smell. The fish should be properly cleaned and scaled before cooking. If you buy frozen fish, thaw it safely in the refrigerator before preparing it.
A fish weighing around 1 1/2 to 2 pounds is a practical size for a family-style platter. Larger or thicker fish will require additional cooking time, so use the temperature and doneness checks rather than relying on the clock alone.
Equipment You’ll Need
- A steamer basket or steaming rack
- A large pot with a tightly fitting lid
- A heatproof plate that fits inside the pot
- A small saucepan for the sauce
- A sharp knife and cutting board
- A food thermometer for checking doneness
Choose a heatproof plate with enough space around the fish for steam to circulate. A plate that is too large for the pot can prevent the lid from closing properly, while a very deep plate may collect more liquid than you want.
How to Make Chinese Steamed Fish with Ginger and Soy Sauce
Step 1: Prepare the Fish
Pat the cleaned fish dry with paper towels. Make two or three shallow diagonal cuts on each side of the thickest part of the fish. These cuts help heat reach the flesh more evenly.
Place a few slices of ginger inside the cavity and arrange some ginger and scallion pieces underneath the fish on the heatproof plate. Keep some of the julienned ginger and scallions aside for the final topping.
Step 2: Prepare the Steamer
Add enough water to a large pot to create steady steam without allowing the water to touch the plate holding the fish. Bring the water to a boil, then place the steaming rack inside the pot.
Carefully set the plate with the fish on the rack. Cover the pot with a lid and maintain steady steaming throughout the cooking process. Use caution when lifting the lid because hot steam can cause burns.
Step 3: Steam Until the Fish Is Cooked
Steam a whole fish weighing approximately 1 1/2 to 2 pounds for about 10 to 15 minutes as an initial estimate. The actual time depends on the fish’s thickness, starting temperature, and the strength of the steam.
Check the thickest part of the fish with a food thermometer. Fish should reach an internal temperature of 145°F. The flesh should appear opaque and separate easily with a fork. If it has not reached the recommended temperature, continue steaming and check again.
Step 4: Make the Soy Sauce
While the fish cooks, combine the soy sauce, water, optional Shaoxing cooking wine, sugar, and minced garlic in a small saucepan.
Warm the mixture over low to medium heat, stirring until the sugar dissolves and the sauce is hot. Let it simmer briefly, then remove it from the heat. Avoid reducing it too much because the sauce should remain easy to spoon over the fish.
Step 5: Add the Aromatics
When the fish is cooked, carefully remove the plate from the steamer. If a large amount of watery cooking liquid has collected on the plate, carefully spoon off some of it while keeping the fish moist.
Scatter the remaining julienned ginger and scallions over the fish. Spoon the warm soy sauce over the fish and around the platter. Finish with fresh cilantro.
For an extra aromatic finish, heat the optional neutral oil in a small saucepan until hot but not smoking. Carefully drizzle it over the ginger and scallions. The oil should sizzle gently and release their fragrance. Keep your hands and face away from splattering oil.
Step 6: Serve Immediately
Serve the steamed fish while hot, with the soy sauce spooned over the flesh. Add extra cilantro or scallions if desired, and bring steamed rice to the table so everyone can enjoy the flavorful sauce.
Tips for Tender, Flavorful Steamed Fish
Do Not Overcook the Fish
Overcooking can make fish dry and firm. Start checking the fish near the lower end of the estimated cooking time, especially if it is smaller or thinner than the suggested size. A thermometer provides a more reliable doneness check than appearance alone.
Slice the Ginger Thinly
Thin strips distribute easily over the fish and release their fragrance into the sauce. Fresh ginger is especially useful here because its bright, slightly spicy flavor balances the savory soy sauce.
Keep the Steam Steady
Make sure the water is steaming before adding the fish. Keep the lid closed as much as possible during cooking so the temperature remains consistent. Check the water level if the steaming process takes longer than expected.
Balance the Sauce to Your Taste
Soy sauce brands vary in saltiness. If the sauce tastes too strong, add a little water. If you prefer a slightly sweeter flavor, add a small pinch of sugar. Taste the sauce before pouring it over the fish.
Add Fresh Herbs at the End
Cilantro and fresh scallions provide a brighter flavor when added near the end. Adding them too early can soften their texture and diminish their fresh appearance.
Common Mistakes to Avoid
- Using an oversized fish for the cooking time: A larger fish takes longer to cook. Always check the thickest part for doneness.
- Letting the water touch the plate: The fish should be cooked by steam rather than submerged in the pot’s water.
- Adding too much soy sauce: A concentrated sauce can overpower the delicate flavor of the fish. Dilute it with water when needed.
- Skipping the fish preparation: Scaling, gutting, and cleaning the fish properly are essential before steaming.
- Pouring oil that is smoking heavily: Hot oil should be handled carefully and should not be allowed to smoke excessively.
- Leaving the fish at room temperature for too long: Serve promptly and refrigerate leftovers within two hours, or within one hour when the ambient temperature exceeds 90°F.
Variations to Try
Steamed Fish with Extra Ginger
If you enjoy a stronger ginger flavor, increase the amount of fresh ginger slightly. Use part during steaming and reserve the rest for the final topping.
Spicy Chinese Steamed Fish
Add thinly sliced fresh red chili or a small amount of chili oil to the finished dish. Adjust the heat gradually so the spice complements rather than overwhelms the fish.
Steamed Fish with Reduced Sodium
Choose reduced-sodium soy sauce and add water to taste. Fresh ginger, scallions, garlic, and cilantro provide plenty of aroma without requiring additional soy sauce.
Steamed Fish Fillets
Boneless fish fillets can be used if a whole fish is unavailable. Place them in a heatproof dish with ginger and scallions, then steam until they reach 145°F. Fillets usually cook faster than a whole fish, so begin checking them early.
What to Serve with Chinese Steamed Fish
This fish is especially good with simple sides that absorb the savory sauce without competing with its flavor.
- Steamed jasmine rice: A classic pairing for the soy-based sauce.
- Garlic bok choy: A fresh vegetable side with a mild, savory flavor.
- Stir-fried green beans: Add a little garlic for an easy vegetable dish.
- Steamed broccoli: A simple option that works well for family dinners.
- Light cucumber salad: Provides a crisp, refreshing contrast to the warm fish.
For a complete meal, serve the fish with rice and one or two vegetables. This keeps the preparation manageable while giving everyone a balanced variety of flavors and textures.
How to Store Leftover Steamed Fish
Allow leftovers to cool briefly, then transfer the fish and sauce to a shallow, airtight food storage container. Refrigerate within two hours of cooking, or within one hour if the room or outdoor temperature is above 90°F.
Store cooked fish in the refrigerator at 40°F or below and use it within three to four days. For longer storage, freeze it in a suitable airtight container. For best quality, use frozen cooked fish within about three months.
How to Reheat Steamed Fish
Reheat leftovers gently in a covered, heatproof dish in the oven or in a steamer until the fish reaches 165°F. Add a small splash of water if the sauce has thickened or the fish looks dry. Avoid repeated reheating because the delicate flesh can become dry and break apart.
For the best texture, store the fish with its sauce and reheat only the portion you intend to eat.
Frequently Asked Questions
What is the best fish for Chinese steamed fish?
Sea bass and red snapper are good choices for steaming whole. Other suitable fish can also work, provided they are fresh, properly cleaned, and sized appropriately for your steamer.
How long does it take to steam a whole fish?
A whole fish weighing approximately 1 1/2 to 2 pounds may take around 10 to 15 minutes, but thickness and cooking conditions affect the time. Check that the thickest part reaches 145°F before serving.
Can I make Chinese steamed fish without Shaoxing wine?
Yes. Shaoxing cooking wine is optional in this recipe. You can leave it out and use the soy sauce, water, ginger, scallions, and garlic for a flavorful result.
Why is my steamed fish watery?
Fish releases moisture during steaming, and some liquid may collect on the plate. Carefully remove excess liquid before adding the finishing sauce, leaving enough moisture to keep the fish tender.
Can I use fish fillets instead of a whole fish?
Yes. Fillets are a convenient alternative, although their cooking time is generally shorter. Steam until the thickest portion reaches 145°F and avoid leaving them in the steamer longer than necessary.
Is Chinese steamed fish served with rice?
Yes. Steamed white rice is a natural pairing because it absorbs the savory sauce. You can also serve the fish with noodles or steamed vegetables.
Final Thoughts
Chinese steamed fish with ginger and soy sauce is a practical way to prepare a flavorful seafood dinner with a short ingredient list. Fresh ginger, scallions, cilantro, and a balanced soy-based sauce complement the delicate fish without requiring deep-frying or a complicated cooking process.
Choose a fresh fish, keep the steam steady, and check the internal temperature to help achieve tender results. Serve it hot with rice and vegetables for a satisfying meal that brings Asian-inspired flavors to your home kitchen.
Recipe Card: Chinese Steamed Fish with Ginger and Soy Sauce
Recipe summary: Whole steamed fish topped with ginger, scallions, cilantro, and a savory soy-based sauce.
Prep time: 15 minutes
Cook time: 15 minutes (estimated)
Total time: 30 minutes (estimated)
Yield: 2 to 4 servings
Cooking method: Steaming
Cuisine inspiration: Chinese-inspiredIngredients
- 1 whole fish, 1 1/2 to 2 pounds, scaled, gutted, and cleaned
- 2 tablespoons soy sauce
- 2 tablespoons water
- 1 tablespoon Shaoxing cooking wine, optional
- 1 teaspoon sugar
- 2-inch piece fresh ginger, thinly sliced and julienned
- 4 scallions, cut into strips or short lengths
- 2 garlic cloves, minced
- 1 tablespoon neutral cooking oil, optional
- 1 small handful fresh cilantro
- A pinch of pepper, optional
Instructions
- Pat the cleaned fish dry. Make two or three shallow diagonal cuts on each side of the thickest portion.
- Place some ginger and scallions inside the cavity and underneath the fish on a heatproof plate.
- Bring water to a boil in a large pot fitted with a steaming rack. Keep the water below the plate.
- Place the fish in the steamer, cover, and steam for approximately 10 to 15 minutes, depending on its size and thickness. Check that the thickest portion reaches 145°F.
- Meanwhile, combine the soy sauce, water, optional Shaoxing wine, sugar, and minced garlic in a small saucepan. Warm gently until the sugar dissolves.
- Carefully remove the cooked fish. Spoon off excess watery liquid from the plate if necessary.
- Top the fish with the remaining ginger, scallions, and cilantro. Pour the warm soy sauce mixture over the fish.
- If desired, heat the neutral oil until hot but not smoking, then carefully drizzle it over the aromatics.
- Serve immediately with steamed rice and vegetables.
Recipe Notes
- Sea bass and red snapper are suitable whole-fish options.
- Cooking time varies with fish thickness, so use a food thermometer rather than relying on time alone.
- Use reduced-sodium soy sauce and adjust the water to suit your taste.
- Shaoxing cooking wine and the finishing oil are optional.
Storage
Refrigerate leftovers promptly in an airtight container at 40°F or below and consume within three to four days. Reheat leftovers to 165°F. Freeze in an airtight container for longer storage, preferably using within about three months for best quality.
Nutrition information: Not calculated. Actual nutrition per serving depends on the fish species, edible portion, sauce consumption, and serving size.
-
Easy Grilled Fish with Garlic Chili Sauce
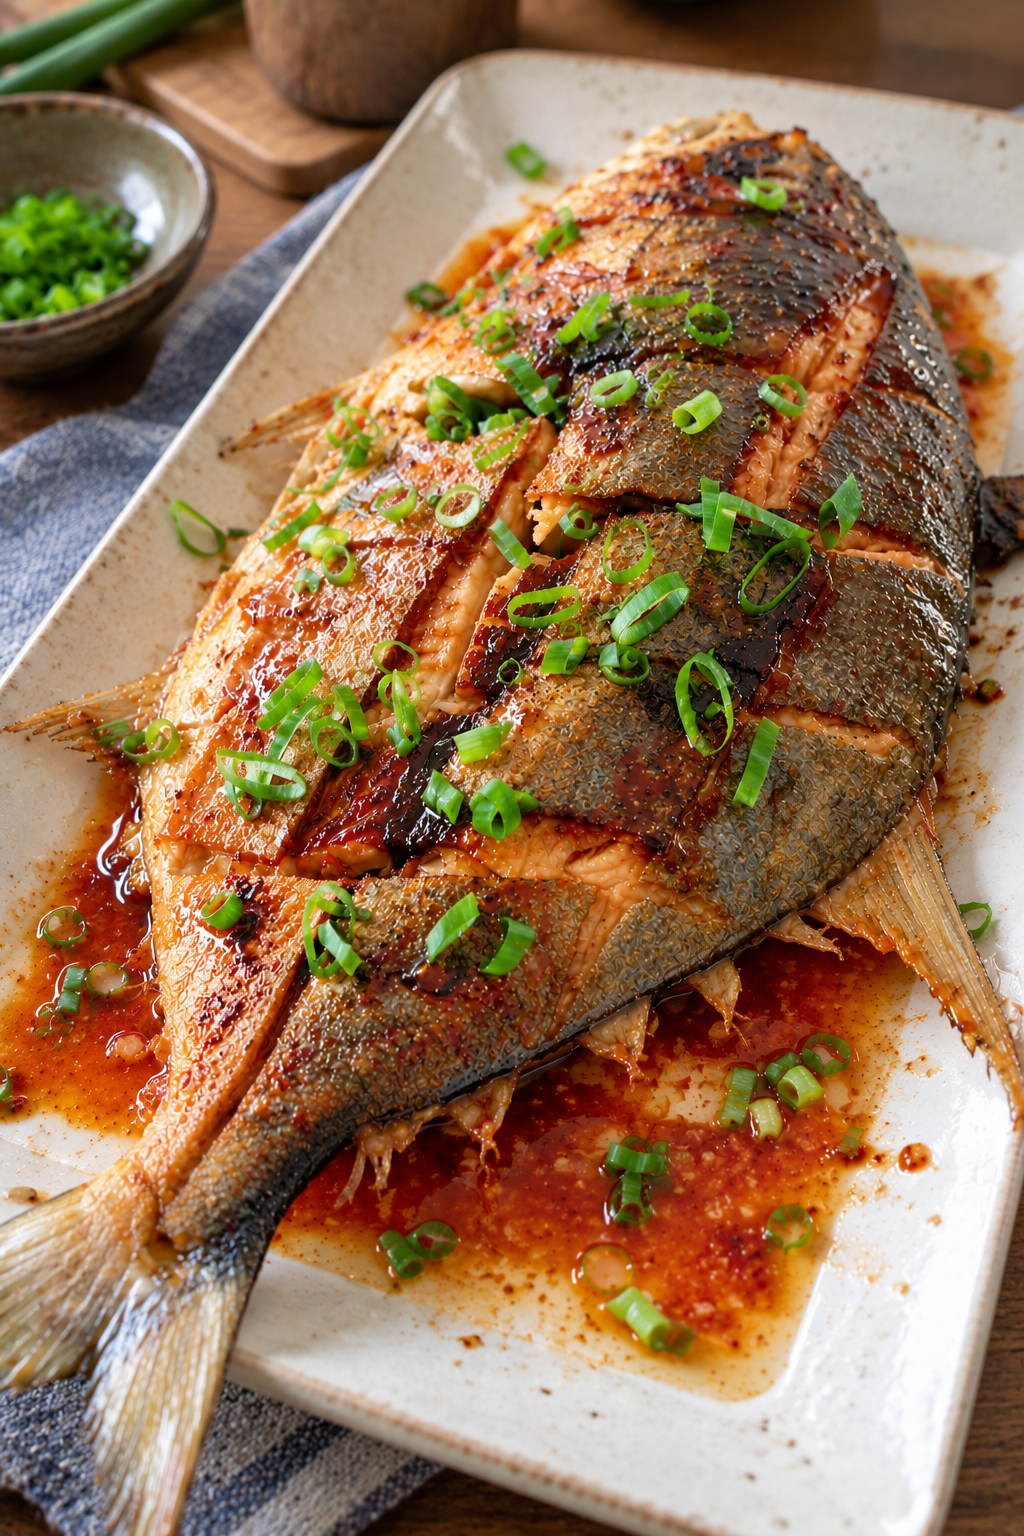
Easy Grilled Fish with Garlic Chili Sauce
This easy grilled fish with garlic chili sauce is a flavorful seafood dinner featuring tender, flaky fish, lightly charred skin, and a savory sauce with garlic, chili, and a touch of sweetness. Fresh green onions add a bright finish, while the rich reddish-brown glaze brings everything together.
Whether you’re preparing a weekend family dinner or looking for a new way to cook whole fish, this recipe offers a delicious combination of savory, spicy, and slightly sweet flavors. You can cook it on an outdoor grill or use your oven when grilling outdoors isn’t practical.
The key to a successful grilled fish recipe is keeping the fish moist while allowing the outside to develop color. A properly prepared garlic chili sauce adds plenty of flavor without overpowering the natural taste of the seafood.
Why You’ll Love This Grilled Fish Recipe
- Bold garlic chili flavor: Garlic, chili sauce, soy sauce, and lime create a savory glaze with a balanced spicy kick.
- Tender, flaky fish: Scoring the skin and monitoring the cooking temperature help the fish cook more evenly.
- Simple ingredients: The sauce uses everyday pantry staples and fresh aromatics.
- Flexible cooking methods: Prepare the fish on an outdoor grill or roast it in the oven.
- Easy to customize: Adjust the chili, sweetness, and acidity to suit your preferences.
Ingredients You’ll Need
Choose a fresh whole fish suitable for grilling, such as sea bass, snapper, or another firm-fleshed variety. Ask your fishmonger to clean and gut the fish if you prefer not to prepare it yourself.
For the Fish
- 1 whole fish, about 2 pounds (900 g), cleaned and scaled
- 1 tablespoon neutral cooking oil
- 1/2 teaspoon kosher salt, or to taste
- 1/4 teaspoon ground black pepper
- 1 tablespoon fresh lime juice
- 2 green onions, thinly sliced, for garnish
For the Garlic Chili Sauce
- 2 tablespoons neutral cooking oil
- 4 garlic cloves, finely minced
- 1 tablespoon fresh ginger, finely minced
- 1–2 tablespoons chili garlic sauce, adjusted to taste
- 2 tablespoons soy sauce
- 1 tablespoon honey or brown sugar
- 2 tablespoons water
- 1 tablespoon fresh lime juice
- 1 teaspoon rice vinegar
Ingredient note: These quantities create a savory, mildly sweet sauce with adjustable heat. The exact ingredients in the photographed dish are unknown, so this is a suggested flavor combination rather than a reconstruction of the original recipe.
Choosing the Right Fish
Whole fish works particularly well for this preparation because the skin helps protect the flesh from drying out. Sea bass and snapper are good options, but other appropriately sized fish can also work.
Look for clear eyes, firm flesh, and a fresh, mild smell. If buying a frozen fish, thaw it safely in the refrigerator before cooking and pat it thoroughly dry.
A fish weighing around 2 pounds is a practical size for this recipe. If your fish is substantially larger or smaller, adjust the cooking time and rely on the internal temperature rather than the clock alone.
How to Prepare Grilled Fish with Garlic Chili Sauce
Step 1: Prepare the Fish
Pat the cleaned fish dry with paper towels. Using a sharp knife, make three or four shallow diagonal cuts on each side of the fish. Avoid cutting too deeply into the flesh.
Rub the fish with the cooking oil, salt, black pepper, and lime juice. Let it stand for about 10 minutes while you prepare the sauce and heat the grill.
Drying the skin is important because excess moisture can cause sticking and make browning more difficult.
Step 2: Make the Garlic Chili Sauce
Heat 2 tablespoons of oil in a small saucepan over medium-low heat. Add the minced garlic and ginger, stirring for approximately 30–60 seconds until fragrant. Avoid letting the garlic turn dark brown, which can make the sauce bitter.
Stir in the chili garlic sauce, soy sauce, honey, water, and rice vinegar. Let the mixture simmer gently for 1–2 minutes, stirring until the ingredients are combined.
Remove the saucepan from the heat and stir in the lime juice. Taste the sauce and adjust the seasoning if necessary. Add a little water if it becomes too thick.
Set aside a clean portion of the sauce for serving before it comes into contact with raw fish or utensils used to handle it.
Step 3: Preheat the Grill
Preheat an outdoor grill to medium-high heat, approximately 400°F. Clean the cooking grates and lightly oil them using a suitable method to reduce sticking.
If your fish tends to fall apart, a fish grilling basket can make turning it easier. Otherwise, use a wide fish spatula and handle the fish gently.
Step 4: Grill the Fish
Place the fish on the grill and cook for approximately 6–9 minutes per side, depending on its thickness, the grill temperature, and the type of fish.
Turn it carefully when the skin releases reasonably easily from the grates. If the fish sticks firmly, give it a little more time instead of pulling it away forcefully.
Brush a thin layer of garlic chili sauce onto the fish during the final few minutes of cooking. Avoid applying a sugary sauce too early because the sugars can burn before the fish is cooked through.
Check the thickest part of the flesh with a food thermometer. Fish should reach an internal temperature of 145°F. The flesh should also appear opaque and separate easily with a fork.
Cooking times are estimates. A thicker fish may need additional time, while a smaller fish may cook more quickly.
Step 5: Use the Oven Instead
If you don’t have an outdoor grill, preheat your oven to 425°F. Place the prepared fish on a lightly oiled, rimmed baking sheet or in an oven-safe baking dish.
Roast for approximately 18–25 minutes, depending on the fish’s size and thickness. Brush with some of the sauce toward the end of cooking, then continue cooking until the thickest part reaches 145°F.
For additional browning, you can briefly use the broiler at the end, watching closely to prevent the sauce from burning.
Step 6: Add the Sauce and Garnish
Transfer the cooked fish to a serving platter. Spoon the remaining reserved sauce over the fish and around the plate.
Scatter the sliced green onions over the top. Serve immediately while the fish is warm and the skin retains as much of its freshly cooked texture as possible.
Tips for Tender, Flavorful Grilled Fish
- Dry the skin well: Moisture makes browning more difficult and can encourage sticking.
- Use a properly heated grill: A preheated cooking surface helps the fish develop color without requiring excessive cooking time.
- Turn the fish carefully: A wide spatula or fish basket can help prevent the delicate flesh from breaking.
- Keep the sauce under control: Apply sugary sauce near the end of cooking to reduce burning.
- Check the thickest section: A food thermometer provides a more dependable indication of doneness than appearance alone.
- Balance the flavor: Add more lime for acidity, more chili sauce for heat, or a small amount of honey for sweetness.
- Garnish just before serving: Fresh green onions provide color and a crisp, fresh contrast to the rich sauce.
Common Mistakes to Avoid
Cooking the Fish Over Excessive Heat
Very high heat can burn the skin and sauce before the flesh cooks through. Maintain a suitable grill temperature and move the fish to a cooler area if the exterior browns too quickly.
Flipping Too Early
Fish can stick to the grates before the skin has formed a firm surface. Allow it to cook undisturbed until it releases more easily, then turn it carefully.
Adding All the Sauce at the Beginning
The honey or brown sugar in the sauce can burn over prolonged direct heat. Cook the fish mostly without the glaze and brush on the sauce during the final minutes.
Overcooking the Fish
Fish continues to lose moisture as it cooks. Check the temperature near the end of the estimated cooking time and remove it from the heat once it reaches 145°F.
Easy Variations
Extra-Spicy Garlic Chili Fish
Increase the chili garlic sauce gradually. You can also add a small amount of fresh chopped chili if you enjoy a stronger heat level.
Honey Garlic Grilled Fish
For a sweeter, milder version, increase the honey slightly and reduce the chili garlic sauce. Keep the glaze thin and apply it near the end of cooking.
Ginger Lime Fish
Increase the fresh ginger and lime juice for a brighter flavor. This variation works well when you want the sauce to complement rather than dominate the fish.
Oven-Roasted Fish
Use the oven method when outdoor grilling isn’t convenient. The fish will still develop browned areas, although the skin may not have exactly the same texture as fish cooked directly over a grill.
What to Serve with Garlic Chili Fish
This fish pairs well with simple sides that balance its savory, spicy sauce.
- Steamed white rice: A classic accompaniment that absorbs the flavorful sauce.
- Roasted vegetables: Broccoli, carrots, and green beans add color and texture.
- Cucumber salad: A cool, lightly dressed salad provides a refreshing contrast.
- Stir-fried greens: Bok choy or other leafy greens make a natural companion for the garlic and ginger flavors.
- Grilled corn: Lightly charred corn adds sweetness and a different texture to the meal.
How to Store and Reheat Leftovers
Remove any uneaten fish from the serving platter and refrigerate it promptly in a covered, food-safe container. Refrigerate within two hours of cooking, or within one hour if the surrounding temperature exceeds 90°F.
Cooked fish can generally be refrigerated at 40°F or below for 3–4 days. For longer storage, freeze it in an airtight, freezer-safe container. For best quality, use frozen cooked fish within approximately 2–3 months.
To reheat, place the fish in an oven-safe dish with a small spoonful of water or reserved sauce. Cover loosely and warm in a 300°F oven until heated through. Reheated leftovers should reach 165°F.
The skin may soften during storage and reheating. If crispness matters, uncover the dish toward the end of reheating and watch carefully to avoid drying out the flesh.
Discard fish that has been stored improperly or shows signs of spoilage. Do not taste food to determine whether it is safe.
Frequently Asked Questions
What is the best fish for this recipe?
Sea bass and snapper are good choices for whole-fish grilling because they have suitable flesh and can be cooked with the skin intact. Choose a fish of a manageable size and adjust the cooking time to its thickness.
Can I make this recipe without an outdoor grill?
Yes. Roast the fish in a preheated 425°F oven for approximately 18–25 minutes, adjusting the time to the fish’s size. Check that the thickest portion reaches 145°F.
Is garlic chili sauce very spicy?
Its heat depends on the brand and amount used. Start with 1 tablespoon, taste the prepared sauce, and add more if desired.
How do I keep fish from sticking to the grill?
Dry the skin, preheat and clean the grates, and lightly oil the cooking surface. Avoid trying to turn the fish before the skin releases more easily.
Can I prepare the sauce ahead of time?
Yes. Prepare the sauce ahead and refrigerate it in a covered container. Reheat it gently before serving, and keep sauce that has touched raw fish separate from sauce intended for the finished dish.
How do I know when whole fish is done?
Check the thickest part of the flesh with a food thermometer. It should reach 145°F. The flesh should also be opaque and separate easily with a fork.
Final Thoughts
Easy grilled fish with garlic chili sauce is a practical way to turn whole fish into a flavorful meal. The combination of browned skin, tender flesh, savory garlic, chili, and fresh green onions creates a satisfying dish that works for everyday dinners and special family meals.
For the best results, prepare the fish carefully, keep the grill at a suitable temperature, and add the sauce toward the end of cooking. Serve it with steamed rice and fresh vegetables for a complete meal.
If you enjoy simple seafood recipes, save this recipe for your next dinner and explore more cooking inspiration on our website.
Recipe Card: Easy Grilled Fish with Garlic Chili Sauce
Recipe summary: Whole grilled fish finished with a savory garlic chili glaze, fresh lime, and green onions.
- Prep time: 15 minutes
- Cook time: 15–25 minutes
- Total time: Approximately 30–40 minutes
- Servings: 2–4, depending on the fish and side dishes
- Cooking method: Outdoor grill, with an oven alternative
Ingredients
- 1 whole fish, about 2 pounds (900 g), cleaned and scaled
- 1 tablespoon neutral cooking oil
- 1/2 teaspoon kosher salt
- 1/4 teaspoon ground black pepper
- 1 tablespoon fresh lime juice
- 2 green onions, thinly sliced
- 2 tablespoons neutral cooking oil for the sauce
- 4 garlic cloves, minced
- 1 tablespoon fresh ginger, minced
- 1–2 tablespoons chili garlic sauce
- 2 tablespoons soy sauce
- 1 tablespoon honey or brown sugar
- 2 tablespoons water
- 1 tablespoon fresh lime juice for the sauce
- 1 teaspoon rice vinegar
Instructions
- Pat the fish dry. Make three or four shallow diagonal cuts on each side.
- Rub the fish with 1 tablespoon oil, salt, pepper, and 1 tablespoon lime juice. Rest for 10 minutes.
- Heat 2 tablespoons oil in a small saucepan over medium-low heat. Cook the garlic and ginger for 30–60 seconds until fragrant.
- Add chili garlic sauce, soy sauce, honey, water, and rice vinegar. Simmer gently for 1–2 minutes, then remove from the heat and stir in the remaining sauce lime juice.
- Preheat the grill to medium-high, approximately 400°F. Grill the fish for about 6–9 minutes per side, depending on thickness.
- Brush the fish with some of the sauce during the final few minutes. Continue cooking until the thickest part reaches 145°F.
- Transfer to a serving platter, spoon over the reserved clean sauce, and garnish with green onions.
- Serve immediately with steamed rice or your preferred side dishes.
Recipe Notes
- Cooking times vary by fish species, thickness, and grill performance.
- For an oven alternative, roast at 425°F for approximately 18–25 minutes, checking the internal temperature.
- Adjust the chili garlic sauce to control the heat.
- Keep sauce intended for serving separate from sauce or utensils that contact raw fish.
- Refrigerate leftovers within two hours and use within 3–4 days.
Nutrition information: Not calculated. Values will depend on the fish species, edible portion, sauce ingredients, and serving size.
-
Garlic Herb Roasted Chicken Crispy Skin and Juicy Meat
Garlic Herb Roasted Chicken Crispy Skin and Juicy Meat
Garlic herb roasted chicken is a comforting dinner made with tender chicken, golden-brown skin, roasted garlic, and fragrant rosemary. The chicken cooks in a savory mixture of olive oil, butter, herbs, and pan juices, creating a simple but satisfying meal that looks beautiful straight from the oven.
This recipe uses bone-in, skin-on chicken leg quarters, which include the thigh and drumstick. These cuts are well suited to roasting because the bone-in meat stays flavorful, while the skin can develop a beautifully browned surface. A cast iron skillet is a convenient option, although an oven-safe roasting pan works just as well.
The preparation is straightforward: season the chicken, arrange it with garlic and herbs, and let the oven do most of the work. Serve it with roasted vegetables, mashed potatoes, or a fresh salad for an easy family dinner.
Why You’ll Love This Garlic Herb Roasted Chicken
- Simple ingredients: Chicken, garlic, rosemary, olive oil, butter, and everyday seasonings provide plenty of flavor without a complicated marinade.
- Golden, flavorful skin: Patting the chicken dry and roasting it uncovered helps the skin brown instead of trapping excess moisture.
- Juicy dark meat: Bone-in chicken leg quarters are flavorful cuts that work particularly well for oven roasting.
- One-pan convenience: An oven-safe skillet or roasting pan keeps the chicken, garlic, and flavorful juices together.
- Easy to customize: Adjust the herbs and seasonings to suit your preferences or use what you already have in your kitchen.
Ingredients You’ll Need
Each ingredient contributes to the flavor or texture of the finished chicken. Fresh rosemary gives the dish a woodsy aroma, while garlic softens and caramelizes during roasting.
Chicken
Use four bone-in, skin-on chicken leg quarters, approximately 3 to 4 pounds in total. Each leg quarter includes a thigh and drumstick. Choose pieces of reasonably similar size so they cook at a similar rate.
Olive Oil and Butter
Olive oil helps distribute the seasonings and encourages browning. A small amount of unsalted butter adds richness to the pan juices. The butter is optional if you prefer to use olive oil alone.
Garlic and Fresh Herbs
Whole garlic cloves roast alongside the chicken and become softer and milder in flavor. Fresh rosemary and thyme add an aromatic herbal note. If fresh herbs are unavailable, dried herbs can be used in smaller quantities.
Seasonings
Kosher salt, freshly ground black pepper, and paprika create a savory seasoning mixture. Paprika adds color and a subtle peppery flavor without overpowering the garlic and herbs.
Ingredients
- 4 bone-in, skin-on chicken leg quarters, about 3 to 4 pounds total
- 2 tablespoons olive oil
- 1 tablespoon unsalted butter, melted (optional)
- 8 to 10 garlic cloves, peeled and lightly crushed
- 2 teaspoons fresh rosemary leaves, finely chopped
- 1 teaspoon fresh thyme leaves, or 1/2 teaspoon dried thyme
- 1 teaspoon paprika
- 1 1/2 teaspoons kosher salt, or to taste
- 1 teaspoon freshly ground black pepper
- 1 tablespoon fresh lemon juice (optional)
- 2 small rosemary sprigs, for the roasting pan
Equipment
- A large cast iron skillet or oven-safe roasting pan
- Paper towels for drying the chicken
- A small bowl for mixing the seasonings
- Tongs or a spatula for handling the chicken
- An instant-read food thermometer
A 12-inch cast iron skillet may fit two large leg quarters comfortably, but four pieces may require a larger roasting pan. Avoid overcrowding the chicken. If the pieces touch too closely, moisture can collect between them and interfere with browning.
How to Make Garlic Herb Roasted Chicken
Step 1: Preheat the Oven
Preheat the oven to 425°F. Position a rack in the middle of the oven so the chicken receives relatively even heat.
Choose a roasting pan large enough to hold the chicken in a single layer. If using cast iron, make sure the skillet is oven-safe and large enough for the pieces without excessive crowding.
Step 2: Dry and Prepare the Chicken
Pat the chicken leg quarters thoroughly dry with paper towels, paying particular attention to the skin. Removing surface moisture helps the skin brown during roasting.
There is no need to rinse raw chicken. Doing so can spread bacteria around the sink and nearby surfaces. Keep the chicken separate from ready-to-eat foods, and wash your hands and utensils after handling it.
Step 3: Mix the Garlic Herb Seasoning
In a small bowl, combine the olive oil, melted butter if using, chopped rosemary, thyme, paprika, kosher salt, and black pepper.
Stir until the seasonings are evenly distributed. Rub the mixture over the chicken, including the sides of each piece. Concentrate most of the oil and seasoning on the skin, and avoid leaving thick clumps of chopped garlic on the exposed surface because they can burn.
Step 4: Arrange the Chicken and Garlic
Place the chicken skin-side up in the skillet or roasting pan. Scatter the peeled garlic cloves around the chicken, then tuck the rosemary sprigs into the open spaces.
Arrange the pieces in a single layer with a little room between them. Keep the garlic mostly in the pan rather than directly on top of the chicken skin. This allows the cloves to soften and brown in the drippings without burning as easily.
Step 5: Roast Until Golden
Transfer the pan to the preheated oven and roast uncovered for approximately 40 to 50 minutes. Cooking time depends on the size of the chicken pieces, the starting temperature, and how accurately the oven maintains its temperature.
Check the chicken toward the end of the estimated cooking time. The skin should be golden brown, and the juices in the pan should be bubbling. If the garlic begins to darken too quickly, move the cloves toward the center of the pan or spoon a little pan juice over them.
Do not rely on skin color alone to determine whether the chicken is safe to eat. Insert an instant-read thermometer into the thickest part of the meat without touching the bone. Chicken must reach at least 165°F for food safety.
Step 6: Rest and Serve
Remove the pan from the oven when the chicken has reached the safe internal temperature. Let the chicken rest for about 5 to 10 minutes before serving.
If desired, add a little fresh lemon juice to the pan juices and spoon them over the chicken. The roasted garlic can be served alongside the meat, while the remaining juices make a flavorful accompaniment for potatoes, rice, or vegetables.
Tips for Crispy Skin and Juicy Chicken
Start With Dry Skin
Surface moisture slows browning. Patting the chicken dry is one of the simplest ways to help the skin develop a more appealing roasted texture. For extra preparation time, refrigerate the seasoned chicken uncovered for several hours, provided it remains safely refrigerated.
Leave the Pan Uncovered
Roasting uncovered allows moisture to escape. Covering the pan for the entire cooking time traps steam and can leave the skin softer rather than crisp.
Give Each Piece Enough Space
Use a sufficiently large roasting pan so the chicken is not packed tightly together. If necessary, divide the pieces between two pans. Crowding can cause the chicken to steam in its own moisture instead of browning evenly.
Use a Thermometer
An instant-read thermometer is more reliable than judging doneness by appearance. Check the thickest portion of each large piece without touching the bone. The minimum safe internal temperature for chicken is 165°F.
Watch the Garlic
Garlic cloves can brown faster than the chicken, especially when exposed directly to hot metal. Nestle them around the meat and turn them if one side becomes too dark. Golden or lightly browned garlic is preferable to heavily charred garlic, which can taste bitter.
Common Mistakes to Avoid
- Skipping the drying step: Wet skin can make it harder to achieve good browning.
- Overcrowding the pan: Too many pieces in a small skillet can trap moisture and produce uneven results.
- Using only appearance to judge doneness: Brown skin does not guarantee that the center has reached a safe temperature.
- Adding chopped garlic too early on top of the skin: Small garlic pieces may burn before the chicken finishes cooking.
- Cutting the chicken immediately: A short resting period helps keep the meat more enjoyable to eat and gives the juices time to settle.
- Using an unsuitable pan: Make sure the pan is oven-safe, large enough, and appropriate for the cooking temperature.
Easy Variations
Lemon Garlic Herb Chicken
Add a little lemon zest to the seasoning mixture and finish the cooked chicken with fresh lemon juice. The citrus balances the richness of the roasted skin and pan juices.
Garlic Butter Chicken
Use the optional tablespoon of melted butter with the olive oil. For a richer finish, spoon a small amount of the pan juices over the chicken just before serving.
Smoky Paprika Chicken
Replace the regular paprika with smoked paprika for a deeper, smoky flavor. Keep the amount moderate so the spice does not overwhelm the rosemary and garlic.
Chicken With Extra Herbs
Try a small amount of fresh oregano or sage alongside the rosemary and thyme. Add herbs gradually, since stronger varieties can dominate the flavor when used in large quantities.
What to Serve With Garlic Herb Roasted Chicken
This roasted chicken pairs well with sides that complement its savory flavor and absorb the pan juices.
- Roasted potatoes: Toss potato wedges with olive oil, salt, and pepper, and roast them separately until tender and browned.
- Mashed potatoes: Their creamy texture works well with the garlic-infused pan juices.
- Roasted carrots: Carrots provide a naturally sweet contrast to the savory herbs.
- Green beans: Quickly sautéed or steamed green beans add freshness and color to the plate.
- Simple green salad: A lightly dressed salad balances the richness of the chicken.
- Rice or crusty bread: Both are useful for serving alongside the flavorful juices.
How to Store Leftover Roasted Chicken
Allow leftovers to cool slightly, then refrigerate them promptly in shallow, airtight containers. Do not leave cooked chicken at room temperature for more than two hours, or more than one hour when the surrounding temperature exceeds 90°F.
Refrigerate leftovers at 40°F or below and use them within 3 to 4 days. For longer storage, freeze the chicken in freezer-safe containers or bags, ideally in individual portions. Properly frozen leftovers can maintain good quality for several months.
How to Reheat Roasted Chicken
For the best balance of moist meat and browned skin, place the chicken in an oven-safe dish and reheat it in a 350°F oven until the center reaches 165°F. Cover loosely with foil if the meat is drying before it is heated through, then uncover near the end if you want to restore some surface crispness.
A microwave is convenient for individual portions, but it may soften the skin. Arrange the chicken in a microwave-safe dish, cover it loosely, and heat it until thoroughly hot, checking the temperature before serving.
Frequently Asked Questions
Can I use chicken thighs instead of leg quarters?
Yes. Bone-in, skin-on chicken thighs work well with the same garlic and herb seasoning. Smaller pieces may finish cooking sooner, so begin checking their internal temperature earlier. Boneless thighs also work, but their cooking time will be different.
Can I use dried rosemary instead of fresh rosemary?
Yes. Dried rosemary can replace fresh rosemary, although its flavor is more concentrated and its texture is different. Start with about 1/2 to 1 teaspoon of dried rosemary for this recipe, adjusting to taste.
Should I cover the chicken while roasting?
For more browned skin, roast the chicken uncovered. If the surface becomes too dark before the center reaches 165°F, loosely tent the pan with foil for the remainder of the cooking time.
Can I prepare the chicken ahead of time?
Yes. You can season the chicken and keep it covered in the refrigerator for several hours before cooking. For food safety, marinate raw chicken in the refrigerator rather than on the counter. Pat away any excess surface moisture before roasting.
Can I make this recipe without a cast iron skillet?
Absolutely. A metal roasting pan or another oven-safe baking dish is suitable. A cast iron skillet retains heat well, but it is not essential to making flavorful roasted chicken.
How do I know when the chicken is done?
Use a food thermometer to check the thickest portion of the meat without touching the bone. Chicken should reach a minimum internal temperature of 165°F. If the pieces vary in size, check each one separately.
Final Thoughts
Garlic herb roasted chicken is a practical way to turn a handful of everyday ingredients into a flavorful, satisfying meal. The combination of roasted garlic, rosemary, black pepper, and golden chicken skin gives the dish plenty of character without requiring a complicated cooking process.
For the best results, dry the chicken thoroughly, avoid overcrowding the pan, keep an eye on the garlic, and use a thermometer to confirm doneness. Serve it fresh from the oven with your favorite vegetables or potatoes, and save any leftovers for another easy meal.
Garlic Herb Roasted Chicken Recipe Card
Garlic Herb Roasted Chicken
Golden-brown chicken leg quarters roasted with garlic, rosemary, thyme, paprika, and savory pan juices.
Prep Time: 15 minutes
Cook Time: 40–50 minutes
Resting Time: 5–10 minutes
Total Time: Approximately 1 hour to 1 hour 15 minutes
Yield: 4 servings
Cooking Temperature: 425°F
Ingredients
- 4 bone-in, skin-on chicken leg quarters, about 3–4 pounds total
- 2 tablespoons olive oil
- 1 tablespoon melted unsalted butter (optional)
- 8–10 garlic cloves, peeled and lightly crushed
- 2 teaspoons chopped fresh rosemary
- 1 teaspoon fresh thyme leaves, or 1/2 teaspoon dried thyme
- 1 teaspoon paprika
- 1 1/2 teaspoons kosher salt, or to taste
- 1 teaspoon freshly ground black pepper
- 1 tablespoon fresh lemon juice (optional)
- 2 small rosemary sprigs
Instructions
- Preheat the oven to 425°F and prepare a large oven-safe skillet or roasting pan.
- Pat the chicken dry with paper towels. Do not rinse raw chicken.
- Mix the olive oil, optional melted butter, chopped rosemary, thyme, paprika, salt, and black pepper in a small bowl.
- Rub the seasoning mixture over the chicken, concentrating on the skin.
- Arrange the chicken skin-side up in the pan. Add the garlic cloves and rosemary sprigs around the meat.
- Roast uncovered for approximately 40–50 minutes, depending on the size of the pieces.
- Check the thickest part of each piece with an instant-read thermometer. The chicken must reach at least 165°F.
- Rest for 5–10 minutes. Add optional lemon juice to the pan juices and serve.
Recipe Notes
- Use a larger pan or two pans if necessary to avoid overcrowding.
- Move the garlic away from excessively hot spots if it browns too quickly.
- Cooking times are estimates. Use internal temperature to determine when the chicken is safe to eat.
- Refrigerate leftovers within two hours and use within 3–4 days.
Estimated Nutrition Per Serving: Not calculated. Actual nutrition depends on the size of the chicken portions, how much skin is eaten, and how much oil and pan juice is consumed.
-
Easy Chinese BBQ Char Siu Pork Recipe with Sticky Glaze

Easy Chinese BBQ Char Siu Pork Recipe with Sticky Glaze
This Easy Chinese BBQ Char Siu Pork Recipe brings sweet-savory flavor, a glossy glaze, and caramelized edges to your home kitchen. Boneless pork shoulder is coated in a flavorful marinade made with hoisin sauce, soy sauce, honey, garlic, and Chinese five-spice powder, then roasted until browned and tender.
Serve the sliced pork over steamed rice, add it to noodle bowls, or pair it with stir-fried vegetables for a satisfying dinner. This oven-roasted version makes Chinese-inspired barbecue pork accessible without a specialized barbecue oven.
What Is Char Siu Pork?
Char siu is a Cantonese-style barbecue pork traditionally known for its sweet-savory seasoning and distinctive reddish glaze. It is commonly sliced and served with rice or noodles and can also be used as a filling for steamed buns.
This homemade version uses an oven and an accessible marinade. Hoisin sauce adds savory sweetness, soy sauce contributes umami, honey helps the surface caramelize, and Chinese five-spice powder provides a warm, aromatic flavor.
The result is a Chinese BBQ-inspired pork dish with a rich coating and a flavorful roasted exterior. The recipe is designed for home cooking rather than claiming to reproduce every traditional preparation method.
Why You’ll Love This Recipe
- Sweet and savory flavor: Hoisin sauce, soy sauce, honey, garlic, and five-spice powder create a balanced marinade.
- A glossy finish: A final coating of glaze adds shine and helps the exterior caramelize.
- Oven-friendly cooking: No outdoor grill or specialized barbecue equipment is required.
- Flexible serving options: Enjoy the pork with rice, noodles, vegetables, or in homemade rice bowls.
- Make-ahead preparation: Marinate the pork in advance to make dinner preparation easier.
Ingredients for Chinese BBQ Char Siu Pork
For the Pork
- 2 pounds (900 g) boneless pork shoulder: Cut into long strips approximately 1 1/2 to 2 inches thick. Pork shoulder has enough fat to provide rich flavor and help keep the meat moist.
For the Marinade
- 1/4 cup hoisin sauce: Creates the sweet-savory foundation of the marinade.
- 3 tablespoons regular soy sauce: Adds saltiness and umami.
- 2 tablespoons honey: Contributes sweetness and helps the exterior caramelize.
- 2 tablespoons Shaoxing cooking wine: Adds depth of flavor. Dry sherry can be used as an alternative.
- 1 tablespoon oyster sauce: Adds savory richness. Check the label if shellfish is a concern.
- 2 cloves garlic, minced: Provides aromatic flavor.
- 1 teaspoon freshly grated ginger: Adds a fresh, slightly spicy note.
- 1 teaspoon Chinese five-spice powder: Provides warm, aromatic seasoning.
- 1/4 teaspoon ground white pepper: Adds mild peppery warmth.
For the Finishing Glaze
- 1 tablespoon honey: Helps create a shiny finish.
- 1 tablespoon reserved marinade: Set aside before adding the raw pork.
Food safety note: Reserve the marinade in a clean container before it touches raw meat. Never use marinade contaminated by raw pork as a finishing sauce unless it has been thoroughly cooked.
Equipment You’ll Need
- A mixing bowl and whisk or spoon.
- A food-safe container or zip-top bag for marinating.
- A rimmed baking sheet lined with aluminum foil.
- A wire rack, if available, to improve airflow around the pork.
- A pastry brush for the finishing glaze.
- An instant-read meat thermometer.
- A sharp knife and cutting board.
A wire rack helps hot air circulate around the meat, while the baking sheet catches drippings. If you do not have a rack, arrange the pork on a foil-lined baking sheet and turn it as needed.
How to Make Chinese BBQ Char Siu Pork
Step 1: Mix the Marinade
In a bowl, whisk together the hoisin sauce, soy sauce, honey, Shaoxing cooking wine, oyster sauce, garlic, ginger, five-spice powder, and white pepper.
Before adding the pork, transfer 1 tablespoon of the marinade into a separate clean container. Cover and refrigerate it for the finishing glaze.
Step 2: Marinate the Pork
Place the pork strips in a food-safe container or zip-top bag. Pour the remaining marinade over the meat and turn the pieces until they are coated on all sides.
Cover and refrigerate for at least 4 hours, preferably overnight. Turn the pieces once during marinating if convenient to distribute the seasoning evenly.
Keep raw pork refrigerated throughout marinating. Do not leave it at room temperature to speed up the process.
Step 3: Preheat the Oven
Preheat the oven to 400°F (200°C). Line a rimmed baking sheet with foil and place a lightly oiled wire rack on top if available.
Remove the pork from the marinade and allow excess liquid to drip off. Discard the marinade that has contacted the raw meat. Arrange the pork strips in a single layer, leaving space between them.
Step 4: Roast the Pork
Roast for approximately 25 to 40 minutes, turning the pieces halfway through. Cooking time depends on the thickness of the strips, the cut of pork, and your oven.
Begin checking the internal temperature early with an instant-read thermometer inserted into the thickest part of the meat.
Whole cuts of pork should reach at least 145°F (63°C), followed by a minimum 3-minute rest, for food safety. Pork shoulder may need additional cooking to reach your preferred tenderness. Temperature, cooking time, and cut all influence the final texture.
Do not rely on the color of the meat or the glaze alone to determine whether the pork is safely cooked.
Step 5: Brush on the Sticky Glaze
Combine the clean reserved tablespoon of marinade with the additional tablespoon of honey. Brush a thin layer over the pork during the final 5 to 10 minutes of roasting, once the meat is nearly cooked.
The sugars in honey and hoisin sauce can darken quickly. Watch the pork closely and lower the oven temperature slightly if the exterior is browning too fast.
Heat the finishing glaze thoroughly before serving. Never brush cooked pork with sauce that has been contaminated by raw meat.
Step 6: Rest and Slice
Transfer the pork to a clean cutting board and let it rest for at least 3 minutes. Slice across the grain into pieces of your preferred thickness.
Arrange the slices on a serving platter and spoon over any clean, cooked glaze. The finished pork should have a caramelized exterior and a flavorful coating with a moist interior.
Tips for Better Char Siu Pork
Choose the Right Cut
Boneless pork shoulder works well because it has rich flavor and some fat. Pork tenderloin is a leaner alternative, but it cooks more quickly and can dry out if overcooked. Adjust the cooking time for the cut you choose.
Allow Enough Marinating Time
At least 4 hours gives the seasoning time to coat the meat thoroughly. An overnight marinade is convenient for meal preparation, but longer marinating does not automatically guarantee a more tender result.
Apply the Glaze Near the End
Honey and hoisin sauce contain sugars that can burn. Applying the finishing glaze near the end of cooking helps the pork develop a glossy exterior without excessive scorching.
Use a Meat Thermometer
A thermometer provides a more reliable doneness check than color or cooking time alone. Insert it into the thickest part of each large piece without touching the baking sheet or rack.
Avoid Crowding the Pan
Leave space between the pork strips so hot air can circulate. Crowded meat releases moisture and may steam instead of developing the desired roasted exterior.
Common Mistakes to Avoid
- Glazing too early: Sugary sauce can burn before the pork is fully cooked.
- Skipping refrigeration: Raw pork must remain refrigerated while marinating.
- Guessing doneness: Different cuts and thicknesses cook at different rates.
- Slicing immediately: A short rest makes the pork easier to carve and helps retain moisture.
- Reusing contaminated marinade: Keep a clean portion separate for finishing or thoroughly cook any marinade that contacted raw meat.
Easy Recipe Variations
Make It Less Sweet
Reduce the honey in the marinade to 1 tablespoon if you prefer a less sweet flavor. The resulting glaze will have a slightly different texture and degree of caramelization.
Add a Little Heat
Add a small pinch of chili flakes or a little chili paste for a spicy-sweet variation. Start with a small amount and adjust to taste.
Use Pork Tenderloin
Pork tenderloin offers a leaner alternative to pork shoulder. Because it is smaller and cooks more quickly, check its temperature early and avoid extending the cooking time unnecessarily.
Make a Gluten-Free Version
Use certified gluten-free soy sauce or tamari and check that the hoisin sauce and oyster sauce are also gluten-free. Always read the product labels because formulations differ.
What to Serve with Char Siu Pork
- Steamed jasmine rice: A simple base that absorbs the flavorful sauce.
- Stir-fried vegetables: Broccoli, bok choy, green beans, or snow peas add freshness.
- Noodle bowls: Serve sliced pork over noodles with vegetables and a light sauce.
- Rice bowls: Add cucumber, scallions, and steamed vegetables for a balanced meal.
- Steamed buns: Use thin pork slices as a filling with crunchy vegetables and an appropriate sauce.
How to Store and Reheat Leftovers
Refrigeration
Place leftover pork in a clean, airtight food storage container. Refrigerate within 2 hours of cooking, or within 1 hour if the surrounding temperature exceeds 90°F (32°C). Properly refrigerated cooked pork should generally be used within 3 to 4 days.
Freezing
Freeze the pork in an airtight, freezer-safe container or bag. For best quality, use it within 2 to 3 months. Label the container with the date and thaw the pork in the refrigerator rather than at room temperature.
Reheating
Place the pork in an oven-safe dish with a small splash of water or broth. Cover and heat at 325°F (163°C) until hot throughout. Add a little clean glaze if desired.
You can also use a microwave. Cover the dish loosely, heat in short intervals, and turn the slices for more even warming. Reheat leftovers to 165°F (74°C).
Frequently Asked Questions
Can I make char siu pork without a grill?
Yes. This recipe uses a conventional oven and baking sheet. A wire rack is helpful but not essential.
What gives char siu pork its red color?
Traditional recipes may use red fermented bean curd or other coloring ingredients. This version relies on its sauce ingredients and roasting to develop a reddish-brown glaze rather than requiring artificial food coloring.
Can I prepare the marinade ahead of time?
Yes. Mix the marinade and refrigerate it in a clean, covered container. Keep the portion reserved for finishing separate from the marinade used with raw pork.
Why did my glaze become too dark?
The sugars in honey and hoisin sauce can brown or burn quickly. Apply the finishing glaze near the end of roasting, watch the pork closely, and reduce the oven temperature if necessary.
Can I use pork tenderloin instead of pork shoulder?
Yes, but tenderloin is leaner and requires less cooking time. Monitor the internal temperature carefully to avoid drying out the meat.
Is char siu pork good for meal prep?
Yes. Portion the cooked pork with rice and vegetables in separate airtight containers. Refrigerate promptly and use within 3 to 4 days, or freeze portions for longer storage.
Enjoy Homemade Chinese BBQ Pork
This Easy Chinese BBQ Char Siu Pork Recipe offers a practical way to bring sweet-savory barbecue flavors to your dinner table. With a flavorful marinade, careful roasting, and a finishing layer of sticky glaze, you can make a satisfying Chinese-inspired meal without specialized equipment.
Serve the sliced pork with rice, noodles, or vegetables, and save any leftovers for another meal. Save this recipe for your next dinner and explore more recipe inspiration on the site.
Easy Chinese BBQ Char Siu Pork Recipe
A Chinese BBQ-inspired pork recipe featuring a hoisin, soy, honey, and five-spice marinade with a glossy finishing glaze.
Prep Time: 15 minutes
Marinating Time: 4 hours to overnight
Cook Time: 25–40 minutes
Total Time: Approximately 4 hours 50 minutes, excluding longer marinating
Servings: 6Ingredients
- 2 pounds (900 g) boneless pork shoulder, cut into long strips
- 1/4 cup hoisin sauce
- 3 tablespoons soy sauce
- 2 tablespoons honey, plus 1 tablespoon for the finishing glaze
- 2 tablespoons Shaoxing cooking wine
- 1 tablespoon oyster sauce
- 2 cloves garlic, minced
- 1 teaspoon grated fresh ginger
- 1 teaspoon Chinese five-spice powder
- 1/4 teaspoon ground white pepper
- 1 tablespoon marinade reserved before adding the pork
Instructions
- Whisk the hoisin sauce, soy sauce, 2 tablespoons honey, cooking wine, oyster sauce, garlic, ginger, five-spice powder, and white pepper together.
- Reserve 1 tablespoon of the marinade in a clean container before adding the pork. Cover and refrigerate.
- Coat the pork in the remaining marinade, cover, and refrigerate for at least 4 hours or overnight.
- Preheat the oven to 400°F (200°C). Line a rimmed baking sheet with foil and add a lightly oiled wire rack if available.
- Remove excess marinade from the pork and discard the marinade that contacted the raw meat. Arrange the strips in a single layer.
- Roast for approximately 25–40 minutes, turning halfway through. Check the thickest portions with a meat thermometer and adjust cooking time as necessary.
- Mix the clean reserved marinade with the remaining tablespoon of honey. Brush onto the pork near the end of cooking, heating the glaze thoroughly while watching to prevent burning.
- Cook the pork to a safe internal temperature. Whole cuts should reach at least 145°F (63°C), followed by a 3-minute rest. Additional cooking may be necessary to achieve the desired pork shoulder tenderness.
- Rest the cooked pork, slice across the grain, and serve warm with rice, noodles, or vegetables.
Recipe Notes
- Cooking time varies with the thickness of the pork strips and the oven.
- A wire rack promotes airflow and browning.
- Keep raw pork refrigerated while marinating and prevent cross-contamination.
- Refrigerate leftovers promptly and use within 3–4 days.
-
Recipe Garlic Herb Dutch Oven Bread, Crispy Crust and Soft, Fluffy Center
Garlic Herb Dutch Oven Bread – Crispy Crust and Soft, Fluffy Center
Homemade Garlic Herb Dutch Oven Bread has a golden, crispy crust, a soft and airy center, and plenty of savory garlic and fresh herb flavor. Baked in a preheated Dutch oven, this rustic round loaf develops a beautifully browned exterior while the inside stays tender and moist.
A simple garlic butter topping adds even more flavor without overpowering the bread itself. Serve it alongside soup, pasta, roasted vegetables, or a family dinner, or enjoy a warm slice on its own.
This recipe uses a straightforward yeast dough and does not require extensive kneading. Allow enough time for the dough to rise, then let the Dutch oven do the work of creating a crusty, artisan-style loaf in your own kitchen.
Why You’ll Love This Garlic Herb Bread
- Crispy, golden crust: A hot Dutch oven helps the loaf develop a deeply browned exterior.
- Soft, airy center: The moist dough creates an open, tender crumb when properly proofed and baked.
- Fresh garlic flavor: Garlic butter and herbs add savory flavor to the crust.
- Simple ingredients: Flour, water, yeast, salt, and a few flavorings form the foundation of this homemade bread.
- Versatile serving options: This rustic loaf works well with soups, pasta, salads, and roasted meals.
What Is Garlic Herb Dutch Oven Bread?
Dutch oven bread is baked in a heavy, covered pot that retains heat and traps moisture released by the dough. This creates a favorable environment for the loaf to expand before its crust becomes firm.
For this garlic herb version, the bread is baked until the crust is golden brown, then brushed with garlic butter and fresh herbs. The result is rustic bread with a savory finish and a tender interior.
Ingredients You’ll Need
For the Bread Dough
- 4 cups (500 g) bread flour: Bread flour provides a strong gluten structure and a pleasantly chewy crumb. All-purpose flour can also work, although the texture may be slightly different.
- 1 1/2 cups (360 g) warm water: Water hydrates the flour and helps the dough develop its airy texture. Use warm, not hot, water.
- 2 1/4 teaspoons (7 g) active dry yeast: Yeast helps the dough rise and gives the bread its characteristic texture.
- 1 1/2 teaspoons fine salt: Salt balances the flavor and supports proper dough development.
- 1 tablespoon olive oil: Adds a little richness and helps keep the crumb tender.
For the Garlic Herb Butter
- 3 tablespoons unsalted butter (42 g): Melted butter helps the herbs adhere to the crust and adds a rich finish.
- 3 garlic cloves, finely minced: Fresh garlic gives the topping its distinctive savory flavor.
- 2 tablespoons finely chopped fresh parsley: Adds fresh herbal flavor and natural green color.
- 1 teaspoon fresh thyme leaves: Adds a subtle earthy note. Use about 1/3 teaspoon dried thyme if fresh thyme is unavailable.
- 1 small pinch of black pepper: Optional, for a little extra flavor.
Equipment for the Best Results
- A 5- to 6-quart oven-safe Dutch oven with a lid
- A large mixing bowl
- A sturdy spoon or dough scraper
- Parchment paper rated for the baking temperature
- A kitchen scale or measuring cups and spoons
- A wire cooling rack
A Dutch oven is particularly useful because its heavy walls retain heat. A 5- to 6-quart pot gives a single round loaf room to expand. Always check the manufacturer’s temperature limits for the pot, lid, and handles before preheating.
How to Make Garlic Herb Dutch Oven Bread
Step 1: Mix the Dough
In a large bowl, combine the warm water and yeast. If using active dry yeast, allow the mixture to stand for about 5 to 10 minutes, following the yeast package instructions.
Add the bread flour, salt, and olive oil. Stir until the flour is hydrated and a rough, sticky dough forms. The dough should look moist and slightly shaggy rather than dry and firm.
Step 2: Let the Dough Rise
Cover the bowl with a lid, clean kitchen towel, or plastic wrap. Leave the dough in a comfortably warm place for approximately 60 to 90 minutes, or until it has noticeably expanded and looks airy.
Rising time depends on room temperature and yeast activity. A cooler kitchen may require additional time, so use the appearance of the dough rather than the clock alone.
Step 3: Shape the Loaf
Lightly flour a work surface and turn out the dough. With lightly floured hands, gently fold the edges toward the center to create a rounded loaf. Turn the dough seam-side down and carefully tighten its surface without pressing out all the air.
Place the loaf on parchment paper and cover loosely. Let it rest for about 20 to 30 minutes while you prepare the oven.
Step 4: Preheat the Dutch Oven
Place the empty Dutch oven and its lid in the oven. Preheat to 450°F (232°C) for approximately 30 minutes, or according to the cookware manufacturer’s instructions.
Use oven mitts when handling the hot pot. Keep the parchment suitable for the baking temperature and away from exposed heating elements.
Step 5: Bake the Bread
Carefully remove the hot Dutch oven. Using the parchment as a sling, lower the dough into the pot. Keep your hands clear of the hot sides and place the lid on securely.
Bake covered for 30 minutes. Remove the lid and continue baking for another 12 to 18 minutes, until the crust is deeply golden brown and the loaf is cooked through.
If you use an instant-read thermometer, the center of a lean loaf is generally around 200–210°F (93–99°C) when fully baked. Color and internal temperature are useful checks, especially if your oven runs hot or cool.
Step 6: Make the Garlic Herb Butter
While the bread finishes baking, melt the butter in a small saucepan over low heat or in a microwave-safe bowl. Stir in the minced garlic, parsley, thyme, and optional black pepper.
For a milder garlic flavor, warm the minced garlic gently in the butter for about 30 to 60 seconds. Avoid browning or burning the garlic, which can make the topping taste bitter.
Step 7: Brush and Cool
Remove the bread from the Dutch oven and transfer it to a wire rack. Brush the warm crust with the garlic herb butter, distributing the herbs naturally over the surface.
Let the loaf cool for at least 20 to 30 minutes before slicing. Cutting too early can compress the soft interior and release excess moisture before the crumb has finished setting.
Tips for a Crispy Crust and Fluffy Center
- Measure the flour carefully. Weighing flour is more consistent than scooping it directly into a measuring cup. Too much flour can make the loaf dense.
- Give the dough enough time to rise. Underproofed dough may produce a tight crumb and limited oven spring.
- Preheat the Dutch oven. A properly heated pot helps the dough expand and encourages a crisp crust.
- Avoid adding too much flour during shaping. The dough should remain slightly tacky. Excess flour can make the bread dry.
- Remove the lid for the final bake. This allows moisture to escape and the crust to brown.
- Let the bread cool before cutting. Cooling helps the interior finish setting and makes cleaner slices.
Common Mistakes to Avoid
Using Water That Is Too Hot
Excessively hot water can damage the yeast. Use comfortably warm water and follow the temperature guidance on your yeast package.
Adding Too Much Flour
A stiff, dry dough is harder to develop into a light loaf. Measure flour accurately and resist the temptation to keep adding flour simply because the dough feels sticky.
Skipping the Covered Baking Stage
The lid helps retain moisture during the early part of baking. Baking uncovered for the entire time may result in a crust that sets before the loaf has fully expanded.
Burning the Garlic
Fresh garlic can become bitter when exposed to excessive heat. Prepare the garlic butter separately and brush it onto the bread after baking for a more controlled flavor.
Easy Variations
Rosemary Garlic Bread
Replace the thyme with finely chopped fresh rosemary. Rosemary has a stronger flavor, so start with a small amount and adjust to taste.
Parmesan Garlic Herb Bread
Sprinkle a small amount of finely grated Parmesan over the loaf during the final few minutes of baking. Watch closely because cheese can brown quickly.
Extra Garlic Butter Bread
Reserve a little garlic herb butter for serving. Spread it over individual warm slices just before eating.
Dried Herb Version
If fresh herbs are unavailable, use small amounts of dried parsley and thyme. Dried herbs are more concentrated, so start with less and adjust according to your preference.
What to Serve with Garlic Herb Bread
- Tomato soup: A warm slice is ideal for dipping into a bowl of tomato soup.
- Pasta dishes: Serve alongside spaghetti, baked pasta, or a creamy mushroom pasta.
- Roasted vegetables: The savory bread complements roasted carrots, broccoli, and seasonal vegetables.
- Salads: Pair it with a fresh green salad for a simple lunch.
- Family dinners: Place the loaf in the center of the table as a shareable side dish.
How to Store Homemade Garlic Herb Bread
Allow the loaf to cool completely before storing it. Keep the bread in a bread bag or airtight container at room temperature for about 1 to 2 days for the best texture. Garlic butter can soften the crust over time, which is normal.
For longer storage, slice the cooled bread, wrap it well, and freeze it for up to 2 months for best quality. Separate slices with parchment if you want to remove only what you need.
How to Reheat
For a whole or large piece of bread, warm it in a 325°F (163°C) oven until heated through. For individual slices, use a toaster oven or skillet. If the bread seems dry, add a small amount of butter before reheating.
Because the topping contains fresh garlic and butter, refrigerate leftovers that have been generously coated with garlic butter if they will not be eaten within a short period. Refrigeration can firm the crumb, so reheat before serving. Discard bread that shows mold or signs of spoilage.
Frequently Asked Questions
Can I use all-purpose flour instead of bread flour?
Yes. All-purpose flour can produce a good loaf, although the crumb may be slightly less chewy. Add the water gradually if you need to adjust the dough’s consistency.
Do I need to knead Dutch oven bread?
This recipe does not require extensive kneading. Mixing the dough thoroughly and allowing sufficient rising time helps develop its structure. Gentle folding during shaping is usually enough for this method.
Why is my bread dense?
Common causes include too much flour, inactive yeast, insufficient rising time, or cutting the bread before it has cooled. Check the yeast’s freshness and allow the dough to expand visibly before shaping.
Can I prepare the dough ahead of time?
You can experiment with a refrigerated overnight rise, but fermentation will proceed more slowly in the refrigerator. Cover the dough well, allow extra time for it to warm and finish rising when necessary, and check its condition before shaping and baking.
Can I make this bread without a Dutch oven?
Yes, although the crust may be different. Bake the loaf on a preheated heavy baking sheet or baking stone at the same oven temperature, watching closely for doneness. A suitable oven-safe cover can help retain moisture during the initial bake, but never use cookware or covers that are not rated for the temperature.
When should I add the garlic butter?
Brush the garlic herb butter onto the crust after baking. This preserves the fresh herb flavor and reduces the risk of burning the garlic during the longer baking period.
Final Thoughts
This Garlic Herb Dutch Oven Bread combines a rustic, golden crust with a soft interior and savory garlic herb butter. With a few basic ingredients, enough time for the dough to rise, and a properly preheated Dutch oven, you can make a satisfying homemade loaf for everyday meals or special dinners.
Serve it warm, save a few slices for later, and experiment with your favorite herbs to make the recipe your own.
Garlic Herb Dutch Oven Bread Recipe
A rustic homemade bread with a crispy golden crust, soft center, and flavorful garlic herb butter.
Prep Time: 20 minutes
Rise Time: 80–120 minutes, approximately
Cook Time: 42–48 minutes
Rest Time: 20–30 minutes
Total Time: Approximately 3 hours to 3 hours 40 minutes
Yield: 1 round loaf
Servings: 10 slicesIngredients
- 4 cups (500 g) bread flour
- 1 1/2 cups (360 g) warm water
- 2 1/4 teaspoons (7 g) active dry yeast
- 1 1/2 teaspoons fine salt
- 1 tablespoon olive oil
- 3 tablespoons (42 g) unsalted butter
- 3 garlic cloves, finely minced
- 2 tablespoons chopped fresh parsley
- 1 teaspoon fresh thyme leaves
- Black pepper, optional
Instructions
- Combine the warm water and yeast in a large mixing bowl. Let stand for 5–10 minutes if directed by the yeast package.
- Add the bread flour, salt, and olive oil. Mix until a rough, sticky dough forms.
- Cover and let rise for 60–90 minutes, or until visibly expanded and airy.
- Gently shape the dough into a round loaf. Place on parchment, cover loosely, and rest for 20–30 minutes.
- Preheat a covered 5- to 6-quart Dutch oven at 450°F (232°C) for about 30 minutes, following the cookware manufacturer’s instructions.
- Carefully transfer the dough with the parchment into the hot Dutch oven. Cover and bake for 30 minutes.
- Remove the lid and bake for another 12–18 minutes, until golden brown and cooked through.
- Melt the butter and stir in the minced garlic, parsley, thyme, and optional black pepper. Warm gently without browning the garlic.
- Transfer the bread to a wire rack and brush the crust with the garlic herb butter.
- Cool for 20–30 minutes before slicing and serving.
Recipe Notes
- Weighing the flour helps produce a more consistent result.
- Rising times vary with room temperature and yeast activity.
- Use parchment paper and cookware rated for the oven temperature.
- For a milder garlic flavor, warm the garlic gently in the butter before brushing.
- Store cooled bread in a bread bag at room temperature for 1–2 days for best texture. Freeze well-wrapped slices for up to 2 months for best quality.
-
Soft and Fluffy Homemade White Bread Recipe

Soft and Fluffy Homemade White Bread Recipe
There is something special about a freshly baked loaf of homemade white bread. This soft and fluffy homemade white bread recipe makes a tender sandwich loaf with a golden crust and a light, airy interior. It is delicious sliced for breakfast toast, layered into sandwiches, or served warm with a little butter.
You only need a handful of everyday ingredients to make this bread from scratch. The process involves mixing, kneading, letting the dough rise, shaping the loaf, and baking until the crust turns golden brown. Although the dough needs time to rise, most of that time is hands-off.
If you are learning to bake bread at home, this straightforward recipe is a useful place to start. Follow the steps below and pay attention to the dough’s texture and rising time for a soft, evenly baked loaf.
Why You’ll Love This Homemade White Bread
- Soft, tender crumb: Milk, egg, and butter help create a rich, tender texture.
- Golden crust: The loaf develops an appetizing golden-brown exterior as it bakes.
- Everyday ingredients: The recipe uses common baking staples that are easy to find.
- Versatile slices: Enjoy it as toast, sandwiches, or a simple snack with butter and jam.
- Make-ahead friendly: Bake a loaf in advance and freeze portions for later.
Ingredients for Soft and Fluffy White Bread
Each ingredient has a specific role in the dough. Measure the flour carefully, use warm rather than hot milk, and allow the dough enough time to rise.
All-Purpose or Bread Flour
Use 4 cups (480 grams) of flour as the starting amount. Bread flour usually produces a slightly chewier, more structured loaf because of its higher protein content. All-purpose flour can also work and often produces a tender sandwich bread. If measuring by volume, spoon the flour into the measuring cup and level it instead of packing it down.
Warm Milk
One cup (240 milliliters) of warm milk adds moisture and contributes to the bread’s tender texture. Aim for approximately 100–110°F. Milk that is too hot can damage the yeast, so check the temperature before mixing.
Instant Yeast
Use 2 1/4 teaspoons (one standard 1/4-ounce packet) of instant yeast. It helps the dough expand and creates the light interior that makes homemade white bread pleasant to eat.
Sugar
Two tablespoons of granulated sugar add a mild sweetness and help support browning. The finished loaf should still taste like classic white sandwich bread rather than dessert bread.
Egg and Unsalted Butter
One large egg and 3 tablespoons (42 grams) of softened unsalted butter enrich the dough. These ingredients contribute to a soft crumb and a more flavorful loaf. Let the egg come closer to room temperature and soften the butter before mixing.
Salt
Use 1 1/2 teaspoons of salt to balance the flavor. Salt also affects dough strength, so measure it rather than leaving it out.
Equipment You’ll Need
- A large mixing bowl or stand mixer with a dough hook
- Measuring cups and spoons or a kitchen scale
- A clean work surface for kneading
- A standard 9-by-5-inch loaf pan
- A kitchen towel or reusable cover for the dough
- A wire cooling rack
- A kitchen thermometer, if available
A standard 9-by-5-inch loaf pan gives the dough room to expand into a sandwich-style loaf. Pan dimensions can affect the final shape and baking time, so check the loaf as it approaches the end of baking.
How to Make Soft and Fluffy Homemade White Bread
Step 1: Combine the Ingredients
Add the warm milk, instant yeast, and sugar to a large mixing bowl. Stir briefly to combine. Add the egg, softened butter, flour, and salt.
Mix until a rough dough forms and no large patches of dry flour remain. If using a stand mixer, begin on low speed to keep the flour from scattering.
Step 2: Knead Until Smooth
Transfer the dough to a lightly floured work surface and knead for approximately 8–10 minutes. Alternatively, knead it with a stand mixer and dough hook for about 6–8 minutes on low to medium-low speed.
The dough should become smoother, elastic, and slightly tacky. It should not feel excessively wet or crumble apart. Add flour only a tablespoon at a time if the dough is genuinely too sticky to handle; adding too much flour can make the finished bread dense.
Step 3: Let the Dough Rise
Place the dough in a lightly greased bowl and turn it once to coat the surface. Cover the bowl with a clean towel or reusable cover.
Leave the dough in a comfortably warm, draft-free place for about 60–90 minutes, or until it has approximately doubled in size. The exact time depends on the room temperature and yeast activity, so use the dough’s appearance rather than the clock alone.
Step 4: Shape the Loaf
Lightly grease a 9-by-5-inch loaf pan. Gently press the risen dough to release large air pockets, then transfer it to a clean work surface.
Shape the dough into a rectangle. Fold the sides inward if needed, then roll it into a snug log with the seam underneath. Place the shaped dough into the prepared pan.
A reasonably even shape helps the bread rise more uniformly and gives the finished loaf a neat top.
Step 5: Let the Bread Rise Again
Cover the pan loosely and let the dough rise for another 30–60 minutes. It should look puffy and expand noticeably above its original size.
Avoid allowing the dough to rise so much that it collapses or becomes fragile. If your kitchen is warm, begin checking it earlier.
Step 6: Preheat the Oven
Preheat the oven to 350°F. Position a rack near the center so the loaf receives reasonably even heat.
Make sure the oven has reached the correct temperature before baking. An oven thermometer can help if your oven tends to run hotter or cooler than its setting.
Step 7: Bake Until Golden
Bake the loaf for approximately 30–35 minutes, checking near the end of the estimated baking time. The top should be golden brown, and the bread should feel set rather than doughy.
If the top browns too quickly before the center is done, loosely cover it with aluminum foil for the remainder of baking. For a more reliable doneness check, the center of an enriched loaf like this should reach approximately 190°F on an instant-read thermometer.
Step 8: Cool Before Slicing
Remove the pan from the oven and let the bread rest for about 5–10 minutes. Carefully remove the loaf from the pan and place it on a wire rack.
Allow the bread to cool for at least 45–60 minutes before slicing. Cutting into a very hot loaf can compress the soft interior and make the crumb appear gummy. Once cooled, use a serrated bread knife to cut even slices.
Tips for Soft, Fluffy Bread
- Measure flour accurately. Too much flour is a common reason homemade bread turns out dry or heavy.
- Check the milk temperature. Warm milk encourages yeast activity, while excessively hot milk can damage the yeast.
- Knead until the dough is elastic. Proper gluten development helps the loaf hold its shape and rise well.
- Watch the dough, not just the clock. Rising times vary with room temperature and yeast activity.
- Shape the dough evenly. A snug, even log helps the loaf rise consistently in the pan.
- Let the bread cool. Cooling allows the crumb to set and makes cleaner slices possible.
Common Homemade Bread Problems and How to Fix Them
Why Is My White Bread Dense?
Dense bread can result from too much flour, insufficient kneading, inactive yeast, or dough that has not risen enough. Measure ingredients carefully, confirm that the yeast is active, and allow the dough to become visibly puffy before baking.
Why Didn’t My Dough Rise?
The milk may have been too hot, the yeast may be old, or the room may be too cold. Check the yeast’s freshness and give the dough more time in a comfortably warm location. Avoid placing the bowl directly on a hot surface.
Why Is the Crust Too Dark?
Your oven may run hot, or the loaf may be positioned too close to the upper heating element. Check the oven temperature and loosely cover the top with foil if it browns too quickly.
Why Is the Center Gummy?
The bread may be underbaked or sliced before it has cooled. Check the internal temperature near the center and allow the finished loaf to cool on a rack before cutting.
Easy Variations
Honey White Bread
Replace the granulated sugar with 2 tablespoons of honey. The loaf will have a slightly different flavor and may brown more quickly, so keep an eye on the crust during baking.
Whole Wheat White Bread Blend
Replace up to 1 cup of the white flour with whole wheat flour for a slightly heartier loaf. The texture will be denser than the original recipe, and the dough may need a little additional moisture.
Soft Dinner-Style Bread
Use the same dough to make smaller rolls instead of a single loaf. Divide the dough into evenly sized pieces, shape them into balls, and arrange them in a greased baking dish. Allow them to rise until puffy and adjust the baking time according to their size.
What to Serve with Homemade White Bread
Fresh white bread is versatile enough for both sweet and savory meals. Try it with:
- Butter, jam, or honey for a simple breakfast
- Eggs and cheese for a breakfast sandwich
- Turkey, chicken, or vegetable sandwich fillings
- Tomato soup or a hearty vegetable soup
- Peanut butter and sliced bananas for a quick snack
- Toasted slices alongside eggs or other breakfast favorites
How to Store Homemade White Bread
At Room Temperature
Allow the loaf to cool completely before storing it. Keep it in a clean, airtight bread bag or container at room temperature. For the best texture, use it within about 2–3 days and keep it away from heat and direct sunlight.
Do not seal warm bread in an airtight container, because trapped steam can make the crust damp. Discard the bread if you notice mold or signs of spoilage.
In the Freezer
For longer storage, slice the completely cooled bread and place the slices in a freezer-safe bag or airtight container. Remove excess air, label the package with the date, and freeze for about 2–3 months for best quality.
Take out individual slices as needed and toast them directly from frozen, or thaw them at room temperature. Freezing slices makes it easier to enjoy homemade bread without thawing the entire loaf.
Frequently Asked Questions
Can I Use All-Purpose Flour Instead of Bread Flour?
Yes. All-purpose flour works for this recipe and can produce a soft, tender loaf. Bread flour generally provides a little more chew and structure, but either option is suitable.
Can I Make This Bread Without a Stand Mixer?
Yes. Mix the ingredients in a large bowl and knead the dough by hand for approximately 8–10 minutes, or until it becomes smooth and elastic. The dough may feel slightly tacky, so avoid adding excessive flour.
How Do I Know When the Dough Has Risen Enough?
During the first rise, the dough should approximately double in size. During the second rise, it should become visibly puffy in the pan. Temperature, flour, and yeast activity can change the timing, so use these visual signs as your guide.
Can I Prepare the Dough Ahead of Time?
You can experiment with refrigerating the dough after kneading for a slower rise, but the timing will change. Keep the dough covered in the refrigerator, allow extra time for it to warm and rise as needed, and confirm that it is properly proofed before baking.
Why Should I Wait Before Slicing the Bread?
The crumb continues to set as the loaf cools. Cutting too early can squash the slices and create a gummy texture, even when the bread is fully baked.
Enjoy Your Homemade White Bread
This soft and fluffy homemade white bread is a practical recipe for everyday baking. With a golden crust, tender crumb, and simple ingredients, it can become a useful staple for toast, sandwiches, and family meals.
Take your time with kneading and proofing, avoid adding too much flour, and let the loaf cool before slicing. Save this recipe for your next baking day and enjoy a fresh loaf made in your own kitchen.
Recipe Card: Soft and Fluffy Homemade White Bread
Recipe summary: A tender homemade white sandwich loaf made with milk, egg, butter, flour, and yeast, finished with a golden crust.
Prep time: 25 minutes
First rise: 60–90 minutes
Second rise: 30–60 minutes
Cook time: 30–35 minutes
Total time: Approximately 2 hours 25 minutes to 3 hours 10 minutes, including rising and cooling preparation as applicable
Yield: 1 loaf
Serving size: Approximately 12 slices, depending on thickness
Ingredients
- 4 cups (480 g) all-purpose flour or bread flour, plus a little extra if needed
- 1 cup (240 ml) warm milk, approximately 100–110°F
- 2 1/4 teaspoons instant yeast (1 standard 1/4-ounce packet)
- 2 tablespoons granulated sugar
- 1 large egg
- 3 tablespoons (42 g) unsalted butter, softened
- 1 1/2 teaspoons salt
Instructions
- Combine the warm milk, instant yeast, and sugar in a large mixing bowl. Add the egg, softened butter, flour, and salt. Mix until a rough dough forms.
- Knead by hand for 8–10 minutes or with a stand mixer and dough hook for 6–8 minutes, until the dough is smooth, elastic, and slightly tacky.
- Place the dough in a lightly greased bowl, cover, and let rise for 60–90 minutes or until approximately doubled in size.
- Grease a 9-by-5-inch loaf pan. Gently deflate the dough, shape it into a snug log, and place it seam-side down in the pan.
- Cover and let rise for 30–60 minutes, until the dough looks puffy and has expanded noticeably.
- Preheat the oven to 350°F with a rack near the center.
- Bake for 30–35 minutes, until the top is golden brown and the center reaches approximately 190°F. Cover loosely with foil if the crust browns too quickly.
- Cool in the pan for 5–10 minutes, then transfer to a wire rack. Let cool for at least 45–60 minutes before slicing.
Recipe Notes
- Flour absorption varies, so add extra flour sparingly and only when necessary.
- Use warm milk, not hot milk, to protect yeast activity.
- Rising times are estimates and depend on room temperature.
- Use a serrated knife after the loaf has cooled for cleaner slices.
Storage
Store completely cooled bread in an airtight bread bag or container at room temperature and use within about 2–3 days for best texture. For longer storage, slice and freeze in a freezer-safe package for about 2–3 months for best quality.
Nutrition: Not calculated. Nutritional values depend on the exact ingredients, brands, loaf yield, and slice size.