Easy No-Bake Biscoff Dessert Recipe – Creamy Lotus Biscoff Icebox Cake Everyone Loves!
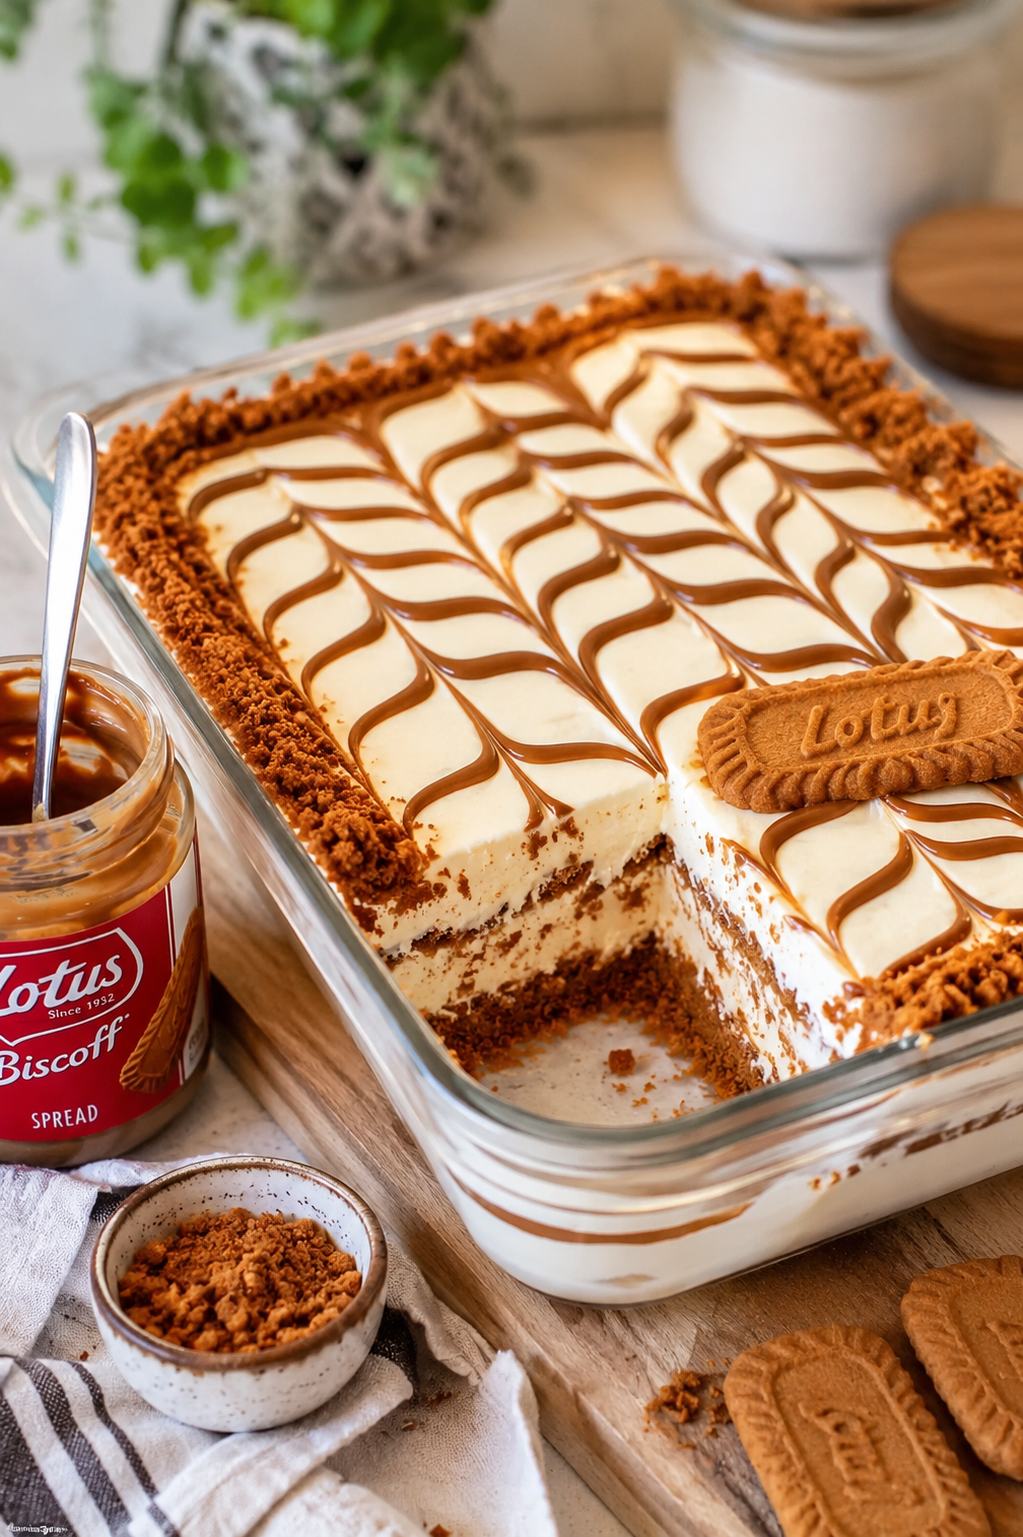
The first time I brought this Easy No-Bake Biscoff Dessert Recipe to a family gathering, I expected a few compliments. What I didn’t expect was an empty dish within twenty minutes and three relatives asking for the recipe before dessert was even finished.
There is something irresistible about the combination of creamy whipped filling, caramelized Lotus Biscoff cookies, and rich cookie butter. The flavors feel luxurious, yet the recipe itself is surprisingly simple. No oven. No complicated techniques. Just layers of flavor that transform in the refrigerator.
As a Baking Enthusiast who tests dozens of dessert recipes every year, I have learned that the best desserts are often the simplest ones. This Lotus Biscoff Icebox Cake proves that point perfectly. While many bakery-style desserts require special equipment and advanced skills, this one relies on patience and a few quality ingredients.
The beauty of this dessert lies in what happens overnight. The cookies soften into cake-like layers while still maintaining enough structure to create beautiful slices. The result tastes like a cross between cheesecake, tiramisu, and cookie butter cake.
If you’re looking for a crowd-pleasing dessert that looks impressive but requires minimal effort, keep reading. This recipe consistently delivers bakery-quality results at home.
Why This Easy No-Bake Biscoff Dessert Recipe Works So Well
Most no-bake desserts depend heavily on whipped cream or pudding. This recipe goes a step further by balancing texture, flavor, and structure.
- The Biscoff cookies gradually soften into cake-like layers.
- The cream mixture stays light and fluffy.
- The cookie butter adds deep caramelized flavor.
- The dessert slices beautifully after chilling.
- It can be prepared a day in advance.
A unique insight many recipes overlook is that Biscoff cookies continue absorbing moisture even after the first 12 hours. The flavor actually improves between 18 and 24 hours of refrigeration, making this one of the rare desserts that tastes better the next day.
Recipe Card
- Preparation Time: 25 Minutes
- Cooking Time: 0 Minutes
- Total Time: 25 Minutes + Chilling
- Servings: 12
- Difficulty Level: Easy
- Calories (Estimated): 420 Per Serving
Ingredients You’ll Need
Main Ingredients
- 2 packages Lotus Biscoff cookies (about 500g)
- 2 cups heavy whipping cream
- 8 oz cream cheese, softened
- 1 cup Lotus Biscoff spread
- 1/2 cup powdered sugar
- 1 teaspoon vanilla extract
Optional Ingredients
- 1 tablespoon instant espresso powder
- 1/2 teaspoon cinnamon
- 1/4 cup caramel sauce
- 2 tablespoons brown sugar
Garnishes
- Crushed Biscoff cookies
- Melted cookie butter drizzle
- Whole Lotus cookies
- Whipped cream swirls
The Flavor Profile That Makes People Ask for Seconds
The flavor starts with warm caramel notes from the Biscoff cookies. Then comes a creamy cheesecake-like richness from the cream cheese and whipped cream mixture.
The cookie butter introduces hints of brown sugar, cinnamon, and baked spice that create remarkable depth without becoming overly sweet.
One uncommon observation is that chilled Biscoff spread develops a slightly toasted flavor profile that becomes more pronounced after refrigeration. This subtle transformation gives the dessert a bakery-quality complexity.
Kitchen Equipment
- 9×13-inch glass baking dish
- Electric mixer
- Mixing bowls
- Rubber spatula
- Offset spatula or spoon
- Measuring cups
Step-by-Step Instructions
-
Place softened cream cheese into a mixing bowl. Beat for 2 minutes until completely smooth. There should be no visible lumps. This creates the foundation for a silky filling.
-
Add powdered sugar, vanilla extract, and Biscoff spread. Continue mixing until the mixture becomes smooth, glossy, and evenly colored.
-
In a separate bowl, whip heavy cream until medium-stiff peaks form. The cream should hold its shape while still looking soft and fluffy.
-
Gently fold the whipped cream into the Biscoff mixture. Use slow folding motions to maintain volume. The final texture should resemble mousse.
-
Spread a thin layer of cream mixture across the bottom of your baking dish. This prevents the cookies from sliding.
-
Create a single layer of Lotus Biscoff cookies. Break cookies as needed to cover gaps while maintaining an even surface.
-
Spread approximately one-third of the cream mixture over the cookie layer. Smooth carefully using an offset spatula.
-
Repeat the layering process two more times. Alternate cookies and cream until all ingredients are used.
-
Finish with a thick cream layer on top. Smooth the surface until clean and level.
-
Warm a few tablespoons of Biscoff spread for 15 seconds. Drizzle across the surface and use a toothpick to create decorative swirls.
-
Cover tightly and refrigerate for at least 12 hours. For best texture, chill 18 to 24 hours.
-
Before serving, sprinkle crushed cookies around the edges and add whole Lotus cookies as garnish.
Common Mistakes That Affect Texture
- Using cold cream cheese creates lumps.
- Under-whipping cream results in runny layers.
- Skipping overnight chilling prevents proper texture development.
- Adding too much cookie butter can make the filling heavy.
- Slicing before fully chilled causes messy portions.
Professional Tips for Bakery-Style Results
A little-known bakery trick is chilling your mixing bowl before whipping cream. Colder equipment creates more stable whipped cream and helps maintain structure longer.
Another practical tip is warming only part of the Biscoff spread for decorating. Fully melted cookie butter can become too thin and disappear into the cream layer.
For ultra-clean slices, dip a knife into hot water and wipe dry between cuts.
Homemade vs Bakery Version
| Feature | Homemade | Bakery Version |
|---|---|---|
| Cost | Lower | Higher |
| Freshness | Maximum | Variable |
| Customization | Unlimited | Limited |
| Sweetness Control | Adjustable | Fixed |
| Preparation Time | 25 Minutes | Purchase Only |
Recipe Variations
Premium Version
Add mascarpone cheese and Belgian white chocolate shavings for a luxurious dessert worthy of special occasions.
Budget-Friendly Version
Replace half the cream cheese with vanilla pudding and reduce the amount of cookie butter.
Coffee Lover Version
Dissolve espresso powder into the cream mixture for a tiramisu-inspired twist.
Chocolate Version
Layer chocolate ganache between cream layers for added richness.
Serving Suggestions
- Serve with hot coffee.
- Pair with cappuccino.
- Enjoy alongside vanilla ice cream.
- Offer with fresh strawberries.
- Serve at birthdays and holiday gatherings.
Storage Tips
- Store covered in the refrigerator for up to 4 days.
- Keep away from strong-smelling foods.
- Do not leave at room temperature longer than 2 hours.
- Freeze individual slices for up to 1 month.
Nutritional Information (Estimated Per Serving)
- Calories: 420
- Carbohydrates: 38g
- Protein: 5g
- Fat: 28g
- Sugar: 24g
- Fiber: 1g
Related Recipes You May Also Like
- No-Bake Oreo Cheesecake
- Chocolate Tiramisu Icebox Cake
- Salted Caramel Cheesecake Bars
- No-Bake Peanut Butter Pie
Frequently Asked Questions
Can I make this dessert ahead of time?
Yes. It is actually better when made 18 to 24 hours before serving.
Can I freeze Biscoff Icebox Cake?
Yes. Freeze tightly wrapped portions for up to one month.
What can I use instead of cream cheese?
Mascarpone cheese or stabilized whipped topping works well.
Why are my layers sliding?
The cream mixture may be too soft or insufficiently chilled.
Do I need an electric mixer?
It is strongly recommended for achieving stable whipped cream.
Can I use homemade whipped cream?
Absolutely. Freshly whipped cream produces the best flavor.
How long does it need to chill?
At least 12 hours, though 18 to 24 hours is ideal.
Can I make individual servings?
Yes. Layer ingredients in dessert cups or jars.
Can I reduce the sweetness?
Reduce powdered sugar by 25% without affecting texture.
Why do the cookies soften?
The cream gradually hydrates the cookies, creating a cake-like consistency.
One Final Thing Before You Grab a Spoon
The most surprising part of this Easy No-Bake Biscoff Dessert Recipe is how dramatically it changes overnight. What starts as layers of cookies and cream becomes a unified dessert with a texture somewhere between cheesecake and cake. That’s why this recipe remains one of the most requested desserts in my kitchen. It delivers maximum flavor with minimal effort, and every slice looks like it came straight from a professional bakery display.