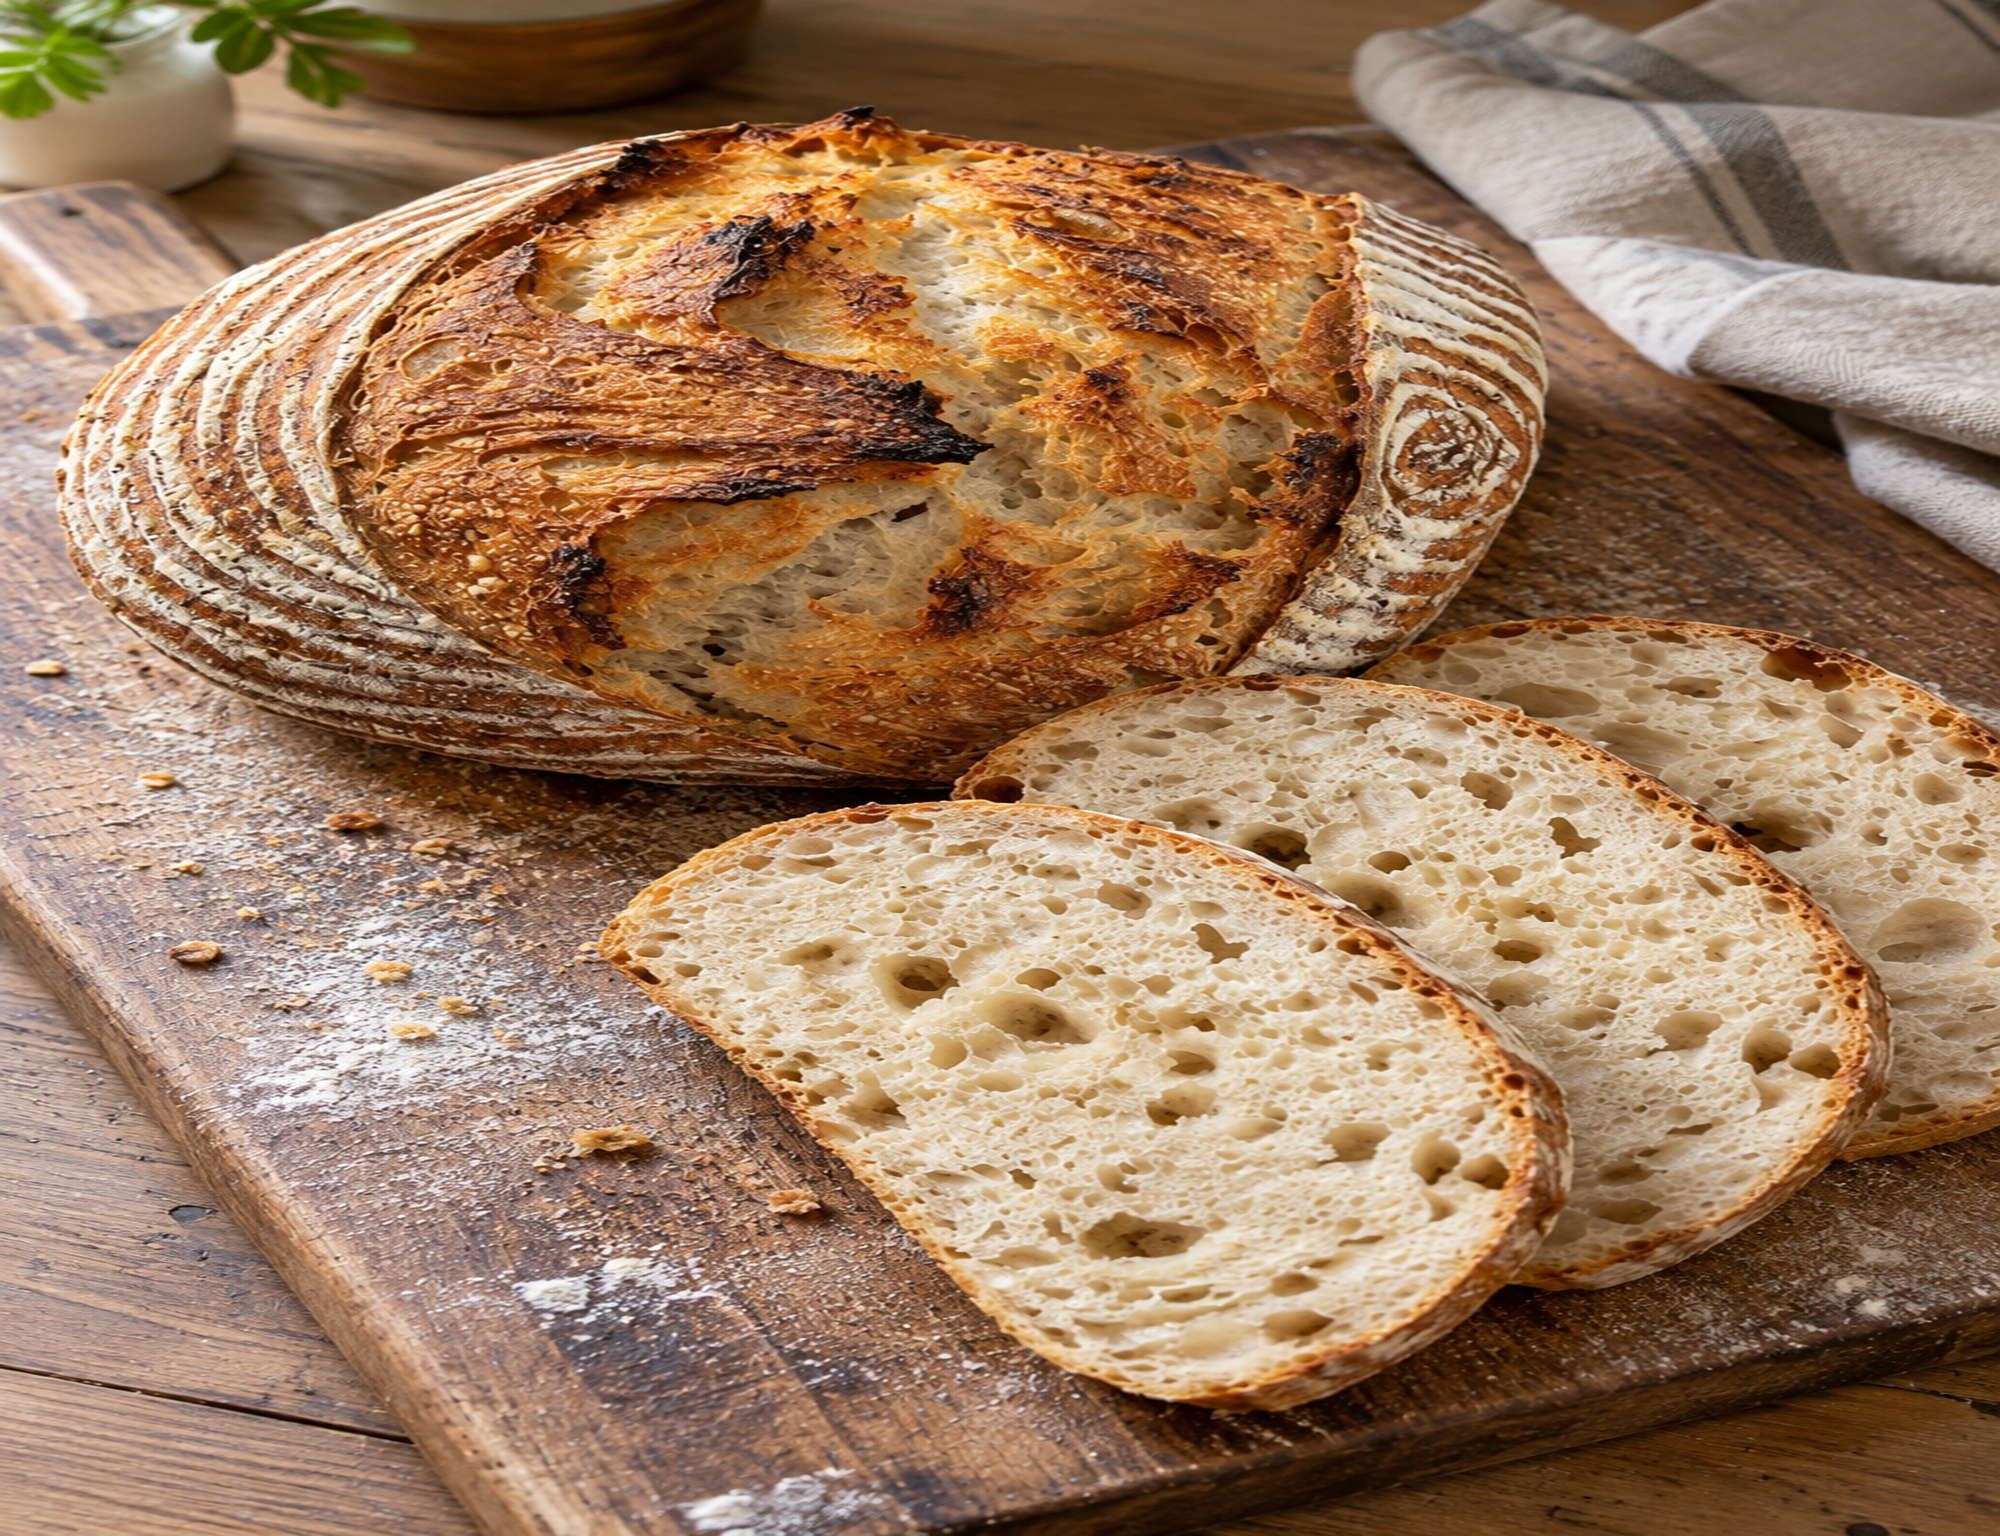
Easy Homemade Artisan Sourdough Bread with a Crispy Crust
Homemade artisan sourdough bread is known for its deeply golden crust, slightly tangy flavor, and soft interior filled with irregular air pockets. Although a loaf from an artisan bakery may look complicated to recreate, you can make a beautiful rustic loaf at home with a few basic ingredients and a little patience.
This sourdough recipe uses an active sourdough starter, bread flour, water, and salt. The dough develops its structure through a combination of resting, folding, fermentation, and careful baking. The result is a crusty round loaf that works well for breakfast, sandwiches, toast, or serving alongside a warm bowl of soup.
What Makes Artisan Sourdough Bread Special?
Unlike bread made with commercial baker’s yeast alone, sourdough relies on a living culture of wild yeast and beneficial bacteria. During fermentation, the culture produces carbon dioxide that helps the dough rise, along with organic acids that contribute to sourdough’s characteristic flavor.
The open crumb comes from proper fermentation, sufficient dough strength, and careful handling. A hot oven and a covered baking vessel also help the loaf expand before the crust becomes firm. These details matter more than making the dough look perfectly smooth or uniform.
Ingredients
- 500 g bread flour (about 4 cups): Provides the protein structure needed for a chewy crumb and a sturdy loaf. Weight is more reliable than volume when measuring flour.
- 350 g water (about 1 1/2 cups): Hydrates the flour and creates a moderately wet dough that can develop an airy interior.
- 100 g active sourdough starter (about 1/3 cup plus 1 tablespoon): Provides the natural leavening and characteristic sourdough flavor. Use a starter that has recently risen after feeding and shows visible bubbles.
- 10 g fine sea salt (about 1 3/4 teaspoons): Enhances flavor and helps regulate fermentation.
- Rice flour or bread flour, for dusting: Helps prevent the shaped dough from sticking to a proofing basket or towel.
Measurement note: Cup measurements are approximate because flour density varies with the way it is scooped. A kitchen scale will give you more consistent results.
Equipment You Will Need
- A large mixing bowl
- A kitchen scale
- A dough scraper or sturdy spatula
- A clean kitchen towel or proofing basket
- A sharp bread lame or razor blade for scoring
- A Dutch oven with a heat-safe lid
- Parchment paper suitable for high-temperature baking
- A wire cooling rack
How to Make Artisan Sourdough Bread
Step 1: Mix the Flour and Water
Combine the bread flour and water in a large bowl until no dry patches remain. The mixture will look rough and feel sticky. Cover the bowl and let the dough rest for 30 to 45 minutes. This resting period allows the flour to absorb water and makes the dough easier to work with.
Step 2: Add the Sourdough Starter and Salt
Add the active sourdough starter and salt. Work them into the dough by pinching, squeezing, and folding until evenly incorporated. The dough may feel slippery or uneven at first, but it should gradually become more cohesive.
Step 3: Develop the Dough with Folds
Cover the bowl and let the dough rest for about 30 minutes. Perform a set of stretch-and-folds by lifting one edge of the dough, stretching it gently, and folding it toward the center. Rotate the bowl and repeat on the remaining sides.
Repeat this process every 30 minutes for three or four sets, keeping the bowl covered between sessions. The dough should gradually become smoother, stronger, and more elastic. If it resists stretching, give it more time to rest instead of pulling it aggressively.
Step 4: Let the Dough Ferment
After the folds, leave the dough covered at room temperature until it has expanded noticeably, looks aerated, and shows bubbles along the sides of the bowl. Depending on starter strength and room temperature, bulk fermentation may take roughly 4 to 7 hours from the time the starter is mixed into the dough.
Use the dough’s appearance and feel rather than relying only on the clock. A cool kitchen can slow fermentation considerably, while a warm room can speed it up. The dough does not necessarily need to double in size, and waiting too long can make shaping more difficult.
Step 5: Shape the Loaf
Lightly flour your work surface and turn out the dough. Gently shape it into a loose round, taking care not to press out all the gas. Let it rest for 15 to 20 minutes.
Shape the dough into a tighter boule by folding the edges toward the center and creating surface tension as you draw it gently across the work surface. Avoid using so much flour that the dough loses its grip on the counter.
Step 6: Proof the Dough
Dust a proofing basket or a bowl lined with a clean towel with rice flour or bread flour. Place the dough seam-side up inside, cover it, and proof in the refrigerator for 8 to 14 hours.
Cold proofing makes the dough easier to score and can deepen its flavor. If you prefer to bake the same day, proof at room temperature instead and watch for the dough to become slightly puffy and responsive to a gentle touch.
Step 7: Preheat the Oven
Place a Dutch oven with its lid inside the oven. Preheat to 475°F for at least 30 to 45 minutes so the baking vessel becomes thoroughly hot. Handle the pot carefully because both the pot and lid will be extremely hot.
Step 8: Score and Bake
Turn the cold dough onto parchment paper so the smooth side faces up. Use a sharp bread lame or razor blade to make one confident slash across the top, approximately 1/2 inch deep. Scoring gives the expanding loaf a controlled place to open.
Carefully lower the dough into the hot Dutch oven, cover it, and bake for 25 minutes. Remove the lid, reduce the oven temperature to 450°F, and bake for another 20 to 25 minutes, until the crust is a deep golden brown.
For a darker, crunchier crust, extend the uncovered baking time by a few minutes while watching carefully to prevent burning. The finished loaf should feel light for its size and have a firm crust.
Step 9: Cool Before Slicing
Transfer the bread to a wire rack and let it cool for at least 2 hours before slicing. The interior continues to set as the loaf cools. Cutting it too soon can compress the crumb and leave the center gummy, even when the crust looks fully baked.
Tips for a Better Crispy Crust
- Use an active starter. A starter that has risen well after feeding is generally more reliable than one that is sluggish or has only recently been fed.
- Preheat the Dutch oven thoroughly. A hot, covered baking vessel traps steam released by the dough, helping the loaf expand before the crust sets.
- Watch fermentation closely. Under-fermented dough may produce a dense crumb, while over-fermented dough can become slack and difficult to shape.
- Handle the dough gently. Build tension during shaping without squeezing out all the gas that developed during fermentation.
- Let the crust finish baking. A deeply golden-brown exterior generally develops more flavor and stays crispier than a pale crust.
- Cool on a rack. Air circulation prevents trapped moisture from softening the bottom of the loaf.
Common Sourdough Problems and How to Fix Them
Why Is My Sourdough Bread Dense?
A dense loaf can result from a weak starter, insufficient fermentation, poor gluten development, or shaping that is too aggressive. Check whether your starter rises predictably after feeding, complete the folding sessions, and allow the dough to become visibly aerated before shaping.
Why Is the Inside Gummy?
A gummy interior may indicate that the bread was underbaked or sliced before it cooled. Bake until the crust is well browned, and give the loaf enough time to cool on a wire rack before cutting.
Why Did My Bread Spread Instead of Rising Upward?
Excessive fermentation, weak dough structure, or insufficient shaping tension can cause a loaf to spread. Strengthen the dough with gentle folds, monitor fermentation, and create a taut outer surface when shaping.
Why Is My Crust Not Crispy?
The crust may remain soft if the bread was removed from the oven too early or stored while still warm. Bake until the exterior is deeply golden, cool completely, and store the loaf in a breathable bread bag or bread box rather than an airtight plastic bag if maintaining a crisp crust is the priority.
Serving Ideas
Thick slices of artisan sourdough are delicious with salted butter, jam, scrambled eggs, or avocado. The sturdy crumb also works well for grilled cheese sandwiches, bruschetta, and open-faced toast.
For a simple savory snack, toast a slice and drizzle it with olive oil. You can also serve sourdough alongside tomato soup, roasted vegetables, or a fresh salad. Its mild tang and chewy texture complement both rich and light dishes.
How to Store Homemade Sourdough Bread
Let the loaf cool completely before storing it. Keep it cut-side down on a cutting board for short-term storage, or place it in a paper bag or breathable bread box. The crust is usually at its best on the day the bread is baked and gradually softens as moisture moves through the loaf.
For longer storage, slice the cooled bread and freeze the slices in a freezer-safe bag for up to 3 months for best quality. Toast frozen slices directly, or thaw them at room temperature before reheating. To refresh a whole loaf, warm it in a 350°F oven for several minutes until the crust becomes crisp again.
Frequently Asked Questions
Can I Make Sourdough Bread Without a Dutch Oven?
Yes. You can bake the loaf on a preheated baking stone or heavy baking sheet and introduce steam using a suitable oven-safe method. A Dutch oven is convenient because it traps steam around the loaf, but it is not the only way to bake sourdough.
Can I Use All-Purpose Flour Instead of Bread Flour?
Yes, although the loaf may have a slightly different structure and a less chewy crumb. Because different flours absorb different amounts of water, hold back a little water during mixing and add it as needed to achieve a workable dough.
How Do I Know When My Sourdough Starter Is Ready?
An active starter typically rises after feeding, develops bubbles throughout, and smells pleasantly fermented. Many starters are ready to use near their peak rise, although timing varies with feeding ratio, flour, and temperature.
Is Sourdough Bread Supposed to Have Large Holes?
Not every sourdough loaf needs very large holes. An open crumb depends on hydration, fermentation, flour strength, shaping, and baking. A moderately open, even crumb is a perfectly good result for everyday sourdough bread.
Can I Leave the Dough in the Refrigerator Overnight?
Yes. An overnight cold proof of about 8 to 14 hours is convenient and can improve flavor while making the dough easier to score. The ideal duration depends on how far fermentation progressed before refrigeration and how cold your refrigerator is.
Easy Homemade Artisan Sourdough Bread
A rustic sourdough loaf with a golden, crispy crust, a chewy texture, and a soft interior with irregular air pockets.
Prep Time: 45 minutes
Bulk Fermentation: 4–7 hours, approximately
Cold Proof: 8–14 hours
Bake Time: 45–50 minutes
Cooling Time: 2 hours
Total Elapsed Time: Approximately 16–25 hours, depending on fermentation and proofing
Yield: 1 loaf, about 10–12 slices
Category: Bread
Method: Mixing, folding, fermentation, and baking
Ingredients
- 500 g bread flour (about 4 cups)
- 350 g water (about 1 1/2 cups)
- 100 g active sourdough starter (about 1/3 cup plus 1 tablespoon)
- 10 g fine sea salt (about 1 3/4 teaspoons)
- Rice flour or bread flour, for dusting
Instructions
- Mix the bread flour and water until no dry flour remains. Cover and rest for 30–45 minutes.
- Add the active sourdough starter and salt. Pinch and fold until evenly incorporated.
- Rest for 30 minutes, then perform three or four sets of stretch-and-folds at 30-minute intervals.
- Cover and bulk ferment until the dough has expanded noticeably and looks aerated, usually about 4–7 hours from starter incorporation, depending on temperature and starter activity.
- Shape the dough into a round, rest for 15–20 minutes, and shape again to create surface tension.
- Place seam-side up in a floured proofing basket, cover, and refrigerate for 8–14 hours.
- Preheat a lidded Dutch oven at 475°F for 30–45 minutes.
- Turn the dough onto parchment, score the top, and carefully transfer it to the hot Dutch oven.
- Bake covered at 475°F for 25 minutes. Remove the lid, reduce the temperature to 450°F, and bake for another 20–25 minutes until deeply golden brown.
- Cool on a wire rack for at least 2 hours before slicing.
Recipe Notes
- Use an active, recently fed sourdough starter for more predictable fermentation.
- Fermentation times are estimates. Dough appearance and temperature are more reliable than the clock alone.
- Handle the hot Dutch oven carefully and follow the manufacturer’s temperature guidance for your cookware and parchment paper.
- Allow the loaf to cool completely before storing or slicing.
Storage: Store cooled bread in a paper bag or bread box for short-term use. Freeze sliced bread in a freezer-safe bag for up to 3 months for best quality.