Crispy Beef Spring Rolls Recipe – Extra Crunchy and Juicy Inside
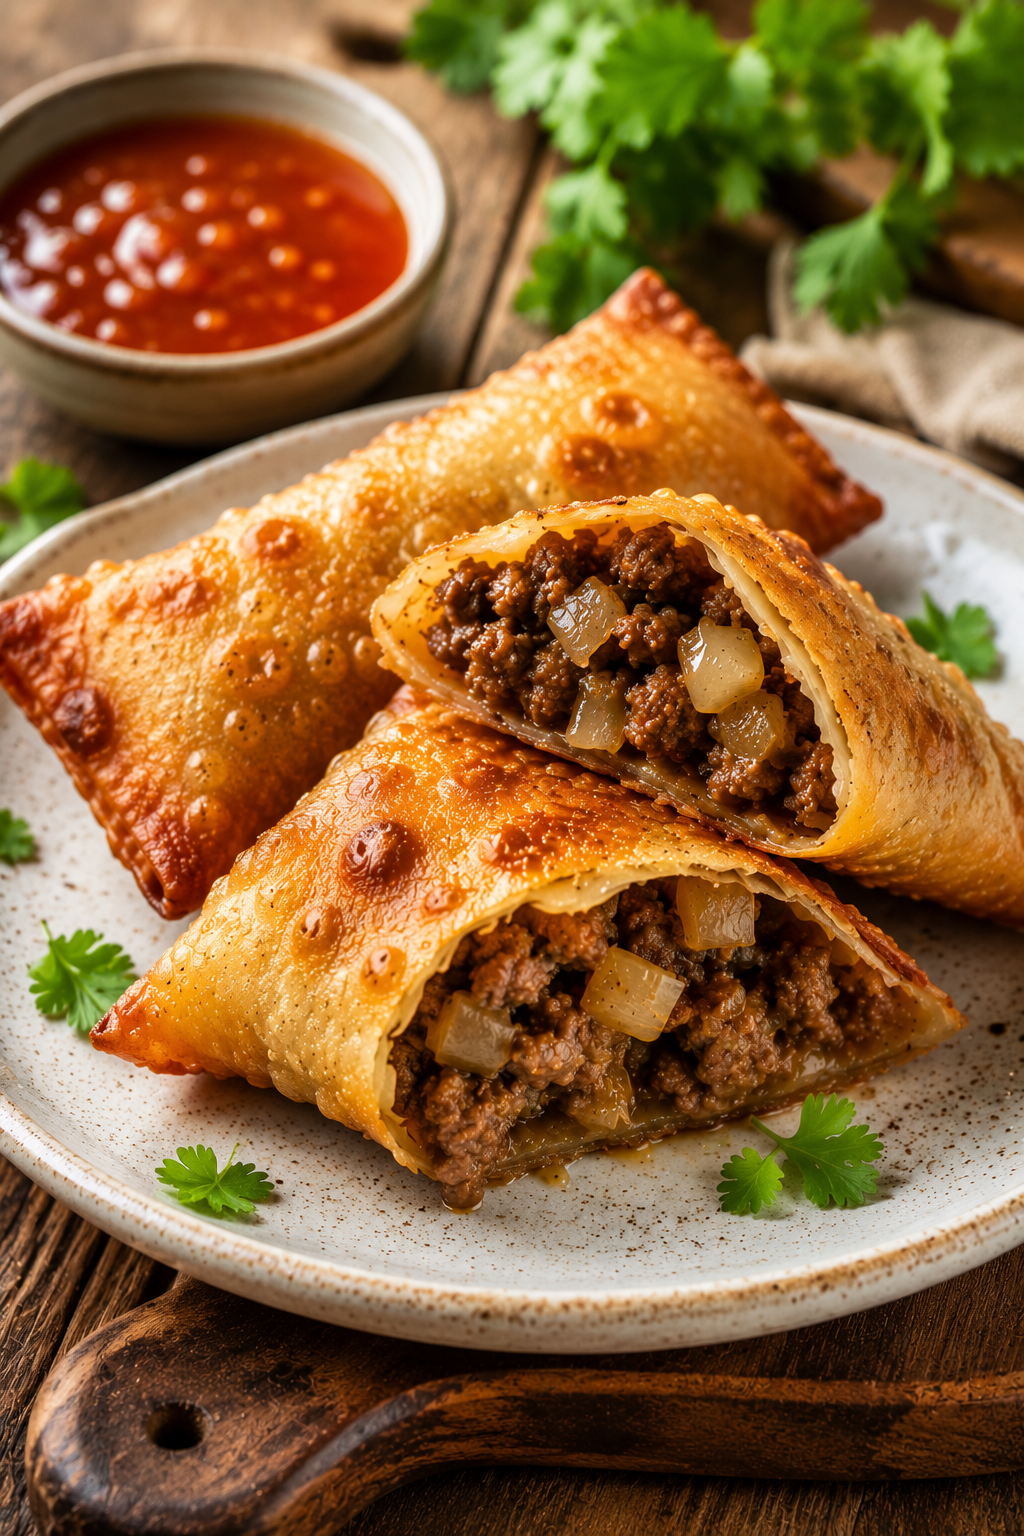
Few appetizers disappear from the table faster than freshly fried spring rolls. The irresistible crackle of the wrapper followed by a juicy, flavorful beef filling creates the perfect contrast of textures. This Crispy Beef Spring Rolls Recipe delivers everything people love about restaurant-quality spring rolls while remaining simple enough to prepare in your own kitchen.
One of the biggest frustrations when making spring rolls at home is ending up with wrappers that become soggy only minutes after frying. Another common issue is dry, bland filling that lacks moisture and depth of flavor. This recipe solves both problems with a balanced combination of seasoned beef, slowly cooked onions, proper wrapping techniques, and carefully controlled frying temperatures.
Whether you’re preparing appetizers for family dinners, game nights, holiday gatherings, or meal prep, these crispy beef spring rolls consistently impress guests. They’re freezer-friendly, easy to customize, and taste even better than many takeout versions.
As someone who enjoys recreating restaurant favorites at home, I’ve learned that achieving perfectly crispy spring rolls isn’t about complicated ingredients—it’s about understanding a few small techniques that make a huge difference. Once you master them, you’ll never settle for store-bought frozen spring rolls again.
Recipe Card
- Preparation Time: 30 minutes
- Cooking Time: 20 minutes
- Total Time: 50 minutes
- Servings: 12 spring rolls
- Difficulty Level: Easy
- Calories (Estimated): 235 kcal per serving
Why This Crispy Beef Spring Rolls Recipe Works
This recipe focuses on creating balance. The beef remains juicy because it is cooked just until browned before being combined with softened onions that naturally add sweetness and moisture. Instead of relying on heavy seasonings, the ingredients complement each other, allowing the beef flavor to shine.
The wrapper becomes beautifully blistered and golden because moisture inside the filling is controlled before wrapping. Excess liquid is one of the most overlooked reasons spring rolls lose their crispiness after frying.
Another important detail is allowing the wrapped rolls to rest for several minutes before frying. This helps seal the wrapper naturally and prevents it from opening in hot oil.
Finally, frying at the correct temperature produces the signature crunchy shell without overcooking the filling.
Flavor Profile
These beef spring rolls combine several complementary flavors:
- Rich savory beef
- Naturally sweet caramelized onions
- Light garlic aroma
- Subtle black pepper warmth
- Golden crispy wrapper
- Sweet chili dipping sauce for a sweet-spicy finish
Main Ingredients
- 500 g lean ground beef
- 2 large onions, finely diced
- 3 garlic cloves, minced
- 2 tablespoons soy sauce
- 1 tablespoon oyster sauce
- 1 teaspoon black pepper
- 1 teaspoon sesame oil
- 1 tablespoon cornstarch
- 12 spring roll wrappers
- Vegetable oil for frying
Optional Ingredients
- Finely chopped mushrooms
- Grated carrots
- Green onions
- Fresh ginger
- White pepper
- Chili flakes
Garnishes
- Fresh cilantro
- Sliced green onions
- Sweet chili sauce
- Sesame seeds
Kitchen Equipment
- Large skillet
- Mixing bowl
- Wooden spoon
- Deep frying pan or Dutch oven
- Cooking thermometer
- Tongs
- Wire cooling rack
- Paper towels
Preparing the Beef Filling
- Heat a large skillet over medium-high heat. Add the ground beef and cook for about 5–6 minutes, breaking it into small crumbles until no pink remains. The beef should be browned but still juicy, not dry.
- Add the diced onions and cook for another 6–8 minutes. Stir frequently until the onions become soft, translucent, and slightly caramelized. This step naturally sweetens the filling while adding moisture.
- Stir in the minced garlic and cook for one additional minute until fragrant. Avoid browning the garlic, as it can become bitter.
- Add soy sauce, oyster sauce, black pepper, sesame oil, and cornstarch. Mix thoroughly until every piece of beef is evenly coated and the sauce lightly thickens.
- Transfer the filling to a large tray or shallow bowl. Spread it out into a thin layer and allow it to cool completely before wrapping. Warm filling creates steam, which softens the wrappers and reduces crispiness.
- While the filling cools, separate the spring roll wrappers under a slightly damp towel to prevent them from drying out.
How to Wrap Beef Spring Rolls Like a Pro
Rolling spring rolls may seem intimidating at first, but once you understand the technique, it quickly becomes second nature. A tightly wrapped spring roll fries more evenly, stays crisp longer, and is much less likely to burst open during cooking.
- Place one spring roll wrapper on a clean surface with one corner pointing toward you like a diamond.
- Spoon about 2 tablespoons of the cooled beef filling near the bottom corner. Resist the temptation to overfill, as too much filling can cause the wrapper to tear during frying.
- Fold the bottom corner tightly over the filling and gently tuck it underneath to create a compact roll.
- Fold both side corners toward the center, keeping the filling securely enclosed.
- Continue rolling tightly until only the top corner remains.
- Lightly brush the final corner with a mixture of flour and water or beaten egg, then finish rolling to seal completely.
- Arrange the finished rolls seam-side down on a tray lined with parchment paper.
- Allow the wrapped spring rolls to rest for about 10–15 minutes before frying. This simple resting period helps the wrapper adhere naturally and significantly reduces the chance of opening in hot oil.
How to Fry Spring Rolls Until Extra Crispy
Temperature control is the biggest difference between average spring rolls and restaurant-quality results. Oil that is too cool allows the wrapper to absorb excess oil, while oil that is too hot browns the outside before the filling heats properly.
- Heat vegetable oil to approximately 350°F (175°C). If you do not have a thermometer, place a small piece of wrapper into the oil. It should begin bubbling immediately without burning.
- Carefully lower only three or four spring rolls into the oil at a time. Avoid overcrowding, as this lowers the oil temperature.
- Fry for 3–4 minutes while occasionally turning until every side develops an even golden-brown color.
- Transfer the cooked spring rolls onto a wire rack rather than paper towels. Air circulation underneath helps preserve maximum crispiness.
- For an even crunchier texture, allow the spring rolls to cool for five minutes, then fry them a second time for 60–90 seconds. Many restaurants use this double-frying technique because it creates an incredibly crisp shell that stays crunchy much longer.
Professional Tips for Perfect Spring Rolls
- Always cool the filling completely before wrapping.
- Use wrappers that are fresh and flexible.
- Keep unused wrappers covered with a damp towel.
- Do not overfill each roll.
- Maintain consistent oil temperature.
- Drain on a wire rack instead of paper towels.
- Serve immediately for maximum crunch.
Common Mistakes to Avoid
| Mistake | Result | Solution |
|---|---|---|
| Warm filling | Soggy wrappers | Cool completely before wrapping |
| Overfilled rolls | Wrappers burst | Use only 2 tablespoons filling |
| Cold oil | Greasy spring rolls | Heat oil to 350°F (175°C) |
| Overcrowding pan | Uneven cooking | Cook in small batches |
| Skipping resting time | Rolls open while frying | Rest wrapped rolls before cooking |
Recipe Variations
Cheesy Beef Spring Rolls
Add shredded mozzarella or cheddar to the filling for a creamy center that contrasts beautifully with the crispy wrapper.
Spicy Version
Mix chopped fresh chilies, chili garlic sauce, or crushed red pepper flakes into the beef filling for extra heat.
Vegetable Boost
Add shredded cabbage, carrots, mushrooms, or bean sprouts for additional texture and nutrition without changing the overall flavor profile.
Premium Restaurant Style
Upgrade the filling by combining ground beef with finely chopped shrimp, fresh herbs, and a small splash of sesame oil for a richer, more complex flavor.
Serving Suggestions
These crispy beef spring rolls pair wonderfully with a variety of dipping sauces and side dishes.
- Sweet chili sauce
- Garlic soy dipping sauce
- Spicy mayo
- Peanut sauce
- Fresh cucumber salad
- Steamed jasmine rice
- Asian slaw
- Pickled vegetables
Storage Tips
Allow cooked spring rolls to cool completely before storing. Refrigerate them in an airtight container for up to four days. Separate layers with parchment paper to prevent sticking.
For longer storage, freeze uncooked spring rolls on a baking tray until solid, then transfer them to freezer bags. They can be frozen for up to three months.
How to Reheat Without Losing Crispiness
- Air Fryer: 375°F for 4–6 minutes.
- Oven: 400°F for 10 minutes.
- Skillet: Reheat with a small amount of oil over medium heat.
Avoid microwaving whenever possible, as it softens the crispy wrapper.
Meal Prep Guide
This recipe is excellent for meal prep. Prepare the filling one day ahead, wrap the spring rolls when convenient, and refrigerate them until ready to fry. You can also freeze the uncooked rolls individually, making it easy to cook only the quantity you need.
One trick I use when preparing large batches is to freeze the spring rolls on a tray first before transferring them to freezer bags. This prevents them from sticking together and makes portioning much easier later.
Nutrition Facts (Estimated Per Serving)
These nutritional values are approximate and may vary depending on the ingredients and cooking method used.
- Calories: 235 kcal
- Protein: 14 g
- Carbohydrates: 18 g
- Fat: 12 g
- Saturated Fat: 4 g
- Fiber: 2 g
- Sugar: 2 g
- Sodium: 420 mg
Homemade vs Restaurant Beef Spring Rolls
Many people assume restaurant spring rolls are difficult to replicate, but homemade versions actually offer several advantages. Besides controlling ingredient quality, you can customize the filling and enjoy them fresh from the fryer.
| Feature | Homemade | Restaurant |
|---|---|---|
| Freshness | Cooked immediately before serving | May sit under warming lamps |
| Beef Quality | Your preferred cut and freshness | Varies by restaurant |
| Seasoning | Fully customizable | Fixed recipe |
| Crispiness | Maximum crunch when freshly fried | Can soften during serving |
| Cost | More economical for families | Higher price per serving |
| Freezer Friendly | Yes | No |
A Rarely Discussed Secret for Extra Crispy Spring Rolls
One professional kitchen technique that isn’t often shared is allowing the wrapped spring rolls to air-dry for 15 to 20 minutes before frying. During this short resting period, the surface wrapper loses a tiny amount of moisture, creating an even crispier shell once it hits the hot oil. The difference may seem small, but the texture stays crunchy significantly longer after cooking.
Another overlooked detail is using a wire rack instead of paper towels after frying. While paper towels absorb excess oil, they also trap steam underneath the spring rolls, gradually softening the crispy wrapper. A cooling rack allows hot air to circulate, preserving that satisfying crunch.
Related Recipes You May Also Like
- Chicken Spring Rolls with Sweet Chili Sauce
- Crispy Vegetable Spring Rolls
- Cheesy Beef Egg Rolls
- Homemade Fried Wontons
Frequently Asked Questions
Can I make these spring rolls ahead of time?
Yes. Assemble them up to 24 hours in advance and keep them covered in the refrigerator before frying.
Can I freeze uncooked spring rolls?
Absolutely. Freeze them individually on a tray before transferring them to freezer bags. Fry directly from frozen by adding an extra minute or two to the cooking time.
Why did my spring rolls become soggy?
The most common causes are warm filling, oil that isn’t hot enough, or draining them on paper towels instead of a wire rack.
What is the best oil for frying?
Neutral oils with a high smoke point, such as vegetable, peanut, or canola oil, produce the crispiest results.
Can I bake instead of fry?
Yes. Brush the spring rolls lightly with oil and bake at 425°F (220°C) for 20–25 minutes, turning halfway through. They will be slightly less crispy than the fried version.
Can I cook these in an air fryer?
Yes. Spray lightly with cooking oil and air fry at 390°F (200°C) for 10–12 minutes, turning once for even browning.
Which dipping sauce pairs best with beef spring rolls?
Sweet chili sauce is the classic choice, but garlic soy sauce, spicy mayonnaise, peanut sauce, and hoisin sauce are all excellent alternatives.
Can I use ground turkey or chicken instead of beef?
Yes. Ground turkey and chicken both work well, though adding a little sesame oil helps maintain moisture and richness.
How do I keep spring rolls crispy for a party?
Place freshly fried spring rolls on a wire rack in a warm oven set to 200°F (95°C). This keeps them hot while maintaining their crunchy texture.
Can leftovers be reheated?
Yes. Reheat them in an air fryer or oven rather than a microwave for the best texture.
Crispy Beef Spring Rolls are proof that simple ingredients can create something truly memorable when prepared with care. From the juicy, savory beef filling to the perfectly golden, crackly wrapper, every bite delivers the comforting flavors people expect from their favorite restaurant appetizers.
By following the techniques in this recipe—cooling the filling completely, wrapping tightly, frying at the correct temperature, and using the optional double-fry method—you’ll consistently achieve spring rolls that are beautifully crisp outside and tender inside.
Whether you’re cooking for family dinners, entertaining guests, preparing freezer meals, or simply satisfying a craving for homemade comfort food, this recipe is one you’ll return to again and again. Once you’ve experienced how fresh, flavorful, and crunchy homemade beef spring rolls can be, they may become a permanent favorite in your recipe collection.