Crispy Chicken Tenders Recipe – Extra Crunchy, Juicy Inside & Better Than Restaurant Style
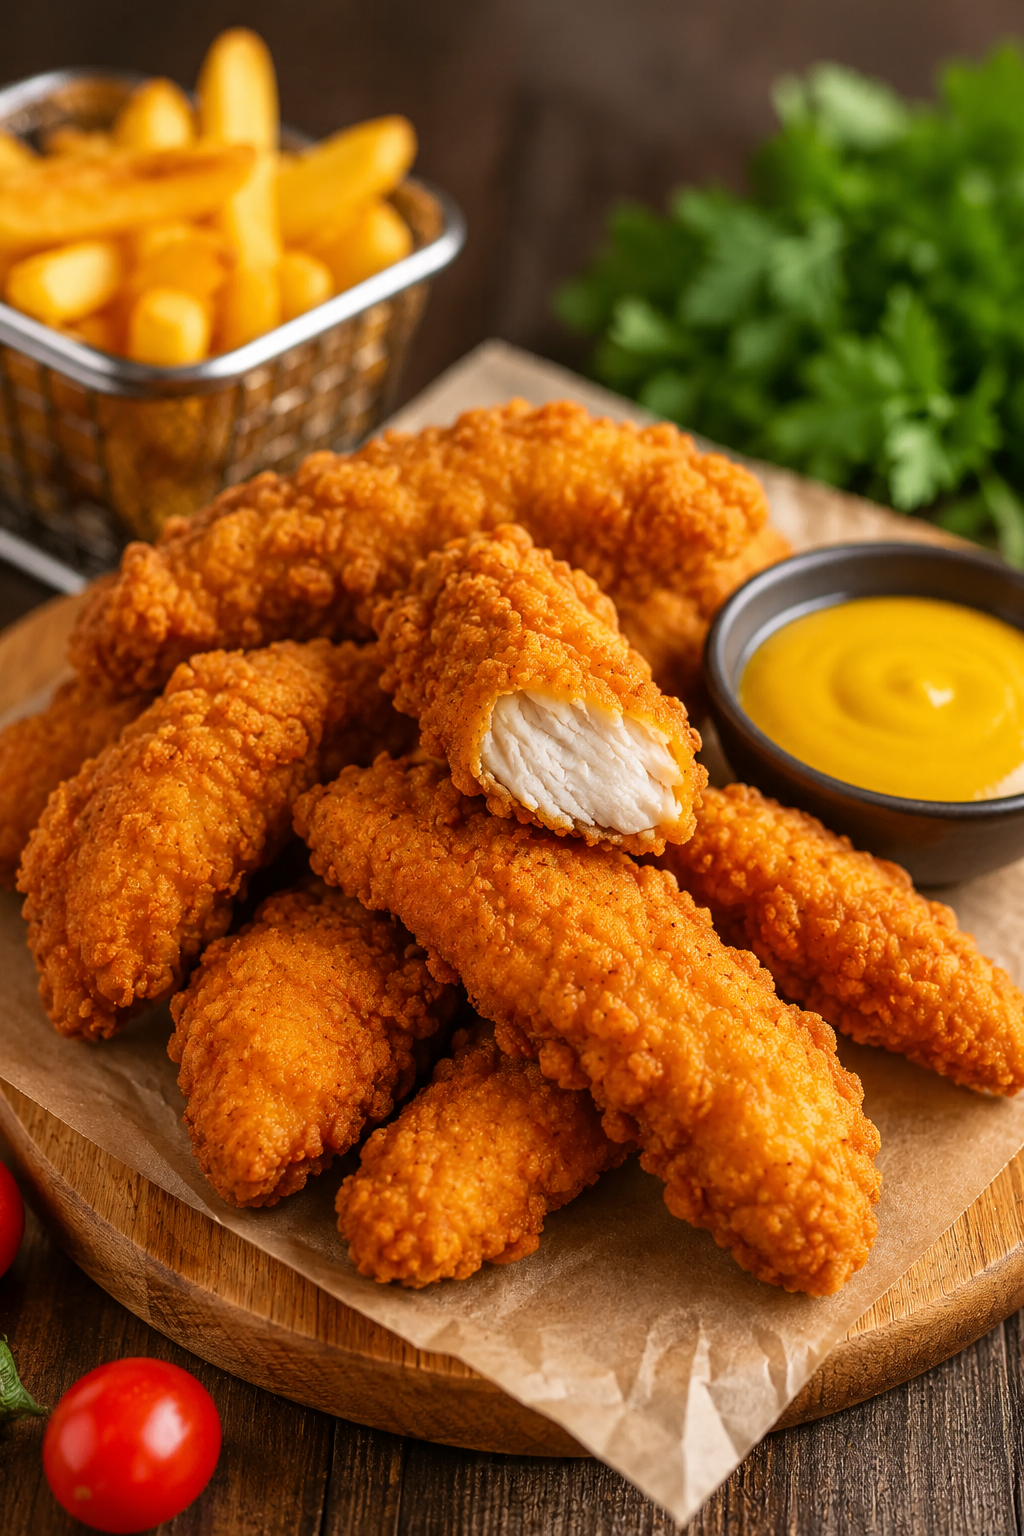
There’s something unforgettable about biting into a perfectly cooked chicken tender. The crust shatters with a satisfying crunch, revealing juicy, flavorful chicken inside that practically melts in your mouth. Many people assume that restaurant-quality chicken tenders require expensive equipment or secret ingredients, but the truth is much simpler. With the right technique and a few pantry staples, you can create chicken tenders that rival and often surpass — your favorite restaurant.
As someone who loves recreating classic comfort foods at home, I’ve tested countless coating combinations over the years. Some were too thick, others became soggy within minutes, and a few simply lacked flavor. This recipe is the result of those experiments, delivering an incredibly crispy exterior while keeping the chicken wonderfully moist.
The secret isn’t just the seasoning—it’s understanding how moisture, flour, starch, and frying temperature work together. Once you master these basics, you’ll never look at frozen chicken tenders the same way again.
Why This Crispy Chicken Tenders Recipe Works Every Time
Unlike many recipes that rely solely on flour, this version combines flour with cornstarch, creating a lighter yet crunchier crust. The buttermilk marinade gently tenderizes the meat while helping the coating cling perfectly during frying.
Another important detail is allowing the coated chicken to rest before frying. This simple step helps the breading adhere better, reducing the chances of it falling off during cooking.
The result is beautifully golden chicken tenders with an audible crunch and juicy interior every single time.
Recipe Card
- Preparation Time: 20 minutes
- Marinating Time: 30 minutes
- Cooking Time: 15 minutes
- Total Time: 65 minutes
- Servings: 4
- Difficulty: Easy
- Calories: Approximately 460 per serving
Ingredients You’ll Need
Main Ingredients
- 500g chicken tenderloins
- 1 cup buttermilk
- 1 large egg
- 2 cups all-purpose flour
- ½ cup cornstarch
- 1 teaspoon salt
- 1 teaspoon black pepper
- 2 teaspoons paprika
- 1 teaspoon garlic powder
- 1 teaspoon onion powder
- ½ teaspoon cayenne pepper (optional)
- Vegetable oil for frying
Optional Ingredients
- Italian seasoning
- Smoked paprika
- Parmesan cheese powder
Garnishes
- Fresh parsley
- Lemon wedges
- Flaky sea salt
Choosing the Best Chicken
Fresh chicken tenderloins are naturally tender and cook quickly, making them ideal for this recipe. If using chicken breast, slice it evenly into strips of similar thickness to ensure consistent cooking.
Try selecting chicken with a light pink color and minimal excess liquid in the package. Fresher chicken retains moisture better and produces a juicier final result.
Kitchen Equipment
- Large mixing bowls
- Whisk
- Tongs
- Deep frying pan or Dutch oven
- Cooling rack
- Paper towels
- Cooking thermometer
Step-by-Step Instructions
- Marinate the Chicken: Combine buttermilk and egg in a bowl. Add the chicken tenders and coat thoroughly. Refrigerate for at least 30 minutes. The chicken should appear fully coated and slightly thicker from the marinade.
- Prepare the Coating: In another bowl, whisk together flour, cornstarch, paprika, garlic powder, onion powder, salt, pepper, and cayenne until evenly combined.
- Coat the Chicken: Remove one tender at a time from the marinade. Press firmly into the flour mixture, ensuring every surface is coated. For extra crunch, dip briefly back into the buttermilk before coating with flour again.
- Rest Before Frying: Place coated tenders on a wire rack for 10 minutes. During this time the coating will hydrate slightly, helping it stick during frying.
- Heat the Oil: Bring vegetable oil to 350°F (175°C). Maintaining this temperature is essential for achieving a crisp crust without greasy results.
- Fry in Batches: Carefully lower several tenders into the hot oil without overcrowding the pan. Fry for 3–4 minutes per side until deep golden brown and the internal temperature reaches 165°F (74°C).
- Drain Properly: Transfer cooked chicken to a wire rack rather than paper towels. This prevents steam from softening the crispy coating underneath.
- Serve Immediately: Sprinkle lightly with flaky sea salt while still hot and serve with your favorite dipping sauces.
Professional Tips for Maximum Crunch
- Always use cornstarch together with flour.
- Never fry directly from the refrigerator if the oil temperature is unstable.
- Use a thermometer instead of guessing oil temperature.
- Allow coated chicken to rest before frying.
- Cook in small batches for consistent heat.
Common Mistakes to Avoid
- Overcrowding the pan lowers oil temperature.
- Skipping the resting period causes breading to fall off.
- Using cold oil produces greasy chicken.
- Cooking over extremely high heat burns the coating before the inside cooks.
Recipe Variations
One of the best things about this crispy chicken tenders recipe is how versatile it is. Once you’ve mastered the basic technique, you can easily customize the flavor to match your family’s preferences or the occasion.
Spicy Nashville Style
Add one teaspoon of cayenne pepper to the flour mixture and brush the finished tenders with a mixture of hot oil, paprika, cayenne, brown sugar, and garlic powder for a bold Southern-inspired finish.
Parmesan Herb Chicken Tenders
Mix freshly grated Parmesan cheese, Italian seasoning, oregano, and parsley into the breading for an extra savory crust that’s perfect with marinara sauce.
Honey Garlic Version
After frying, lightly drizzle the tenders with homemade honey garlic sauce for a sweet and savory twist that’s especially popular with children.
Extra Crispy Double-Coated
For an even thicker crunch, repeat the dipping process twice. The additional layer creates those irresistible crunchy ridges often found in premium fried chicken restaurants.
Serving Suggestions
Crispy chicken tenders pair beautifully with both classic comfort foods and lighter side dishes. Here are some favorite combinations:
- Crispy French fries
- Creamy coleslaw
- Macaroni and cheese
- Mashed potatoes with gravy
- Corn on the cob
- Fresh garden salad
- Garlic butter vegetables
- Buttermilk biscuits
Offer a variety of dipping sauces such as honey mustard, ranch dressing, barbecue sauce, spicy mayo, buffalo sauce, garlic aioli, or classic ketchup so everyone can customize each bite.
Storage Tips
If you have leftovers, allow the chicken tenders to cool completely before storing them. Placing hot fried food directly into a sealed container traps steam, softening the crispy coating.
- Refrigerator: Store in an airtight container for up to 4 days.
- Freezer: Freeze individually on a tray before transferring to freezer bags for up to 2 months.
- Separate layers with parchment paper to prevent sticking.
Best Reheating Methods
Reheating properly makes a huge difference. Avoid microwaving whenever possible because it softens the crispy coating.
- Oven: Bake at 400°F (200°C) for 10–12 minutes.
- Air Fryer: Heat at 375°F (190°C) for 5–7 minutes.
- Skillet: Reheat over medium heat with a tiny amount of oil until crispy again.
A little-known trick is to place the chicken on a wire rack while reheating in the oven. This allows hot air to circulate around every side, restoring crispiness evenly.
Meal Prep Guide
This recipe is excellent for weekly meal preparation. Marinate the chicken overnight and prepare the dry coating in advance. You can even bread the chicken several hours before cooking and keep it refrigerated until you’re ready to fry.
Cooked chicken tenders also make excellent fillings for wraps, sandwiches, salads, rice bowls, tacos, and even homemade chicken parmesan.
Homemade vs Restaurant Chicken Tenders
| Feature | Homemade | Restaurant |
|---|---|---|
| Freshness | Excellent | Varies |
| Seasoning Control | Fully Customizable | Fixed Recipe |
| Cost Per Serving | Lower | Higher |
| Oil Quality | Fresh Oil | May Be Reused |
| Crispiness | Outstanding When Fresh | Depends on Service Time |
| Ingredient Quality | Your Choice | Restaurant Standard |
Estimated Nutrition Facts (Per Serving)
- Calories: 460 kcal
- Protein: 34 g
- Carbohydrates: 28 g
- Fat: 24 g
- Saturated Fat: 5 g
- Fiber: 2 g
- Sugar: 3 g
- Sodium: 720 mg
Related Recipes You May Also Like
- Classic Buttermilk Fried Chicken
- Homemade Crispy Chicken Sandwich
- Air Fryer Chicken Nuggets
- Garlic Parmesan Chicken Wings
Frequently Asked Questions
Why are my chicken tenders not crispy?
The oil may not be hot enough, or the pan may be overcrowded. Maintaining 350°F (175°C) is essential for a crispy coating.
Can I bake these instead of frying?
Yes. Bake at 425°F (220°C) for about 20–25 minutes, flipping halfway through. The coating won’t be quite as crunchy but will still be delicious.
Can I use chicken breast?
Absolutely. Slice chicken breasts into evenly sized strips for consistent cooking.
Why use buttermilk?
Buttermilk gently tenderizes the chicken while helping the coating adhere more effectively.
Can I make these gluten-free?
Yes. Replace the flour with your favorite gluten-free flour blend and verify that all seasonings are gluten-free.
Which oil is best for frying?
Vegetable oil, peanut oil, or canola oil are all excellent choices because they have high smoke points and neutral flavors.
Can I prepare them ahead of time?
Yes. You can marinate the chicken overnight and bread it a few hours before frying.
How do restaurants get their chicken so crunchy?
They often use a combination of flour, starch, proper frying temperature, and double coating—exactly the techniques used in this recipe.
Can I freeze uncooked breaded chicken tenders?
Yes. Freeze them on a baking tray first, then transfer them to freezer bags. Fry directly from frozen, adding a few extra minutes of cooking time.
What dipping sauces work best?
Honey mustard, ranch, barbecue sauce, buffalo sauce, garlic aioli, spicy mayo, and sweet chili sauce are all delicious options.
Great chicken tenders are all about balance: a light yet sturdy coating, perfectly seasoned flour, properly heated oil, and juicy chicken that stays moist from the first bite to the last. By following the techniques in this recipe—especially marinating in buttermilk, using a flour-and-cornstarch blend, and letting the coating rest before frying—you’ll consistently achieve restaurant-quality results in your own kitchen. Whether you’re preparing a quick family dinner, a game-day snack, or a crowd-pleasing party platter, these crispy chicken tenders are guaranteed to disappear fast.